
Use and Care Manual
2
6” to 10”
Wall Thickness
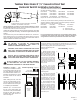
Horizontal Termination Installation – Attach the horizontal termination to
the 94 degree elbow per the joint assembly instructions with a weep hole
facing the bottom. Secure the termination to the elbow with the three screws
provided. See Figure 3.
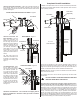
Horizontal Termination and
Elbow Installation - Align the
elbow and termination vent
assembly through the hole in
the wall. Align and press the
elbow down onto the appliance
adapter. Completely seat and
secure the connection per the
joint assembly instructions. A
slight rotation of the joint may
be necessary to line up the
venting. The venting should be
square and sealed at nal as-
sembly.
The weep holes around the
outside of the termination must
be at least 1 inch from the n-
ished wall of the building. See
Figure 4.
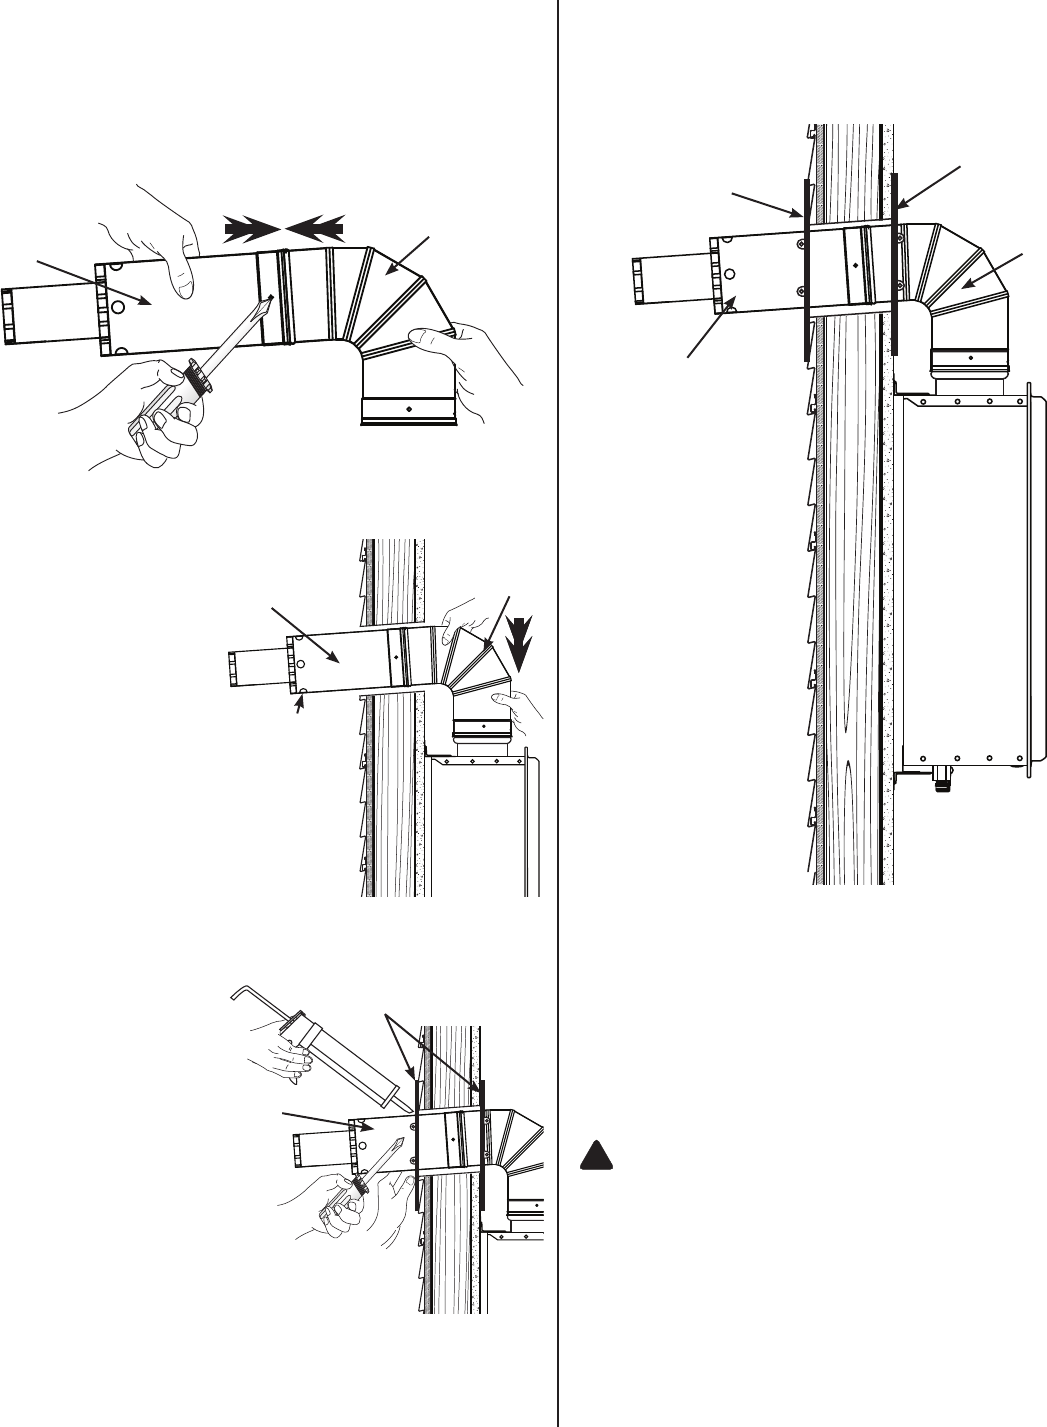
Trim Plate Installation - Attach
the trim plate to the exterior
wall and horizontal termination
with hardware provided. Ap-
ply a bead of silicone sealant
completely around the termi-
nation where it penetrates the
trim plate and where the trim
plate meets the wall to create
a liquid tight assembly, which
will prevent rain and snow en-
try into the wall construction.
Optional trim plate can also
be attached to the interior wall.
See Figure 5.
Install Horizontal Termination to Elbow - Figure 3
Install Elbow - Figure 4
Install Trim Plate - Figure 5
Completed Vent Kit Installation
94° Elbow
Termination
Weep hole
Trim Plate
Trim Plate
(Optional)
TANKLESS
WATER
HEATER
This kit can be extended up to the maximum allowable lengths as listed in
the Use and Care Manual provided with the water heater. NOTICE: If a vent
length of more that two (2) feet straight up from the top of the water heater is
needed, a condensate collector must be installed at the water heater.
DO NOT attempt to connect any other vent material from another manufac-
turer or brand to this vent kit.
The material used in this vent kit has been approved by the water heater
manufacturer.
DO NOT ATTEMPT TO USE ANY VENTING BY ANOTHER
MANUFACTURER WITH THIS VENT KIT.
Installation is complete. Refer to Owner’s Use and Care Manual provided with
your Direct Vent Tankless Water Heater for initial operation checks to ensure
proper operating conditions.
TANKLESS
WATER
HEATER
If you need service refer to these instructions and the instruction manu-
al that came with the water heater for additional information. Should you
have any questions about your new water heater or vent kit, or if these require
adjustment, repair, or routine maintenance, it is suggested that you rst contact
your installer, plumbing contractor or previously agreed upon service agency.
In the event the rm has moved, or is unavailable, refer to the telephone di-
rectory, commercial listings or local utility for qualied service assistance.
Should your problem not be solved to your complete satisfaction, you should
then contact the Manufacturer’s National Service Department. Refer to the
section titled “IF YOU NEED SERVICE” in the Use and Care Manual provided
with your water heater(s) for contact information and procedures.
Termination
94° Elbow
Termination
94° Elbow
Termination
Trim Plates
Clearance Considerations - The concentric vent piping and t-
tings are certied for a clearance of zero (0) inches to combus-
tible surfaces.
!