TW100-BRF114 Firewall Router Cable/DSL Internet Access 4-Port Switching Hub User's Guide
Table of Contents CHAPTER 1 INTRODUCTION ............................................................................................. 1 TW100-BRF114 Features ................................................................................................. 1 Package Contents .............................................................................................................. 3 Physical Details ..........................................................................................................
TW100-BRF114 User’s Guide Chapter 1 Introduction 1 Congratulations on the purchase of your new TW100-BRF114. The TW100-BRF114 is a multi-function device providing the following services: • • Communication Applications. Support for Internet communication applications, such as interactive Games, Telephony, and Conferencing applications, which are often difficult to use when behind a Firewall, is included. • Special Internet Applications.
Introduction • Protection against DoS attacks. DoS (Denial of Service) attacks can flood your TW100-BRF114 User’s Guide Physical Details Internet connection with invalid packets and connection requests, using so much bandwidth and so many resources that Internet access becomes unavailable. The TW100BRF114 incorporates protection against DoS attacks.
Introduction Chapter 2 Rear Panel Installation 2 This Chapter covers the physical installation of the TW100-BRF114. Figure 3: Rear Panel Reset Button Requirements This button has two (2) functions: • • Reboot. When pressed and released, the TW100-BRF114 will reboot (restart). Clear All Data. This button can also be used to clear ALL data and restore ALL settings to the factory default values. To Clear All Data and restore the factory default values: 1. Power Off. 2.
Installation 3. Connect WAN Cable Connect the DSL or Cable modem to the WAN port on the TW100-BRF114. Use the cable supplied with your DSL/Cable modem. If no cable was supplied, use a standard cable. 4. Power Up • Power on the Cable or DSL modem. • Connect the supplied power adapter to the TW100-BRF114 and power up. Use only the power adapter provided. Using a different one may cause hardware damage 3 Chapter 3 Setup This Chapter provides Setup details of the TW100-BRF114. 5.
Setup Using your Web Browser Configuration Program The TW100-BRF114 contains an HTTP server. This enables you to connect to it, and configure it, using your Web Browser. Your Browser must support JavaScript. The configuration program has been tested on the following browsers: • Netscape V4.08 or later • Internet Explorer V4 or later TW100-BRF114 User’s Guide Preparation To establish a connection from your PC to the TW100-BRF114: 1. After installing the TW100-BRF114 in your LAN, start your PC.
Setup TW100-BRF114 User’s Guide Setup Wizard PPTP The first time you connect to the TW100-BRF114, the Setup Wizard will run automatically. (The Setup Wizard will also run if the TW100-BRF114's default setting are restored.) 1. Step through the Wizard until finished. • 2. 3. You need to know the type of Internet connection service used by your ISP. Check the data supplied by your ISP. • The common connection types are explained in the tables below.
Setup Home Screen TW100-BRF114 User’s Guide LAN Screen After finishing or exiting the Setup Wizard, you will see the Home screen. When you connect in future, you will see this screen when you connect. An example screen is shown below. Use the LAN link on the main menu to reach the LAN screen. An example screen is shown below. Figure 6: LAN Screen Data - LAN Screen TCP/IP Figure 5: Home Screen IP Address IP address for the TW100-BRF114, as seen from the local LAN.
Setup TW100-BRF114 User’s Guide DHCP Password Screen What DHCP Does The password screen allows you to assign a password to the Firewall Router. A DHCP (Dynamic Host Configuration Protocol) Server allocates a valid IP address to a DHCP Client (PC or device) upon request. • The client request is made when the client device starts up (boots). • The DHCP Server provides the Gateway and DNS addresses to the client, as well as allocating an IP Address. • The TW100-BRF114 can act as a DHCP server.
TW100-BRF114 User’s Guide Chapter 4 PC Configuration 4 Checking TCP/IP Settings - Windows 9x/ME: 3. Select Control Panel - Network. You should see a screen like the following: This Chapter details the PC Configuration required on the local ("Internal") LAN. Overview For each PC, the following may need to be configured: • TCP/IP network settings • Internet Access configuration Windows Clients Figure 9: Network Configuration 4. 5.
PC Configuration • On the Gateway tab, enter the TW100-BRF114 's IP address in the New Gateway field and click Add, as shown below. Your LAN administrator can advise you of the IP Address they assigned to the TW100-BRF114. TW100-BRF114 User’s Guide Checking TCP/IP Settings - Windows NT4.0 1. Select Control Panel - Network, and, on the Protocols tab, select the TCP/IP protocol, as shown below. 2. Click the Properties button to see a screen like the one below.
PC Configuration TW100-BRF114 User’s Guide Figure 15 - Windows NT4.0 - Add Gateway 2. Figure 14: Windows NT4.0 - IP Address 3. 4. Select the network card for your LAN. Select the appropriate radio button - Obtain an IP address from a DHCP Server or Specify an IP Address, as explained below. The DNS should be set to the address provided by your ISP, as follows: • Click the DNS tab.
PC Configuration TW100-BRF114 User’s Guide Checking TCP/IP Settings - Windows 2000: 1. 2. Select Control Panel - Network and Dial-up Connection. Right - click the Local Area Connection icon and select Properties. You should see a screen like the following: Figure 16: Windows NT4.0 - DNS Figure 17: Network Configuration (Win 2000) 3. 4. 23 Select the TCP/IP protocol for your network card. Click on the Properties button. You should then see a screen like the following.
PC Configuration TW100-BRF114 User’s Guide Checking TCP/IP Settings - Windows XP 1. 2. Select Control Panel - Network Connection. Right click the Local Area Connection and choose Properties. You should see a screen like the following: Figure 18: TCP/IP Properties (Win 2000) 5. Ensure your TCP/IP settings are correct, as described below. Using DHCP To use DHCP, select the radio button Obtain an IP Address automatically. This is the default Windows setting. Using this is recommended.
PC Configuration TW100-BRF114 User’s Guide Internet Access To configure your PCs to use the TW100-BRF114 for Internet access: • Ensure that the DSL modem, Cable modem, or other permanent connection is functional. • Use the following procedure to configure your Browser to access the Internet via the LAN, rather than by a Dial-up connection. For Windows 9x/ME/2000 1. 2. 3. 4. 5. 6. 7. Select Start Menu - Settings - Control Panel - Internet Options. Select the Connection tab, and click the Setup button.
PC Configuration Macintosh Clients Chapter 5 From your Macintosh, you can access the Internet via the TW100-BRF114. The procedure is as follows. 1. Open the TCP/IP Control Panel. 2. Select Ethernet from the Connect via pop-up menu. 3. Select Using DHCP Server from the Configure pop-up menu. The DHCP Client ID field can be left blank. 4. Close the TCP/IP panel, saving your settings.
Operation and Status Data - Status Screen TW100-BRF114 User’s Guide Connection Status - PPPoE Internet Connection Method This indicates the current connection method, as set in the Setup Wizard. Broadband Modem This shows the connection status of the modem. Internet Connection Current connection status: • Active • Idle • Unknown • Failed If using PPPoE (PPP over Ethernet), a screen like the following example will be displayed when the "Connection Details" button is clicked.
Operation and Status TW100-BRF114 User’s Guide Connection Status - PPTP Buttons Connect If not connected, establish a connection to your ISP. Disconnect If connected to your ISP, hang up the connection. Clear Log Delete all data currently in the Log. This will make it easier to read new messages. Refresh Update the data on screen. If using PPTP (Peer-to-Peer Tunneling Protocol), a screen like the following example will be displayed when the "Connection Details" button is clicked.
Operation and Status TW100-BRF114 User’s Guide Disconnect If connected to your ISP, hang up the connection. Connection Log Clear Log Delete all data currently in the Log. This will make it easier to read new messages. Connection Log Refresh Update the data on screen. • The Connection Log shows status messages relating to the existing connection. • The Clear Log button will restart the Log, while the Refresh button will update the messages shown on screen.
Operation and Status Data - Fixed/Dynamic IP address Screen Network Mask The Network Mask associated with the IP Address above. Default Gateway The IP Address of the remote Gateway or Router associated with the IP Address above. DNS IP Address The IP Address of the Domain Name Server which is currently used. DHCP Client This will show "Enabled" or "Disabled", depending on whether or not this device is functioning as a DHCP client.
TW100-BRF114 User’s Guide Chapter 6 Internet Features 6 Communication Applications Most applications are supported transparently by the TW100-BRF114. But sometimes it is not clear which PC should receive an incoming connection. This problem could arise with the Communication Applications listed on this screen. If this problem arises, you can use this screen to set which PC should receive an incoming connection, as described below.
Internet Features TW100-BRF114 User’s Guide If an application still cannot function correctly, try using the "DMZ" feature. DMZ This feature, if enabled, allows one (1) computer on your LAN to be exposed to all users on the Internet, allowing unrestricted 2-way communication between the "DMZ PC" and other Internet users or Servers. Figure 28: Special Applications Screen Use this to Enable or Disable this Special Application as required.
Internet Features URL Filter Screen TW100-BRF114 User’s Guide Dynamic DNS (Domain Name Server) Click the "Configure URL Filter" button on the Advanced Internet screen to access the URL Filter screen. An example screen is shown below. This free service is very useful when combined with the Virtual Server feature. It allows Internet users to connect to your Virtual Servers using a URL, rather than an IP Address. This also solves the problem of having a dynamic IP address.
Internet Features MAC Address DDNS Data User Name Enter the "User name" specified at the www.dyndns.org Web site when you registered. Password Enter your current password for www.dyndns.org Domain Name • Enter your domain name, as allocated at www.dyndns.org. • The name should consist only of letters and the hyphen (dash). Using any other characters may cause problems.. DDNS Status TW100-BRF114 User’s Guide The MAC (hardware) address is a low-level network identifier.
Internet Features TW100-BRF114 User’s Guide Virtual Servers Screen Virtual Servers This feature allows you to make Servers on your LAN accessible to Internet users. Normally, Internet users would not be able to access a server on your LAN because: • Your Server does not have a valid external IP Address. • Attempts to connect to devices on your LAN are blocked by the firewall in this device. The Virtual Servers screen is reached by the Virtual Servers link on the Internet menu.
Internet Features TW100-BRF114 User’s Guide Connecting to the Virtual Servers Buttons Defaults This will delete any Servers you have defined, and set the predefined Servers to use their default port numbers. Disable All This will cause the "Enable" setting of all Virtual Servers to be set OFF. Add Add a new entry to the Virtual Server list, using the data shown in the "Properties" area on screen. The entry selected in the list is ignored, and has no effect.
TW100-BRF114 User’s Guide Chapter 7 Other Features and Settings 7 Access Control This feature is accessed by the Access Control link on the Advanced menu. Overview The Access Control feature allows administrators to restrict the level of Internet Access available to PCs on your LAN. With the default settings, everyone has unrestricted Internet access. This Chapter explains the screens and settings available via the "Other" menu. To use this feature: 1.
Other Features and Settings TW100-BRF114 User’s Guide Data - Access Control Screen Edit Service List If you wish to define additional Services, or manage the Service list, click this button to open the "Services" screen. View Log Click this to open a sub-window where you can view the "Access Control" log. This log shows attempted Internet accesses which have been blocked by the Access Control feature.
Other Features and Settings TW100-BRF114 User’s Guide Default Schedule Screen Services Screen This screen is displayed when the Define Schedule button on the Access Control screen is clicked. This screen is displayed when the Edit Service List button on the Access Control screen is clicked. • This schedule can be (optionally) applied to any Access Control Group. • Blocking will be performed during the scheduled time (between the "Start" and "Finish" times.
Other Features and Settings TW100-BRF114 User’s Guide Access Control Log Remote Management To check the operation of the Access Control feature, an Access Control Log is provided. Click the View Log button on the Access Control screen to view this log. This feature allows you to manage the TW100-BRF114 via the Internet. This log shows attempted Internet accesses which have been blocked by the Access Control function.
Other Features and Settings TW100-BRF114 User’s Guide PC Database Buttons The PC Database is used whenever you need to select a PC (e.g. for the "DMZ" PC). It eliminates the need to enter IP addresses. Also, you do not need to use fixed IP addresses on your LAN. Add This will add the new PC to the list. The PC will be sent a "ping" to determine its hardware address. If the PC is not available (not connected, or not powered On) you will not be able to add it.
Other Features and Settings PC Database (Admin) TW100-BRF114 User’s Guide MAC Address This screen is displayed if the "Advanced Administration" button on the PC Database is clicked. It provides more control than the standard PC Database screen. Select the appropriate option • Automatic discovery - Select this to have the TW100-BRF114 contact the PC and find its MAC address. This is only possible if the PC is connected to the LAN and powered On. • MAC is - Enter the MAC address on the PC.
Other Features and Settings TW100-BRF114 User’s Guide Upgrade Firmware Options The firmware (software) in the TW100-BRF114 can be upgraded using your Web Browser. This screen allows advanced users to enter or change a number of settings. For normal operation, there is no need to use this screen or change any settings. You must first download the upgrade file, then select Upgrade on the Other menu. You will see a screen like the following.
Other Features and Settings TW100-BRF114 User’s Guide Security Options This screen allows you to set Firewall and other security-related options. Respond to ICMP Allow IPsec Allow PPTP Allow L2TP Figure 43: Security Screen Data - Security Screen The ICMP protocol is used by the "ping" and "traceroute" programs, and by network monitoring and diagnostic programs. • If checked, the Firewall Router will repond to ICMP packets received from the Internet.
Other Features and Settings Logs TW100-BRF114 User’s Guide Timezone The Logs record various types of activity on the Firewall Router. This data is useful for troubleshooting, but enabling all logs will generate a large amount of data and adversely affect performance. Since only a limited amount of log data can be stored in the Firewall Router, log data can also be E-mailed to your PC. Timezone Select the correct Timezone for your location.
Other Features and Settings TW100-BRF114 User’s Guide Routing Overview • If you don't have other Routers or Gateways on your LAN, you can ignore the "Routing" page completely. • If the TW100-BRF114 is only acting as a Gateway for the local LAN segment, ignore the "Routing" page even if your LAN has other Routers. • If your LAN has a standard Router (e.g.
Other Features and Settings TW100-BRF114 User’s Guide Static Routing - Example Buttons Save Save the RIP setting. This has no effect on the Static Routing Table. Add Add a new entry to the Static Routing table, using the data shown in the "Properties" area on screen. The entry selected in the list is ignored, and has no effect. Update Update the current Static Routing Table entry, using the data shown in the "Properties" area on screen. Delete Delete the current Static Routing Table entry.
TW100-BRF114 User’s Guide Appendix A Troubleshooting A Internet Access Problem 1: When I enter a URL or IP address I get a time out error. Solution 1: A number of things could be causing this. Try the following troubleshooting steps. This Appendix covers the most likely problems and their solutions. Overview • Check if other PCs work. If they do, ensure that your PCs IP settings are correct.
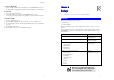
Appendix B Specifications B TW100-BRF114 Model TW100-BRF114 Dimensions 141mm(W) * 100mm(D) * 27mm(H) Operating Temperature 0° C to 40° C Storage Temperature -10° C to 70° C Network Protocol: TCP/IP Network Interface: 5 Ethernet: 4 * 10/100BaseT (RJ45) LAN connection 1 * 10/100BaseT (RJ45) for WAN LEDs 11 Power Adapter 12V DC External Regulatory Approvals CE Standards This product complies with the 99/5/EEC directives, including the following safety and EMC standards: • EN301489-1/-17 •