QB Series Precision Balance Operation Manual 42194
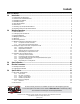
Contents About This Manual ................................................................................................................................... 1 1.0 Introduction.................................................................................................................................. 1 1.1 1.2 1.3 1.4 1.5 1.6 1.7 1.8 2.0 Unpacking and Inspection . . . . . . . . . . . . . . . . . . . . . . . . . . . . . . . . . . . . . . . . . . . . . . . . . . . . . . . . .
6.0 Troubleshooting ......................................................................................................................... 25 7.0 Dimensions ................................................................................................................................ 27 QB Series Limited Warranty...................................................................................................................
About This Manual The QB Series precision balance is an advanced precision weighing instrument incorporating a highly-sophisticated electronic tuning fork sensor assembly capable of providing quick, reliable, and stable weight measurement. This manual is intended to give users guidelines and specifications to ensure proper use and care of the device. 1.0 Introduction The QB Series balance contains several features to provide optimum performance.
Weighing Platform (both styles) Platform Support E RIC Adaptor Connector QB T ER OV PT CE AC R DE UN F P ON F OF Level Indicator E LAK Expansion Bay Display Leveling Leg (4) AC Adaptor Figure 1-1. Main Component Parts of the QB Series 1.2 General Care and Maintenance To keep your QB Series balance operating properly, the device needs to be maintained and cared for. Keep the housing and platform clean by wiping them off with a soft damp cloth daily.
1.4 Installation Steps Use the following steps to properly install the QB Series balance: 1. Inspect the leveling legs and ensure that they are all completely retracted. 2. Place the balance down on a firm, level mounting surface. 3. Using the bubble level to the upper left of the display panel as a guide, adjust the leveling legs as necessary until the bubble is centered inside the bulls-eye of the bubble level (see Figure 1-2).
1.5 Special Information The QB Series balance is a sensitive, precision weighing instrument and should always be treated with care. While every attempt is made prior to shipping to ensure that your balance arrives ready-to-use, uncontrollable events during the shipping process may make it necessary to calibrate the device before being used. While not absolutely necessary, we recommend that you perform a span calibration prior to using the balance for the first time.
1.7 Powering Up the QB Series Balance Press and release the ON/OFF key to turn on the QB Series balance. 1. All display segments momentarily illuminate. M lb P k 2. All display segments momentarily flash. 3. The device activates the default weighing mode and displays the g symbol in the lower right corner of the display to indicate that weighments are displayed in grams. 1.8 Powering Down the QB Series Balance To turn the balance off, press and release the ON/OFF key.
2.0 Weighing Operations The following section describes weighing operations of the QB Series balance, including: units of measure, general weighing, weighing with a tare, batching, comparator, and piece counting. 2.1 Units of Measure Table 2-1 shows the various units of measure (maximum capacity and minimum increment) available on your QB Series balance. NOTE: There is no push-button conversion from one unit to another.
8. The display returns to a 0.00 value for the appropriate unit of measure. To change to a different unit of measure, repeat steps 1 – 9 above. 2.3 General Weighing The following section provides a step-by-step procedure on general weighing using the QB Series balance. 1. Power up the balance (see Section 1.7 on page 5). 2. All display segments momentarily illuminate, followed by two flashes of all displays. The device then displays default weighing mode.
2. The balance displays default weighing mode. If the balance does not show a 0.0 value after the normal start sequence, press and release the T key. 3. The default unit of measure is displayed. To change the unit of measure, see Section 2.2. 4. Gently place the empty container on the platform. The unit of measure indicator begins to flash indicating the device is registering the weight of the commodity. The value display begins to update.
5. Release the F key. The display changes to show either 1.SET.1 or 1.SET.2. If the display shows 1.SET.1, continue with step 6 below. If the display shows 1.SET.2, press and release the T key once to change the value to 1.SET.1, then continue with step 6 below. 6. Press and release the F key once. The display changes to read 2.SEL.1. This indicates that the comparator function is currently inactive. 7. Press and release the T key once. The display changes to read 2.SEL.2.
2.8.1 Reference Sample Method Use the following steps to establish upper and lower comparison limits in the QB Series balance using the reference sample method. 1. Press and hold the P key until the display reads L Set, then release the P key. 2. The following indicators flash simultaneously – unit of measure, 0.00 weight value or the previously entered lower limit value, under arrow, and M. 3. Place a commodity on the weighing platform that represents the minimum acceptable weight value. 4.
14. The following indicators flash simultaneously: unit of measure, 0.00 weight value or the previously entered upper limit value, over arrow (#), and M (see Figure 1-7 on page 5). 15. Press and release the T key once. With the exception of the least significant digit, the display stops flashing, and indicates all zeros, or the last upper limit value entered. 16. Press and release the T key once. The flashing display changes by a value of one. 17.
2.9 Operating the Counting Function The QB Series balance is capable of functioning as a counting device, enabling it to determine quantity as opposed to weight. In order to perform this function, the balance must be programmed with the average piece weight of the sample being evaluated.
NOTES: • • It is possible to use a sample that is too light for the balance to accurately calculate an average piece weight. If you notice that the display momentarily shows ADD followed by a display that includes an illuminated UNDER annunciator, you have attempted to use a sample that is too light for the device to accurately calculate an average piece weight.
3.0 Span Calibration To achieve optimum accuracy from your QB Series balance, it should be calibrated on a regular basis in the environment in which it is normally used. If the device is moved to another physical environment, recalibrate the device before using it. A few extra moments invested with this section will ensure virtually error-free performance of the device. After properly performing the installation guidelines (see Section 1.3 on page 2 and Section 1.
4.0 Function Parameters The parameter menu allows you to activate or deactivate certain features and functions of the QB Series balance. The following section provides information on the functions of the QB and how to view and change those functions. Table 4-1 below describes the various functions of the QB. NOTE: Bold type indicates factory setting. Display 1.SET Setting 1 Function Mode Selection 2 2.SEL 1 2 21.CO 1 2 22.LI 0 1 23BU 0 1 2 3.
Display 61.0.C Setting Function 0 Output control (available only when interface option is set to ON) 1 2 Description Output prohibited (stop) Continuous output NOTE: When the RS-232C interface is installed, output interval of data in constant transmission is 0.1 – 1 second, depending on the weighing condition and response parameters of 5.rE.X above. Continuous output when data is stable. No output when data is unstable.
4.1 Viewing Parameters The following information provides a step-by-step procedure to view the parameters of the QB Series balance. 1. Turn the balance on (see Section 1.7 on page 5). 2. If the device does not show a 0.0 value after the normal start sequence, press and release the P key. 3. Turn the counting function off (see Section 2.9.5 on page 13). 4. Press and hold the F key until the display reads FUNC. 5. Immediately release the F key.
9. Using Table 4-1 on page 15 as a guide, scroll to the function you wish to change by repeatedly pressing the F key. If you scroll through all of the functions, the device automatically returns to the conventional weighing mode. To return to the function mode, return to step 5. 10. Once the function you wish to change is displayed, repeatedly press the T key until the parameter you want to use is displayed. 11. To continue on to another function, return to step 9. 12.
5.0 Specifications This section contains tables listing common specifications and model specific data for the QB Series balance. Table 5-1 below provides specifications of each of the models in the QB Series of balances. Unit of Measure (Display Symbol) QB-150E QB-300E QB-600E QB-620E QB-1500E QB-3000E QB-6000E QB-6200E gram (g) 150 x 0.01 300 x 0.01 600 x 0.02 620 x 0.01 1500 x 0.1 3000 x 0.1 6000 x 0.2 6200 x 0.1 12000 x 1 kilogram (kg) 0.15 x 0.00001 0.3 x 0.00001 0.6 x 0.
Unit of Measure (Display Symbol) QB-150E QB-300E Shipping weight (lb) QB-600E QB-620E QB-3000E QB-6000E 1.27 QB-6200E QB-12KE 1.
5.1.2 RS-232C Commands One of the following two formats is selectable in the function setting (see Section 4.0 on page 15). 6-digit data format (Content: 14 words, including terminators; CR = 0DH, LF = 0AH) 1 2 3 4 5 6 7 8 9 10 11 12 13 14 P1 D1 D2 D3 D4 D5 D6 D7 U1 U2 S1 S2 CR LF Table 5-3. RS-232C 6-digit Command Format 7-digit data format* 1 2 3 4 5 6 P1 D1 D2 D3 D4 D5 7 8 9 10 11 12 13 14 15 D6 D7 D8 U1 U2 S1 S2 CR LF *Note inclusion of D8.
Units (U1, U2 = 2 words, based on ASCII codes) sp g gram g c t carat ct o z ounce oz o t troy ounce ozt g g grain gr Table 5-7. Units (Continued) Conditional Response Parameter For Comparator Function (S1 = 1 word) S1 Code Contents l 4CH Low (under) g 47H Good (accept) h 48H High (over) Table 5-8.
5.1.
DB-25 Connection TXD RXD GND DCD RTS CTS DSR DTR 2 3 7 8 4 5 6 20 Jump pins 8, 4, and 5 3 4 5 1 RXD TXD GND 2 DTR DIN-5 Balance Connections Jump pins 6 and 20 Figure 5-2. Connection to a Computer 5.
6.0 Troubleshooting The following section contains a troubleshooting chart for the QB Series scale. Refer to this chart to locate causes and corrective actions to various conditions.
Condition Cause Corrective Action 1 - ERR • The calibration weight is less than 1/2 full capacity • Reinitiate calibration with a test mass equal to the nominal capacity of the balance • Consult your local Rice Lake Weighing Systems distributor 2-ERR • The data error exceeds 1% • Defective weighing mechanism • Consult your local Rice Lake Weighing Systems distributor 3-ERR 4-ERR • Calibration has started with a load on the platter • Remove load and reinitiate calibration process • Consult your lo
7.0 Dimensions 208 208 Figure 7-1 below shows the dimensions of the QB Series balance. 310 310 Ø140 71 (87) 71 (86) 190 Figure 7-1.
QB Series Limited Warranty Rice Lake Weighing Systems (RLWS) warrants that all RLWS equipment and systems manufactured and sold by RLWS and properly installed by an authorized RLWS Distributor or Original Equipment Manufacturer (OEM) will operate per written specifications as confirmed by the Distributor/OEM and accepted by RLWS. All systems and components are warranted against defects in materials and workmanship for five years.