
Specifications


Operating Manual OptiCaT 1500 Erbium-Doped Fiber Amplifier 3 - 3
not pass its self-test because of a warning or an alarm condition, then the EDFA
changes the LED and display as described in table 4-1 in Section 4
Troubleshooting.
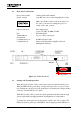
During normal operation, the EDFA displays “1550 EDFA.” When the “select”
button is pressed, the display changes to show system information according to the
menu structure of Fig. 3-1. By repeatedly pressing “select,” the display cycles
through the menu headings “Optical,” “Pump 1,” “Pump 2,” on up to “Pump 4 if
installed,” and “System.”
In EDFA’s where fewer pumps are installed, the menu headings for those lasers
not installed are eliminated. The down button moves the display down in the menu
structure; if the bottom of the menu is reached, the display wraps back to the top.
For instance, if “Pump 1” is shown and the down button is pressed, then the
display shows the pump 1 laser bias current. The up button moves the display up
the menu structure.
3.4 Output Power Adjustment
To adjust the output power repeatedly press the “select” button until the
“Optical” menu heading appears in the display. Press the down button until the
display reads “Pwr Adj = xx.xdBm.” Press the “select” button and the display will
start to flash. Use the up and down button to adjust the power to the desired
setting. Press the select button again to save the adjustment.
Press the down button again, and the display will read “Update Adj. = Y/N.”
Press the select button and the display will start to flash. Use the up/down buttons
to select “Y” or “N.” Press the select button again to save your choice. If “Y” is
chosen, the adjusted power setting will automatically come up each time the unit is
turned on. If “N” is chosen, the power setting will change back to the previously
updated value when power to the unit is cycled.