Operating Instructions Hardware Guide 1 Guide to the Printer 2 Installing the Printer and Options 3 Connecting the Printer 4 Paper and Other Media 5 Replacing Consumables 6 Cleaning the Printer 7 Troubleshooting 8 Removing Misfed Paper 9 Appendix Read this manual carefully before you use this machine and keep it handy for future reference. For safe and correct use, be sure to read “Safety Information” before using the machine.
Introduction This manual contains detailed instructions and notes on the operation and use of this machine. For your safety and benefit, read this manual carefully before using the machine. Keep this manual in a handy place for quick reference. Important Contents of this manual are subject to change without prior notice. In no event will the company be liable for direct, indirect, special, incidental, or consequential damages as a result of handling or operating the machine.
Positions of RWARNING and RCAUTION labels This machine has labels for RWARNING and RCAUTION at the positions shown below. For safety, please follow the instructions and handle the machine as indicated. ASH075S Do not incinerate used toner or toner containers. Toner dust might ignite when exposed to an open flame. Disposal should take place at an authorized dealer or an appropriate collection site. Keep toner (used or unused) and toner containers out of reach of children. Do not touch labelled gray areas.
Manuals for This Printer For particular functions, see the relevant parts of the manual. ❖ Safety Information Provides information on safe usage of this machine. To avoid injury and prevent damage to the machine, be sure to read this. ❖ Quick Installation Guide Contains procedures for removing the printer from its box, and connecting it to a computer.
How to Read This Manual Symbols This manual uses the following symbols: Indicates important safety notes. Ignoring these notes could result in serious injury or death. Be sure to read these notes. They can be found in the “Safety Information” section of Hardware Guide. Indicates important safety notes. Ignoring these notes could result in moderate or minor injury, or damage to the machine or to property. Be sure to read these notes. They can be found in the “Safety Information” section of Hardware Guide.
Description for the Specified Model In this manual, the following items explain about the printer for the specified models: This explains about the 220–240 V model printer. You can identify the model by checking the label on the rear of the printer. Read if you purchase this model. This explains about the 120 V model printer. You can identify the model by checking the label on the rear of the printer. Read if you purchase this model.
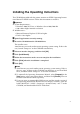
Installing the Operating Instructions The CD-ROM provided with the printer contains an HTML Operating Instructions Manual in HTML version. Follow this instructions to install it. Important ❒ System Requirements : • Windows 2000/XP/Vista, or Windows Server 2003/2003 R2. • 800 × 600 or higher monitor resolution. ❒ Web Browsers : • Microsoft Internet Explorer 5.5 SP2 or higher • Firefox 1.0 or higher A Quit all applications currently running. B Insert the CD-ROM into the CD-ROM drive. The installer starts.
TABLE OF CONTENTS Positions of RWARNING and RCAUTION labels ...............................................i Manuals for This Printer........................................................................................ii How to Read This Manual ....................................................................................iii Symbols .................................................................................................................... iii Description for the Specified Model............
6. Cleaning the Printer Cautions to Take When Cleaning .......................................................................63 Cleaning the Toner Density Sensor ...................................................................64 Cleaning the Friction Pad and the Paper Feed Roller ......................................66 Cleaning the Registration Roller ........................................................................69 7. Troubleshooting Error & Status Messages on Smart Organizing Monitor.......
viii
1. Guide to the Printer Exterior: Front View ASH022S 1. Top Cover 6. Tray 1 Open this cover to replace the print cartridge. Up to 250 sheets of plain paper can be loaded. 2. Control Panel 7. Top Cover Open Lever 8. Standard tray extension Contains keys for printer control and indicators that shows the printer status. 3. Front Cover Open this cover to replace the waste toner bottle or remove jammed paper. To open this cover, pull the lever on the right side of the printer. 4.
Guide to the Printer Exterior: Rear View 1 ASH023S 1. Front Cover Open Lever 2. Cable cover 3. Memory cover Remove this cover to install the additional memory unit (option). 4. Power Socket 5. Rear cover Remove this cover when you load paper larger than A4 in the paper tray. 6. Ethernet Port Use a network interface cable to connect the printer to the network. 7. USB Host Interface Use a USB cable to connect the digital camera to the printer.
Inside Inside 1 ASH024S 1. Print Cartridge 3. Waste Toner Bottle Loads from the printer rear, in the order of cyan (C), magenta (M), yellow (Y), and black (K). If a toner end indicator on the control panel lights up, replace the print cartridge of the indicated color. Collects toner that is wasted during printing. If the message “Waste Toner Bottle Full. The Waste Toner Bottle is full. Open the indicated cover, and then replace the Waste Toner Bottle. Front Cover: [Waste Toner Bottle].
Guide to the Printer Control Panel 1 ASH021S 1. Alert Indicator 4. {Job Reset} key Lights up whenever a printer error occurs. Use Smart Organizing Monitor to check the error. Press this key to cancel a job that is printing out. You can also use this key to print a test page. To print the test page, turn the printer off and then, while pressing and holding this key down, turn the printer back on, keeping the key pressed until the Alert indicator flashes once. The test page will then print out. 2.
2. Installing the Printer and Options Installing the Printer This section describes how to install the printer and perform settings after installation. Where to Put the Printer The printer’s location should be carefully chosen because environmental conditions greatly affect its performance. R WARNING: • The supplied power cord is for use with this equipment only. Do not use with other appliances. Doing so may result in fire, electric shock, or injury.
Installing the Printer and Options ❖ Space Required for Installation The recommended (or minimum) space requirements are as follows: 2 ASH200S ❖ Optimum Environmental Conditions Permissible and recommended temperature and humidity ranges are as follows: ASH201S • White area: Permissible Range • Gray area: Recommended Range Note ❒ When you use this machine for a long time in a confined space without good ventilation, you may detect an odd smell.
Installing the Printer ❖ Environments to Avoid Important ❒ Areas exposed to direct sunlight or strong light ❒ ❒ ❒ ❒ ❒ ❒ Dusty areas Areas with corrosive gases Areas that are excessively cold, hot, or humid Locations near air conditioners or humidifiers Locations near other electronic equipment Locations subject to frequent strong vibration 2 ❖ Power Source Connect the power cable to a power source of the following specification: • 220 - 240 V, 50/60 Hz, 6 A or more • 120 V, 60 Hz, 11 A or more Unpacki
Installing the Printer and Options ❒ ❒ ❒ ❒ ❒ 2 ❒ ❒ Important Removed tape is dirty. Be careful not to let it touch your hands or clothes. Leave the tape holding the paper feed tray and cover in place while moving the printer. Lower the machine slowly and carefully to prevent trapping your hands. Do not grip on the tray area when lifting the printer. Do not allow paper clips, staples, or other small metallic objects to fall inside the machine. Keep the uncovered print cartridge away from direct sunlight.
Installing the Printer C Pull Front Cover Open Lever, and then open the front cover with both hands carefully. 2 ASH107S D Lower the blue fusing unit lever. ASH108S E Hold each tape near its joint, and then pull both tapes gently upward to remove them from the printer at the same time.
Installing the Printer and Options F Carefully lift the blue fusing unit levers. 2 ASH049S G Close the front cover with both hands carefully. ASH111S H Pull up Top Cover Open Lever to open the top cover.
Installing the Printer I Remove the protection tape. 2 ASH110S J Take each print cartridge out. Gripping its center, carefully pull the print cartridge upward and out. ASH005S When taking out the black print cartridge, be sure to remove the protection sheet also.
Installing the Printer and Options K Hold the print cartridge and shake it from side to side five or six times. 2 ASH113S L Check the toner color and location correspond, and then carefully insert the print cartridge vertically. ASH009S M Close the top cover with both hands carefully.
Installing the Printer Turning the Power On Follow the procedure below to turn the power on. R WARNING: • Plug and unplug the power cable with dry hands, or an electric shock could occur. 2 Important ❒ Make sure the power cable is plugged securely into the wall outlet. ❒ Turn the power switch off when plugging and unplugging the power plug. ❒ Do not turn off the power switch until initializing is completed. Doing so results in malfunction. A Plug in the power cable.
Installing the Printer and Options Installing Options This section describes how to install options. By installing options, you can improve the printer performance and have an expanded variety of features to use. For the specifications of each option, see p.104 “Specifications”. 2 Attaching Paper Feed Unit TK1010 When installing multiple options, install Paper Feed Unit TK1010 first. R CAUTION: • The printer weighs approximately 23 kg (50.6 lb.).
Installing Options B Turn off the printer's power switch, and then unplug the printer's power cord from the wall outlet. C Remove the adhesive tape from the optional paper feed unit. 2 ASH025S D Lift the printer using the inset grips on both sides of the printer. ASH051S E There are three upright pins on the optional paper feed unit. Align them with the holes on the underside of the printer, and then carefully lower the printer.
Installing the Printer and Options Note ❒ When moving the printer, remove the optional paper feed unit. ❒ Before using the optional paper feed unit, you can make settings in the printer driver. ❒ If the new device is listed in the column of configuration options, then it has been properly installed. ❒ If the optional paper feed unit is not installed properly, reinstall it following this procedure.
Installing Options C Loosen the screw securing the inner cover by using a coin. 2 ASH027S D Be sure to install the memory unit as shown. ASH028S E To install the recommended memory, align the notch of the recommended memory with the protruding part of the vacant slot, and then carefully insert the module at an angle.
Installing the Printer and Options F Keeping the module at an angle, press it down until it clicks into place. 2 ASH030S G Attach the inner cover, and then fasten the screw. ASH031S H Attach the memory cover. I After installing the option, print the configuration page to confirm the installation. If it is installed properly, the memory capacity will appear under “Total Memory” on the configuration page. Note ❒ Before using the new memory unit, make settings in the printer driver.
3. Connecting the Printer Network Connection Follow the procedure below to connect the printer to the computer through the network. Prepare a hub, straight-through Ethernet cable, and any other necessary network devices before connecting the 10BASE-T or 100BASE-TX cable to the printer's Ethernet port. R CAUTION: • Connect only an approved network interface board to this printer.
Connecting the Printer C Connect the other end of the cable to the printer's network, such as a hub. D Attach the cable cover. 3 ASH091S Reference For details about network environment settings, see Software Guide. Reading the LED Lamps AQC070S 1. Yellow: comes on when 100BASETX is being used. It comes off when 10BASE-T is being used. 20 2. Green: comes on when the printer is properly connected to the network.
USB Connection USB Connection Important ❒ USB2.0 interface cable is not supplied. Obtain it separately, according to the computer you are using. ❒ USB connection is possible under Windows 2000/XP/Vista, Windows Server 2003/2003 R2, and Mac OS X. ❒ USB connection with Macintosh is only possible via the printer's USB port. A Remove the cable cover. 3 ASH090S B Connect the square-shaped connector of the USB2.0 cable to the USB port.
Connecting the Printer D Attach the cable cover. 3 ASH091S Reference For details about settings for USB connection printing, see Software Guide.
4. Paper and Other Media Paper and Other Media Supported by This Printer This section describes the paper size, feed direction, and the maximum amount of paper that can be loaded into each paper tray in this printer. Note ❒ The optional paper feed unit can be installed on the SP C221N and SP C222DN model printers. ❒ All paper must be set vertically, regardless of the paper size.
Paper and Other Media • Select a size using Smart Organizing Monitor. • Set a size as a custom size using Smart Organizing Monitor. The following sizes are supported: Tray 1: approximately 90 - 216 mm in width, and 148 - 356 mm in length. Bypass Tray: approximately 90 - 216 mm in width, and 148 - 356 mm in length. • Select a size using the printer driver. • Set a size as a custom size using the printer driver.
Paper Recommendations Paper Recommendations Loading Paper Important ❒ Do not use ink-jet printer paper because it may stick to the fusing unit and cause a paper misfeed. ❒ Do not load OHP transparencies. Load translucent media only. ❒ Set the paper as described below • Tray 1: Print side facing up • Paper Feed Unit (Tray 2): Print side facing up • Bypass Tray: Print side facing down ❒ Print quality cannot be guaranteed if paper other than the ones recommended is used.
Paper and Other Media Types of Paper and Other Media This section provides information about the type of paper supported by this printer and cautions for use. Setting the paper type Use the printer driver or Smart Organizing Monitor to specify the paper type you want to use. ❖ Printer driver On the printer driver screen, click the [Paper] tab, and then select a paper type under [Paper Type:].
Cardstock Label Paper Envelope 105-160 Note Tray 2 105-160 Tray 1 Enabled paper feeding tray Thickness (g/m2) Bond Paper Duplex Paper Type Paper Recommendations • The number of sheets that can be printed in one minute is approximately half that of plain paper. • If the paper thickness is outside the specified range, select Plain Paper (90-105 g/m2). • The number of sheets that can be printed in one minute is approximately half that of plain paper.
Note Tray 2 Tray 1 Enabled paper feeding tray Duplex Thickness (g/m2) Paper Type Paper and Other Media • The loading orientation of envelopes depends on the type of envelope. To load envelopes that open along the short edge, open out their flaps and place the envelopes so that their flaps point toward the back of the tray.
Note Tray 2 Tray 1 Enabled paper feeding tray Duplex Thickness (g/m2) Paper Type Paper Recommendations • Fan envelopes, and then align their edges before loading. 4 ASH121S • When fanning envelopes, make sure they are not stuck together. If they are stuck together, separate them. • When fanning envelopes, make sure the envelope flaps are not stuck together. If they are stuck together, separate them.
Note Tray 2 Tray 1 Enabled paper feeding tray Duplex Thickness (g/m2) Paper Type Paper and Other Media • Before loading envelopes, flatten them out so that their curl does not exceed that shown in the illustration below. 4 ASH122S If the curl is severe, flatten out the envelopes using your fingers, as shown in the illustration below. ASH123S • If envelopes are severely curled after printing, flatten them by bending them back against the curl.
Paper Recommendations Paper Not Supported by This Printer Avoid using the following paper as they are not supported by this printer. • Paper meant for an ink-jet printer • Bent, folded, or creased paper • Curled or twisted paper • Torn paper • Wrinkled paper • Damp paper • Paper that is dry enough to emit static electricity • Paper that has already been printed onto, except a preprinted letterhead. Malfunctions are especially likely when using paper printed on by other than a laser printer (e.g.
Paper and Other Media Print Area The following shows the print area for this printer. Be sure to set the print margins correctly by the application. ❖ Paper 4 A B C D Print area Feed direction Approx. 4.2 mm (0.17 inches) Approx. 4.2 mm (0.17 inches) Note ❒ The print area may vary depending on the paper size, printer language and printer driver settings.
Paper Recommendations ❖ Envelope A B C D Print area Feed direction Approx. 4.2 mm (0.17 inches) Approx. 4.2 mm (0.17 inches) 4 Note ❒ The print area may vary depending on the paper size, printer language and printer driver settings. ❒ For better print quality, we recommend the right, left, top, and bottom print margins to be at least 15 mm (0.6 inches) each.
Paper and Other Media Loading Paper This describes how to load paper into the paper tray and bypass tray. R CAUTION: • Do not pull out the paper tray forcefully. If you do, the tray might fall and cause an injury. Loading Paper in Tray 1 The following example explains loading procedure for the standard paper tray (Tray 1). The same procedure can be used for the optional paper feed unit. 4 Important ❒ Make sure paper is not stacked above the limit mark inside the tray. Misfeeds might occur.
Loading Paper B Push the metal plate down until it clicks into place to lock. ASH033S C Pinch the clip on the side paper guide and slide it to match the standard 4 size. ASH034S ASH093S When loading custom size paper, position the paper guide slightly wider than the actual paper size.
Paper and Other Media D Pinch the front end paper guide and slide it inward to mach the standard size. ASH036S 4 ASH126S When loading custom size paper, position the paper guide slightly wider than the actual paper size. E Load the new paper stack print side up. Make sure paper is not stacked higher than the upper limit (upper line) marked inside the tray.
Loading Paper Slide the guides inward, until they are flush against the paper's sides. Make sure the paper is not stacked higher than the projection on the side paper guides. ASH094S 4 F Check there are no gaps between the paper and the paper guides; both side and front end paper guides. ASH084S If there is a gap between the paper and the front end paper guide, as in the example below, the paper might not feed in correctly.
Paper and Other Media G Carefully push Tray 1 straight into the printer. ASH037S To avoid paper jams, make sure the tray is securely inserted. 4 Note ❒ The upper limit differs depending on paper type; thin paper or thick paper. Check the label inside the tray to confirm the upper limit. Reference For details about paper types supported by the printer, see p.25 “Paper Recommendations”. For details about the paper settings, see Software Guide.
Loading Paper Loading legal size paper This section explains how to load Legal size paper into the printer. The same procedure applies to A4 paper (297 mm) or larger. Important ❒ Do not move the side paper guides forcefully. Doing so can damage the tray. ❒ Do not move the end paper guide forcefully. Doing so can damage the tray. ❒ When inserting the tray, make sure it is not slanted. Inserting it at a slant can damage the printer. A Remove the rear cover using a coin.
Paper and Other Media C Push the metal plate down until it clicks into place to lock. ASH033S D Pinch the extender in the "PUSH" direction, and then pull out the extender 4 until it stops (you will hear a click). ASH095S After extension, make sure the arrows on the extender and tray are aligned.
Loading Paper E Pinch the clip on the side paper guide, and then slide it to match the standard size. ASH115S 4 ASH093S F Pinch the front end paper guide and slide it inward to match the legal paper size.
Paper and Other Media G Load the new paper stack print side up. Make sure paper is not stacked higher than the upper limit (upper line) marked inside the tray. ASH116S 4 Slide the guides inward until they are flush against the paper's sides. Make sure the paper is not stacked higher than the projection on the side paper guides. ASH094S H Check there are no gaps between the paper and the paper guides; both side and front end paper guides.
Loading Paper If there is a gap between the paper and the front end paper guide, as in the example below, the paper might not feed in correctly. ASH119S I Carefully push Tray 1 straight into the printer. 4 ASH037S To avoid paper jams, make sure the tray is securely inserted. Note ❒ To reinsert the extender, you might have to push it with moderate force. Reference For details about paper types supported by the printer, see p.25 “Paper Recommendations”.
Paper and Other Media Loading envelopes Important ❒ Check there is no air in the envelopes before loading. ❒ Load only one size and type of envelope at a time. ❒ Before loading envelopes, flatten their leading edges (the edge going into the printer) by running a pencil or ruler across them. ❒ Some kinds of envelope might cause misfeeds, wrinkles or print poorly. ❒ Print quality on envelopes may be uneven if parts of an envelope have different thicknesses. Print one or two envelopes to check print quality.
Loading Paper F Set the envelopes in Tray 1 with the printing side facing up. ASH124S Make sure envelopes are not stacked higher than the upper limit (lower line) mark inside the tray. 4 ASH055S G Carefully slide the paper tray back in until it stops. To avoid paper jams, make sure the tray is securely inserted. ASH056S Note ❒ Be sure to load envelopes so that their flaps are on the right. If you do not, the envelopes will become creased.
Paper and Other Media Loading Paper in the Optional Paper Feed Unit The following example explains the loading procedure for the optional paper feed unit. A Lift and pull the optional paper feed unit, and then hold the tray with both hands, and then pull it out. 4 ASH076S Place the tray on a flat surface. B Press down on the bottom plate until it clicks. ASH077S C Pinch the clips on the side paper guide, and then adjust the guide to the paper size.
Loading Paper D Pinch the clip on the end paper guide and align the arrow with the paper size. ASH097S E Load the new paper stack print side up. 4 Make sure paper is not stacked higher than the upper limit (upper line) marked inside the tray. ASH080S F Lift and slide the tray, then push it all the way in. Push the tray firmly to avoid a paper jam.
Paper and Other Media Loading Paper in the Bypass Tray Important ❒ Set the size and direction of the loaded paper using Smart Organizing Monitor or the printer driver. Make sure the settings do not conflict. Otherwise, the paper may jam or the print quality may be affected. ❒ Load paper with the print side down and in the short-edge feed direction. ❒ Duplex printing is not possible. ❒ You cannot use the bypass tray to feed in paper that requires a specified printing position (such as preprinted paper).
Loading Paper C Support the paper with your hands, and insert it carefully until it stops. ASH060S D Start Smart Organizing Monitor or the printer driver and specify the paper 4 size. E Start printing. Reference For details about specifying the paper sizes, see Software Guide.
Paper and Other Media 4 50
5. Replacing Consumables Replacing the Print Cartridge R WARNING: • Do not incinerate used toner or toner containers. Toner dust might ignite when exposed to an open flame. Dispose used toner containers in accordance with local regulations. • Do not store toner, used toner, or toner containers in a place with an open flame. The toner might ignite and cause burns of a fire. R CAUTION: • Keep toner (used or unused) and toner containers out of reach of children.
Replacing Consumables ❖ When to replace the print cartridge If the Alert indicator or any of the toner indicators on the control panel light up, or the message “No Toner. The following toner has run out. Open the indicated cover, and then replace the Toner Cartridge. Top Cover : [Black/Yellow/Magenta/Cyan]” appears on the Smart Organizing Moni- tor dialog box, replace the indicated print cartridge. • If cyan, magenta, or yellow toner runs out, you can print in black and white using black toner.
Replacing the Print Cartridge A Pull up Top Cover Open Lever to open the top cover. ASH004S From the rear, the print cartridges are installed in the order of cyan (C), magenta (M), yellow (Y), and black (K). B Gripping its center, carefully pull the print cartridge upward and out. 5 ASH005S • Do not shake the removed print cartridge. Remaining toner may leak. • Place the old print cartridge on paper or some other material to avoid dirtying your workspace. • Color is labeled on each print cartridge.
Replacing Consumables D Hold the print cartridge and shake it from side to side five or six times. ASH007S Even distribution of toner within the bottle improves print quality. E Remove the cover from the print cartridge. 5 ASH008S F Check the toner color and location correspond, and carefully insert the print cartridge vertically.
Replacing the Print Cartridge G Close the top cover with both hands carefully. ASH010S Wait while the toner loads. To avoid malfunction, do not turn off the power while the Ready indicator on the control panel is blinking. H Put the cover that you removed in step 5 on the old print cartridge. Then, 5 put the old print cartridge into the bag, and then put it into the box. ASH061S Note ❒ Make sure to cover the old print cartridge with the protective cover for recycling and environmental purposes.
Replacing Consumables Replacing the Waste Toner Bottle R WARNING: • Do not incinerate spilled toner or used toner. Toner dust might ignite when exposed to an open flame. • Wait at least 30 minutes after disconnecting the power plug before removing the transfer unit. • Do not incinerate used toner or toner containers. Toner dust might ignite when exposed to an open flame. Dispose used toner containers in accordance with local regulations. R CAUTION: • The inside of this printer becomes very hot.
Replacing the Waste Toner Bottle A Pull Front Cover Open Lever, and then open the front cover with both hands carefully. ASH011S B Slide both levers on the front cover outward. 5 ASH012S C Hold both green ends of the transfer unit, and then lift it up.
Replacing Consumables D Hold the center of the waste toner bottle, and then carefully pull it out horizontally. ASH040S E Pull the waste toner bottle halfway out, grab the bottle, and then pull it straight out.
Replacing the Waste Toner Bottle To prevent the waste toner bottle touching the intermediate transfer unit, do not lift the bottle while pulling it out. ASH042S F Close the bottle cap.
Replacing Consumables G Hold the center of the new waste toner bottle, and then carefully insert it halfway into the printer body. Leave the cap open. ASH044S To prevent the waste toner bottle touching the intermediate transfer unit, do not lift the bottle while inserting it. 5 ASH045S H Push in the waste toner bottle until it clicks into place. Push the green part all the way in.
Replacing the Waste Toner Bottle I Place the transfer unit down on the front cover. ASH020S J Slide the transfer unit along the guide rails into the printer. When it stops, push on the green PUSH mark until it clicks into place. 5 ASH016S K Close the front cover with both hands carefully. ASH067S Note ❒ Before removing the waste toner bottle from the printer, spread paper or some other material around the area to keep toner from dirtying your workspace.
Replacing Consumables 5 62
6. Cleaning the Printer Cautions to Take When Cleaning R WARNING: • Do not attempt any maintenance or troubleshooting other than that mentioned in this manual. This machine contains a laser beam generator and direct exposure to laser beams can cause permanent eye damage. R CAUTION: • The inside of this printer becomes very hot. Do not touch parts labelled “v” (indicating a hot surface). Clean the printer periodically to maintain fine printing. Dry wipe the exterior with a soft cloth.
Cleaning the Printer Cleaning the Toner Density Sensor Clean the toner density sensor when the following message appears on the Smart Organizing Monitor dialog box. “Toner Density Sensor requires cleaning.” A Pull up Top Cover Open Lever to open the top cover. ASH004S B Lift out the cyan print cartridge. 6 ASH105S C Slide the toner density sensor lever once to the left. ASH062S Slide the lever only once.
Cleaning the Toner Density Sensor D Reattach the cyan print cartridge removed in step 2. Push it all the way in carefully. ASH063S E Close the top cover with both hands carefully.
Cleaning the Printer Cleaning the Friction Pad and the Paper Feed Roller If the friction pad or paper feed roller is dirty, a multi-feed or misfeed might occur. In this case, clean the friction pad and paper feed roller as follows: R CAUTION: • Unplug the power cord from the wall outlet before you move the machine. While moving the machine, you should take care that the power cord will not be damaged under the machine. Important ❒ Do not use chemical cleaner or organic solvent such as thinner or benzine.
Cleaning the Friction Pad and the Paper Feed Roller E Wipe the rubber part of the roller with a soft damp cloth. After that, wipe it with a dry cloth to remove water. ASH065S F Push the metal plate down until it clicks into place to lock. 6 ASH033S G Slide Tray 1 along the rails, and push it carefully all the way into the printer. ASH037S H Insert the plug of the power cord into the wall socket securely. Connect all the interface cables that were removed. I Turn on the power switch.
Cleaning the Printer Note ❒ If misfeeds or multi-feeds of paper occur after cleaning the friction pad, contact your sales or service representative. ❒ If the optional paper feed unit is installed, clean its friction pad in the same way as the main friction pad. ❒ Follow the same procedure to clean the paper feed roller of the optional paper feed unit.
Cleaning the Registration Roller Cleaning the Registration Roller The surrounding registration roller might get dirty with paper dust when using paper other than standard paper. Wipe off the paper dust when printing is affected by it. R CAUTION: • Unplug the power cord from the wall outlet before you move the machine. While moving the machine, you should take care that the power cord will not be damaged under the machine. • The inside of this printer becomes very hot.
Cleaning the Printer The registration roller is set in the position shown by the arrow. ASH066S Clean the registration roller if printed paper becomes smeared after clearing a paper jam. D Using a cloth, wipe the metal registration roller. E Close the front cover with both hands carefully. 6 ASH067S F Insert the plug of the power cord into the wall socket securely. Connect all the interface cables that were removed. G Turn on the power switch.
7. Troubleshooting Error & Status Messages on Smart Organizing Monitor This section explains what the message that appear on the Smart Organizing Monitor dialog box mean and what to do when a particular message appears. Message Explanation Recommended Action Print overrun error has occurred. The print data could not be processed. Print the job again from a higher performance computer. The indicated paper input tray is not installed correctly, or not installed.
Troubleshooting Message Explanation Recommended Action Paper Size Mismatch The paper size setting in the tray differs from that of actual paper size in the tray. Load paper of the selected size in the tray, and then change the paper size setting with Smart Organizing Monitor. Paper of the selected paper size is not loaded in the indicated paper source tray. [Tray 2] Misfeed recovery print failed. The print data could not be re- Print again. covered due to insufficient Please try to print again.
Error & Status Messages on Smart Organizing Monitor Message Explanation Recommended Action Cover Open The top cover or front cover is open. Open and then close the top cover or front cover. The indicated print cartridge is not set correctly, or not set. Set the indicated print cartridge correctly. (Black) (Black) The error message appears even though the print cartridge is set correctly. Using a dry cloth, carefully wipe the interface area on the print cartridge surface.
Troubleshooting Message Explanation Recommended Action No Toner The printer is out of toner (Magenta). Replace the print cartridge (Magenta). The following toner has run out. See p.51 “Replacing the Print Cartridge” Open the indicated cover, and then replace the Toner Cartridge. Top Cover : [Magenta] No Toner The following toner has run out. The printer is out of toner (Cy- Replace the print cartridge an). (Cyan). See p.
Error & Status Messages on Smart Organizing Monitor Message Explanation Recommended Action Functional problem within the printer. There is an abnormality in the NVRAM on the controller. Turn off the main power, and then turn it on again. If the error occurs again, contact service people to repair it. Turn power switch off, then on. If the error appears again, please call service. SC824 Functional problem within the printer. There is an abnormality in the memory on the controller.
Troubleshooting Message Explanation Recommended Action Functional problem within the printer. It is impossible to communicate with the engine. Turn off the main power, and then turn it on again. If the error occurs again, contact service people to repair it. Turn power switch off, then on. If the error appears again, please call service. SC670 No Response from I/O Device No information has been reCheck the cable, power cord, ceived from the printer. and main switch.
Panel Indicator Panel Indicator The following table explains the meaning of the various Indicator patterns that the printer alerts to users about its conditions. Indicator patterns All indicators are lit. Cause There are problems with the printer. Check the printer status on the Smart Organizing Monitor dialog box. After checking the printer's status, turn off the main power, and then turn it back on again. If all the indicators are still lit, contact your service representative.
Troubleshooting Printer Does Not Print Possible Cause Is the power on? Solutions Confirm that the cable is securely plugged into the power outlet and the printer. Turn the power on. Does the Alert indicator stay red? If so, check the error message on the Smart Organizing Monitor dialog box and take the required action. Is paper loaded? Load paper into the paper tray or the bypass tray. See p.34 “Loading Paper”.
Printer Does Not Print When the Printer is Directly Connected to a Computer via USB Cable Windows When the printer is directly connected via a USB cable to a computer but the Ready indicator does not flash or light up, use the following method to check the port connection: • For a USB port connection, port USB00 (n) *1 should be set. *1 (n) is the number of printers connected. Windows 2000 A Click [Start], point to [Settings] and then click [Printers]. B Click to select the icon of the printer.
Troubleshooting Windows XP Home Edition A Access the [Control Panel] window from [Start] on the taskbar. B Click [Printers and Other Hardware]. C Click [Printers and Faxes]. D Click to select the icon of the printer. Next, on the [File] menu, click [Properties]. E Click the [Ports] tab. F Check the [Print to the following port(s).] box to confirm that the correct port is selected. If the port such as LPT1 is not correct, reinstall the driver.
Printer Does Not Print Using [About This Mac] A Click Apple Menu, and then select [About This Mac]. B Click [More Info]. C Under [Contents], for [Hardware], select [USB]. Using the printer browser A In the menu bar, click [Go], select [Application], and then select [Utilities]. B Double click [Printer Setup Utility]. C Click [Add]. The printer browser starts. Confirm the printer is displayed on the browser. If it is not, reinstall the driver.
Troubleshooting Other Printing Problems Status Toner smears appear on the print side of the page. Possible Causes, Descriptions, and Solutions The paper setting may not be correct. For example, although you are using thick paper, the setting for thick paper may not be set. • Check the printer driver's paper settings. See the printer driver Help. Confirm that the paper is not curled or bent. Envelopes can be curled easily. Flatten paper before loading. See p.23 “Paper and Other Media”.
Other Printing Problems Status Possible Causes, Descriptions, and Solutions Multiple pages are fed at once. • There may be a gap between the front end paper guide and the paper, or between the paper guide both side and the paper in the paper tray. Make sure there are no gaps. See p.34 “Loading Paper”. • Paper is either too thick or too thin. See p.23 “Paper and Other Media”. • Paper has already been printed on. See p.23 “Paper and Other Media”. • Number of paper set in the tray exceeds the limit.
Troubleshooting Status Images are not printed in the right position Possible Causes, Descriptions, and Solutions Adjust the printing position from Smart Organizing Monitor. See Software Guide. ASH102S Images are printed diagonally to the pages Adjust the front end paper guide and both side paper guides to match the paper size. See p.34 “Loading Paper”. ASH103S Vertical line appear. The intermediate transfer belt is dirty.
Other Printing Problems Status Possible Causes, Descriptions, and Solutions It takes too much time to resume printing. • The data is so large or complex that it takes time to process it. If the Ready indicator is blinking, the data is being processed. Just wait until it resumes. • The printer was in the Energy Saver mode. To resume from the Energy Saver mode, the printer has to warm up, and this takes time until printing starts.
Troubleshooting Status Possible Causes, Descriptions, and Solutions Solid areas, lines or text are Select [K (Black)] for [Gray Reproduction (Text/Line Art):] in the shiny or glossy when created as printer driver's dialog box. a mixture of cyan, magenta, yel- See the printer driver Help. low. Black gradation is not natural. Select [CMY + K] for [Gray Reproduction (Text/Line Art):] in the printer driver's dialog box. See the printer driver Help. Solid lines are printed as broken lines.
Other Printing Problems Status Possible Causes, Descriptions, and Solutions The backs of printed sheets are blemished. • When removing a jammed sheet, the inside of the printer may have become dirtied. Print several sheets until they come out clean. • If document size is larger than paper size, e.g. A4 document on B5 paper, the back of the next printed sheet may be dirtied. If rubbed with your finger, it smears out. The setting of the paper may not be correct.
Troubleshooting Additional Troubleshooting Problems Solutions Strange noise is heard. If a supply was recently replaced or an option in the area the strange noise is coming from, check the supply or option is properly attached. If the strange noise persists, contact your sales or service representative. No e-mail is received when an Alert occurs, and after resolving an Alert. • Confirm [Auto E-mail Notification:] is set to [On] using Web Image Monitor or Smart Organizing Monitor. See Software Guide.
8. Removing Misfed Paper When Paper is Jammed If a paper jam occurs, the Alert indicator on the control panel flashes and the following message appears on the Smart Organizing Monitor dialog box: “Paper Misfeed. Open the indicated cover, and then remove any misfed paper. [Front Cover]” Open the front cover, and check the following locations (in the order shown) for the paper jam. Important ❒ Misfed paper may be covered in toner. Be careful not to get toner on your hands or clothes.
Removing Misfed Paper When Paper Jams inside the Fusing Unit If the Alert indicator lights up, paper may be misfed: A paper misfeed occurs during paper feeding. Open the front cover to remove the misfed paper. R CAUTION: • The inside of this printer becomes very hot. Do not touch the parts labelled “v” (indicating a hot surface). • The fusing section of this machine might be very hot. Caution should be taken when removing misfed paper.
When Paper is Jammed B Lower the blue fusing unit lever, and then pull out the jammed paper carefully. ASH046S ASH047S Pull the paper downward to remove it. Do not pull it upward. If it is difficult to locate the paper, check for jammed paper by pulling down the guide.
Removing Misfed Paper C Carefully lift the blue fusing unit levers. ASH049S D Close the front cover with both hands carefully. ASH067S Note ❒ When closing the front cover, push the upper side of the cover firmly. After closing the cover, check that the error is cleared. 8 When Paper Jams Inside the Tray If paper becomes jammed in Tray 1 or 2, open the front cover and remove it. A Pull Front Cover Open Lever, and then open the front cover with both hands carefully.
When Paper is Jammed B Carefully pull the jammed paper upward and out. ASH068S If paper has jammed inside the transfer unit, holding both sides of the paper, pull the paper carefully forward and out. ASH069S C Close the front cover with both hands carefully. 8 ASH067S Note ❒ Do not pull out the paper tray (Tray 1). ❒ If paper is jammed in Tray 2 but is difficult to locate, pull out Tray 2 to remove it. After removing the paper, carefully push Tray 2 all the way back inside the printer.
Removing Misfed Paper When Paper Jams inside the Transfer Unit If a paper misfeed occurs inside the transfer unit, open the front cover and remove it. A paper jam occurs when duplex printing is performed. A Pull Front Cover Open Lever, and then open the front cover with both hands carefully. ASH011S B Carefully remove misfed paper under the transfer unit. 8 ASH050S If you cannot find the misfed paper, look inside the printer. C Close the front cover with both hands carefully.
9. Appendix If the Printer is Not Going to Be Used for a Long Time If the printer is going to be inactive for a long time, follow the procedure shown here. R WARNING: • Plug and unplug the power cable with dry hands, or an electric shock could occur. R CAUTION: • The inside of this printer becomes very hot. Do not touch parts labelled “v” (indicating a hot surface). • Unplug the power cord from the wall outlet before you move the machine.
Appendix C Pull Front Cover Open Lever, and then open the front cover with both hands carefully. ASH011S D Lower the blue fusing unit lever. ASH046S E Using a coin, turn both gray knobs on the fusing unit 90 degrees counterclockwise (until the slots are horizontally aligned with the shown in the illustration below).
If the Printer is Not Going to Be Used for a Long Time F Carefully lift the blue fusing unit levers. ASH049S G Close the front cover with both hands carefully. ASH111S Note ❒ This step is not necessary if the printer's power switch is on but the printer has been inactive for a long time.
Appendix Using the Printer Again after it has been Inactive for a Long Period Use the following procedure to start using the printer again after it has been inactive for a long period. Important ❒ To avoid damage to the fusing unit's knobs, be sure to turn both knobs back to their original positions, as shown in the following procedure. A Plug in the power cable. B Pull Front Cover Open Lever, and then open the front cover with both hands carefully. ASH011S C Lower the blue fusing unit lever.
If the Printer is Not Going to Be Used for a Long Time D Using a coin, turn both gray knobs on the fusing unit 90 degrees clockwise (until the slots are vertically aligned with the tration below). marking shown in the illus- ASH128S E Carefully lift the blue fusing unit levers. ASH049S F Close the front cover with both hands carefully. 9 ASH111S G Turn the power switch to On.
Appendix Moving and Transporting the Printer R CAUTION: • The printer weighs approximately 23 kg (50.6 lb.). When moving the printer, use the inset grips on both sides, and lift slowly in pairs. The printer will break or cause injury if dropped. • Unplug the power cord from the wall outlet before you move the machine. While moving the machine, you should take care that the power cord will not be damaged under the machine.
Moving and Transporting the Printer Moving the Printer R CAUTION: • Unplug the power cord from the wall outlet before you move the machine. While moving the machine, you should take care that the power cord will not be damaged under the machine. Moving the printer in a short distance A Be sure to check the following points: • The power switch is turned off. • The power cable is unplugged from the wall outlet. • The interface cable is unplugged from the printer.
Appendix Consumables R CAUTION: • Our products are engineered to meet high standards of quality and functionality, and we recommend that you use only the expendable supplies available at an authorized dealer. Print Cartridge Print cartridge Average number of pages printable per cartridge *1 Black 2,000 pages Cyan 2,000 pages Magenta 2,000 pages Yellow 2,000 pages *1 A4/letter 5% test chart, printing continuously in monochrome/color only.
Consumables Waste Toner Bottle Name Waste Toner Bottle SP C220 *1 Average printable number of pages *1 25,000 pages A4/letter 5% test chart, 3 pages / job, printing in 50% monochrome/color. Note ❒ The actual number of printable pages varies depending on the image volume and density, number of pages to be printed at a time, paper type and paper size used, and environmental conditions such as temperature and humidity.
Appendix Specifications R WARNING: • The supplied power cord is for use with this equipment only. Do not use with other appliances. Doing so may result in fire, electric shock, or injury.
Specifications ❖ Media Type See p.23 “Paper and Other Media” ❖ Paper Output Capacity Standard 150 sheets (80 g/m2, 20 lb.) ❖ Paper Input Capacity • SP C220N: Standard Paper Tray 250 sheets *1 Bypass Tray 1 *1 *1 : Paper weight: 80 g/m2 (20 lb. bond) • SP C221N/SP C222DN: Standard Paper Tray 250 sheets *1 Bypass Tray 1 *1 Optional Paper Feed Units 500 sheets *1 *1 : Paper weight: 80 g/m2 (20 lb.
Appendix ❖ Noise Emission *1 Sound Power Level Mainframe only Stand-by 43 dB (A) During Printing Monochrome: 63 dB (A) Color: 64 dB (A) Sound Pressure Level *2 Mainframe only Stand-by 35 dB (A) During Printing 57 dB (A) *1 : The preceding measurements made in accordance with ISO7779 are actual values. *2 : Measured at the position of a bystander.
Specifications Options Paper Feed Unit TK1010 ❖ Paper size A4K and Letter (81/2 × 11 inches) K ❖ Dimensions (W × D × H) 400 × 450 × 127 mm (15.8 × 17.8 × 5 inches) ❖ Paper weight 60 - 105 g/m2, (16 - 28 lb.) ❖ Weight Less than 4 kg (8.8 lb.
INDEX A Additional troubleshooting, 88 Appendix, 100 Attaching Memory Unit Type F 256MB (DDR-SDRAM Module), 16 Attaching Paper Feed Unit TK1010, 14 C Cleaning the friction pad, 66 Cleaning the paper feed roller, 66 Cleaning the printer, 63 Cleaning the registration roller, 69 Cleaning the toner density sensor, 64 Connecting the printer network connection, 19 USB connection, 21 Consumables, 102 E Ethernet, 19 Ethernet port, 19 F Friction pad, 66 G Guide to the printer control panel, 4 exterior, 1 exterio
U USB port, 21 W Waste toner bottle, 56, 103 109
110 GB GB EN USA G165-8606A
In accordance with IEC 60417, this machine uses the following symbols for the main power switch: a means POWER ON. b means POWER OFF. Trademarks Microsoft, Windows, Windows Server, and Windows Vista are registered trademarks of Microsoft Corporation in the United States and/or other countries. Adobe® and PostScript® are registered trademarks of Adobe Systems Incorporated. PCL® is a registered trademark of Hewlett-Packard Company.
Operating Instructions Hardware Guide GB GB EN USA G165-8606A