Section 4 Viewing Still Images and Movies You can display still images or movies on the LCD Monitor and check them. This section explains displaying still images and movies on the LCD Monitor. It is recommended you plug in the AC Adaptor whenever viewing still images or movies on the LCD Monitor.
Chapter 1 / Section 4 Viewing Still Images and Movies Viewing the Photo You Just Took Right after shooting a still image, if you want to see it immediately, you can display the shot in Shooting Mode. This function is called Quick Review. For movies, the first frame appears as a still image. To display the still image you just took, follow the steps below. While still in the Shooting Mode, press the (Quick Review) button. The still image you just took is displayed on the LCD Monitor.
Chapter 1 / Section 4 Viewing Still Images and Movies Displaying an Enlarged View of the Still Image Displayed Press the (Enlarged View) button. The still image is enlarged. One part of the still image is displayed on the LCD Monitor. The enlargement ratio changes each time you press The still image you displayed with the (Quick Review) button can be displayed enlarged up to 3.4 times using the (Enlarged View) button. the button.
Chapter 1 / Section 4 Viewing Still Images and Movies Deleting the Displayed Still Image or Movie While using the Quick Review function, press the (Delete) button. Press the The movie or still image you displayed using the (Quick Review) button can be deleted by pressing the (DELETE) button. button to select [DELETE]. To delete a still image or movie that is displayed, follow the steps below. Buttons used here Press the button.
Chapter 1 / Section 4 Viewing Still Images and Movies Viewing a Still Image or Movie When you take a still image or movie, it is immediately stored in internal memory or on an SD Memory Card. Still images and movies in internal memory or on an SD Memory Card can be displayed on the LCD Monitor. Viewing Still Images Recorded on an SD Memory Card Turn the Mode Dial to (Playback Mode). The last still image taken is displayed. To view still images, follow the steps below.
Chapter 1 / Section 4 Viewing Still Images and Movies Viewing Still Images Recorded on Internal Memory To view still images recorded on internal memory, follow the steps below. If an SD Memory Card is loaded, turn off the power, remove the SD Memory Card and turn the power back on. Turn the Mode Dial to (Playback Mode). The last still image taken is displayed. For movies, the first frame is displayed as a still image. Move to the still image you want to view using the buttons.
Chapter 1 / Section 4 Viewing Still Images and Movies Press the shutter release button. Viewing Movies Playback begins. The elapsed playback indicator or the elapsed time is displayed on the LCD Monitor. To view movies, follow the steps below. Buttons used here Turn the Mode Dial to (Playback Mode). The last still image taken is displayed. For movies, the first frame is displayed as a still image. Move to the movie you want to see using the buttons. If you press the image or movie.
Chapter 1 / Section 4 Viewing Still Images and Movies Viewing at a Glance The LCD Monitor screen is split into six thumbnail images, allowing you to view your still images or movies at one glance (Thumbnail Display). If you select a still image or movie you want to see from Thumbnail Display Mode, you can view it normally with just the one shot displayed. To view the Thumbnail Display and select the still image for viewing, follow the steps below. Press the (Thumbnail Display) button.
Chapter 1 / Section 4 Viewing Still Images and Movies Enlarged Viewing When you are displaying a still image, if you press the still image up to 3.4 times larger. To view still images in Enlarged Display Mode, follow the steps below. (Enlarged View) button, you can display the Display the still image you want to enlarge. Press the Buttons used here Press the want to display. Turn the Mode Dial to (Enlarged View) button. The still image is enlarged.
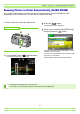
Chapter 1 / Section 4 Viewing Still Images and Movies Showing Photos in Order Automatically (SLIDE SHOW) You can show still images or movies recorded in internal memory or on an SD Memory Card sequentially on the LCD Monitor. This function is called a slide show. To view a slide show, follow the steps below. Press the button. The Playback menu is displayed. Buttons used here Confirm you are selecting [SLIDE SHOW] and then press the button.
Chapter 1 / Section 4 Viewing Still Images and Movies Viewing on a Television You can also view the still images and movies you have taken on a TV screen. The camera displays everything on the TV screen just as on its LCD Monitor. To use your television for viewing, connect your camera to the television with the video cable that came with your camera. To view still images and/or movies on a television, follow the steps below. Make sure the power is off.
Section 5 Deleting Still Images and Movies One of the big advantages of digital cameras is that you can delete unwanted still images and movies on the spot. This section explains deleting still images and movies you have taken. For how to protect still images from accidental deletion, see p.88.
Chapter 1 / Section 5 Deleting Still Images and Movies Deleting Unwanted Still Images or Movies You can easily delete still images and movies that have not come out right. The following are the three ways to delete photos: • One shot at a time • All frames at once • Select multiple frames and delete together Still images and movies set to Protect cannot be deleted. Still images or movies recorded on the following media are deleted.
Chapter 1 / Section 5 Deleting Still Images and Movies Deleting All Frames at Once Press the (Delete) button. Press the button to select [DELETE ALL] and press the button. To delete all still images or movies, follow the steps below. A screen appears to confirm the deletion. Buttons used here Press the Turn the Mode Dial to button to select [YES]. (Playback Mode). The last still image taken is displayed. Press the button.
Chapter 1 / Section 5 Deleting Still Images and Movies Press the buttons to select the still images or movies you want to delete. Deleting Multiple Frames at Once To delete selected still images or movies all at once, follow the steps below. Press the (Delete) button. The trash symbol appears in the upper left of the still image (or movie). Buttons used here Repeat Steps and to select all the still images you wish to delete.
Chapter 1 / Section 5 Deleting Still Images and Movies Write-protecting Your Images (PROTECT) You can protect still images and movies from being accidentally deleted. There are 3 methods of making Protect settings: • One shot at a time • All frames at once • Select multiple frames and protect together Still images and movies that are protected cannot be deleted. However, when the memory is formatted, it makes no difference whether files are protected or not: all are deleted.
Chapter 1 / Section 5 Deleting Still Images and Movies Press the button. When set to Protect, the Protect symbol appears in the upper left of the screen. The procedure for releasing protection from one file at a time is the same as that for setting protection. • For how to display still images (or movies), see p.77. • To set/remove protection of all still images (or movies) at once, see p.90. • To set/remove protection of selections made on the Thumbnail Display screen, see p.91.
Chapter 1 / Section 5 Deleting Still Images and Movies Protecting All Still Images Press the button to select [ALL FILES]. To protect all your still images (or movies), follow the steps below. Buttons used here Confirm you are choosing [SELECT] and then press . When set to Protect, the Protect symbol appears in the upper left of the screen. Turn the Mode Dial to Press the (Playback Mode). button. The Playback menu is displayed. Press the button to select [PROTECT] and then press the button.
Chapter 1 / Section 5 Deleting Still Images and Movies Protecting Multiple Still Images or Movies at Once Press the button to select [PROTECT] and then press the button. The Protect symbol appears in the upper left of the first still image (or movie). To protect selected still images or movies all at once, follow the steps below. Buttons used here Press the buttons to select the still image or movie you wish to Protect and press the button.
Chapter 1 / Section 5 Deleting Still Images and Movies Copying the Contents of Internal Memory to a Memory Card (COPY TO CARD) You can copy all the movie and still image data stored in internal memory onto an SD Memory Card at once. To copy still images and movies from internal memory to SD Memory Card, follow the steps below. Turn the camera on. Turn the Mode Dial to Buttons used here Press the (Playback Mode). button. The Playback menu appears. Press the CARD].
Chapter 1 / Section 5 Deleting Still Images and Movies Using a Printing Service (PRINT) The still images recorded on SD Memory Card can be printed out if you take them to a shop that offers a digital camera print service. To use a print service, it is necessary to make settings required for printing. These settings are called DPOF (Dee-Pof) settings.
Chapter 1 / Section 5 Deleting Still Images and Movies Setting DPOF for All Still Images Press the button to select [ALL FILES]. To apply DPOF settings to all your still images, follow the steps below. Buttons used here Confirm you are choosing [SELECT] and then press . Once the DPOF setting is made, the DPOF symbol appears in the upper left of the screen. Turn the Mode Dial to Press the (Playback Mode). button. The Playback menu appears. Press the button to select [PRINT] and press button.
Chapter 1 / Section 5 Deleting Still Images and Movies Setting DPOF for Multiple Still Images Press the button. The Playback menu appears. Press the button to select [PRINT] and then press the button. To make the DPOF setting for selected still images all at once, follow the steps below. The DPOF symbol appears in the upper left of the first still image. Buttons used here Press the buttons to select the next still image you wish to set to DPOF, and then press the button.
Section 6 Changing Camera Settings This section explains how to make changes to the camera's settings. In this section, still images and movies will both be referred to as "images".
Chapter 1 / Section 6 Changing Camera Settings Getting the SD Memory Card Ready for Use (CARD FORMAT) If the error message "This card cannot be used" is displayed, or if you have formatted the card with a computer or some other device, it will be necessary to format the SD Memory Card prior to use. If you format a card that still has images stored on it, these will be lost. For how to format internal memory, see p.98. To format a memory card, follow the steps below.
Chapter 1 / Section 6 Changing Camera Settings Formatting Internal Memory (IN FORMAT) If the error message "Format the internal memory" is displayed, it will be necessary to format the internal memory prior to use. Formatting the internal memory clears all the images recorded in the memory. If you have images that you do not want to clear from the memory, please contact the Ricoh Service offices (see p.163) prior to formatting the internal memory. To format the internal memory, follow the steps below.
Chapter 1 / Section 6 Changing Camera Settings Changing Power-Save Mode Settings (POWER SAVE) You can reduce the power consumption of the LCD Monitor and extend the life of your batteries. At the time of purchase, Power-Save Mode is set to [OFF]. Press the SAVE]. Possible Settings OFF (Power Save Mode Inactivated) (Set at purchase) ON (Activate Power Save Mode) button to select [POWER To change the Power-Save Mode, follow the steps below. Turn the Mode Dial to (Setup Mode). The Setup Screen appears.
Chapter 1 / Section 6 Changing Camera Settings Changing Auto Power-Off Settings (AUTO POWER OFF) If you do not operate the camera for the set period of time, it will shut off automatically (Auto Poweroff) to conserve battery power. At the time of purchase, Auto Power-Off is set to one minute, but you can change this setting. Possible Settings OFF (The Auto Power-Off function does not work) 1 Minute (Default) 5 Minutes 30 Minutes Press the OFF]. button to select [AUTO POWER Press the setting.
Chapter 1 / Section 6 Changing Camera Settings Beep at Recording (BEEP SOUND) When you shoot an image, it is immediately recorded to internal memory or SD Memory Card. When recording, your camera makes a beep sound to let you know it is recording. You can set the camera so it does not make this sound. Press the SOUND]. Possible Settings ON (Make sound) (Default) OFF (Silent) button to select [BEEP To make changes to the beep sound, follow the steps below. Turn the Mode Dial to (Setup Mode).
Chapter 1 / Section 6 Changing Camera Settings Changing File Name Settings (SEQUENTIAL NO.) When you shoot a still image, it is stored on SD Memory Card or in internal memory, with a consecutively-numbered file name automatically assigned. When you are switching SD Memory Cards, you can set your camera to continue consecutive numbering from the previously loaded SD Memory Card. Possible Settings ON (Continue numbering) Press the NO.]. button to select [SEQUENTIAL Press the setting.
Chapter 1 / Section 6 Changing Camera Settings Changing Image Confirmation Time (LCD CONFIRM.) Immediately after pressing the shutter release button, the still image taken is displayed for a moment so you can check it. At purchase, Confirmation Time is set to one second, but this can be changed. Press the button to select [LCD CONFIRM.]. Possible Settings OFF (Photo not displayed for confirmation) 1 Minute (Default) 2 Seconds 3 Seconds To change Confirmation Time, follow the steps below.
Chapter 1 / Section 6 Changing Camera Settings Adjusting the Brightness of the LCD Monitor (LCD BRIGHTNESS) You can adjust the brightness of the LCD Monitor. To adjust the brightness of the LCD Monitor, follow the steps below. Turn the Mode Dial to Press the button. The LCD Brightness Adjustment bar appears. (Setup Mode). The Setup Screen appears. Press the brightness. Press the button to select [LCD BRIGHTNESS]. Moving it to the the buttons to adjust the side makes it darker.
Chapter 1 / Section 6 Changing Camera Settings Changing the Display Language (LANGUAGE) You can change the language displayed on the LCD Monitor. Possible Settings Press the button to select [LANGUAGE]. Press the setting. buttons to select the desired JPN (Japanese) ENG (English) (Default) FRE (French) GER (German) CHI (Chinese, simplified characters) To change the display language, follow the steps below. Turn the Mode Dial to (Setup Mode). The Setup Screen appears.
Chapter 1 / Section 6 Changing Camera Settings Changing the Playback Method for Viewing on TV (VIDEO OUT MODE) You can view your still images and movies on a television screen by connecting your camera to a television with the video cable (included). Your camera is set to NTSC video format (used in Japan and other countries) for use with television equipment, etc. If the equipment you want to connect to uses PAL format (used in Europe and elsewhere), then switch your camera to PAL format before connecting.