
Operation Manual

49
Chapter 1 / Section 3 Using Special Features for Improved Photography
To shoot with the Self-timer, follow the steps
below.
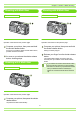
Turn the Mode Dial to (Shooting Mode).
Press the (Self-timer) button.
The self-timer mode is switched on and the Self-timer
symbol is displayed.
The "10" to the right of the symbol indicates the
number of seconds. In this case, if you press the
shutter release button, the camera will shoot after 10
seconds.
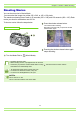
Press the shutter release button.
The flash begins to blink and the Self-timer starts.
After about ten seconds the camera takes the picture.
About two seconds before it shoots, the time interval
between blinks begins to shorten and the audio tone
begins to beep.
After shooting, Self-timer mode switches off.
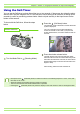
Buttons used here
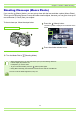
Using the Self-Timer
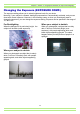
You can set the Self-timer to shoot after either two or ten seconds. If the person who takes the photo
wants to be in the still image as well, it is convenient to use a setting of ten seconds; a setting of two
seconds is useful for preventing camera shake. Attach a tripod securely to the tripod mount on the
bottom of the camera.
• Each press of the (Self-timer) button, it selects a function in the following sequence: 10 sec, 2 sec, Self-
timer Off, 10 sec, 2 sec...
• Self-timer settings are released when the power is turned off.
• The focus is fixed when the shutter release button is pressed.
• Pressing the (Self-timer) button may clear the display on the LCD monitor in order to recharge the flash.