
Scanner User Manual


Basic Procedure for Sending E-mail
13
1
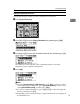
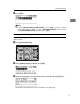
G Press {Start}.
Scanning starts.
You must press {q} to send scan files that are scanned from the exposure
glass.
Scan files that are scanned from the ADF are sent immediately.
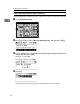
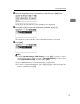
H If you still have originals to send, place them on the machine, and then press
{Start}.
Repeat this step until all originals are scanned.
I After all originals are scanned, press {q}.
Transmission starts.
Note
❒ If you have selected two or more destinations, the destinations can be
made to appear one by one by pressing {U} or {T}.
❒ To cancel a selected destination, display the destination in the destination
field, and then press {Clear/ Stop}.
❒ In [System Settings], you can specify the administrator’s e-mail address as
the default sender name. This lets you send e-mail without entering any-
thing for [Sender's Name]. For details, see General Settings Guide.
❒ Depending on the security setting, the logged-on user may be specified as
[Sender's Name].
❒ You can use the Return Receipt function when sending scan files by e-mail.
An e-mail is sent to the sender selected in step
E
, notifying him/her that
the recipient has read their e-mail. To use this function, under [Options], se-
lect [Return Receipt].
❒ To enable the Return Receipt function, you must set the ScanRouter deliv-
ery software to send e-mail by SMTP. For details about how to specify this
setting, see the manuals supplied with the ScanRouter delivery software.
Note, however, that if the receiving party's e-mail application does not
support Message Disposition Notification (MDN), notification e-mail
might not be returned.
❒ To cancel scanning, press {Clear/ Stop}.
Reference
p.14 “Specifying Destination”
p.28 “Specifying Sender”
p.95 “Various Scan Settings”