Laser MFP User’s Guide Read this manual carefully before you use this machine and keep it handy for future reference. For safe and correct use, please be sure to read the Safety Information in this manual before using the machine.
Contents of this manual are subject to change without prior notice. In no event will the company be liable for direct, indirect, incidental or consequential damages as a result of handling or operating the machine. Copyright © 2007. • Centronics is a trademark of Centronics Data Computer Corporation. • PCL and PCL 6 are trademarks of Hewlett-Packard company. • Microsoft, Windows, Windows 98, Windows Me, Windows 2000, Windows NT 4.
CONTENTS 1. Introduction Special features ...................................................................................................................................................... 1.1 Printer overview ...................................................................................................................................................... 1.2 Understanding the Status LED ..................................................................................................................
7. Basic printing Printing a document ................................................................................................................................................ 7.1 Canceling a print job ............................................................................................................................................... 7.1 8. Scanning Scanning basics ..............................................................................................................................
13. Maintenance Printing reports ...................................................................................................................................................... 13.1 Cleaning your machine ......................................................................................................................................... 13.2 Maintaining the toner cartridge ..............................................................................................................................
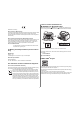
Safety Information CAUTION: When using this machine, the following safety precautions should always be followed. • Protect the machine from dampness or wet weather, such as rain and snow. • Unplug the power cord from the wall outlet before you move the machine. While moving the machine, you should take care that the power cord will not be damaged under the machine.
Caution: CAUTION: Use of controls or adjustment or performance of procedures other than those specified in this manual might result in hazardous radiation exposure. • Avoid getting toner on your clothes or skin when removing a paper jam or replacing toner. If your skin comes into contact with toner, wash the affected area thoroughly with soap and water. For North America CDRH Regulations • If toner gets on your clothing, wash with cold water.
Positions of Labels and Hallmarks for WARNING and CAUTION Labels This machine has labels for WARNING and CAUTION at the positions shown below. For safety, please follow the instructions and handle the machine as indicated.
NOTICE USA Note to users in the United States of America FCC Requirements 1. This equipment complies with Part 68 of the FCC rules and requirements adopted by the ACTA. On the cover of this equipment is a label that contains, among other information, a product identifier in the format US:AAAEQ##TXXXXX. If requested, this number must be provided to the telephone company. 2. This equipment uses the RJ11C USOC jack. 3.
CANADA This product meets the applicable Industry Canada technical specifications. The Ringer Equivalence Number is an indication of the maximum number of devices allowed to be connected to a telephone interface. The termination on an interface may consist of any combination of devices subject only to the requirement that the sum of the RENs of all the devices does not exceed five.
1 Introduction Expand your machine’s capacity • Your machine has 96 MB of memory which can be expanded to 320 MB. • You can add a 250-sheet optional tray 2 to your machine. This tray lets you add paper to the machine less often. • Zoran IPS Emulation* compatible with PostScript 3 (PS) enables PS printing. Thank you for purchasing this multifunctional product. Your machine provides printing, copying, scanning, and faxing functions.
Printer overview These are the main components of your machine: Front view 1 2 3 ADF (automatic document feeder)1 document width guides document input tray Rear view 10 11 12 tray 1 1 control board cover 7 extension telephone socket (EXT) 2 network port 8 duplex unit USB port 9 power receptacle power switch rear cover optional tray 2 3 multi-purpose tray 4 parallel port 10 5 optional tray 2 cable connector 11 6 telephone line socket (LINE) 4 scanner lid 13 output support 5
Control panel overview 1 Speed buttons: Allows you to store frequently-dialed fax numbers and email addresses and enter them with the touch of a few buttons. 13 Back: Sends you back to the upper menu level. 2 Shift: Allows you to shift the speed buttons to access numbers 16 through 30. 14 Status: Shows the status of your machine. See page 1.4. 3 Address Book: Allows you to store frequently used fax numbers in memory or search for stored fax numbers or email addresses.
Understanding the Status LED Finding more information The Status LED on the control panel shows the status of your machine. See the table below to know your machine’s status. You can find information for setting up and using your machine from the following resources, either printed or onscreen. Status Off Green Red Description • The machine is off-line. • The machine is in Power Save mode. When data is received, or any button is pressed, it switches to on-line automatically.
Selecting a location Select a level, stable place with adequate space for air circulation. Allow extra space for opening covers and trays. The area should be well-ventilated and away from direct sunlight or sources of heat, cold, and humidity. Do not set the machine close to the edge of your desk or table.
2 System setup This chapter gives you an overview of menus available on your machine and step-by-step instructions for setting up the machine’s systems.
6 Changing the display language Press OK to save the time and date. When you enter a wrong number, Out of Range appears and the machine does not proceed to the next step. If this happens, simply reenter the correct number. To change the language that appears on the control panel, follow these steps: 7 Press Stop/Clear to return to Standby mode. 1 Press Menu until System Setup appears on the bottom line of the display and press OK. 2 Press OK when Machine Setup appears.
Setting sounds Entering characters using the number keypad You can control the following sounds: As you perform various tasks, you may need to enter names and numbers. For example, when you set up your machine, you enter your name or your company’s name, and the fax number. When you store fax numbers or email addresses in memory, you may also enter the corresponding names. • Key Sound: Turns the key sound on or off. With this option set to On, a tone sounds each time a key is pressed.
Correcting numbers or names Scan Power Save mode If you make a mistake while entering a number or name, press the left Scroll button to delete the last digit or character. Then enter the correct number or character. Scan Power Save mode allows you to save power by turning off the scan lamp. The scan lamp under the scanner glass automatically turns off when it is not in actual use to reduce power consumption and extend the life of the lamp.
3 Software overview CD Printer, Scanner Drivers and Utilities Type 104 This chapter gives you an overview of the software that comes with your machine. Further details about installing and using the software are explained in the Software section. This chapter includes: • Supplied software • Printer driver features • System requirements (Continue) You must install the printer and scanner software using the supplied CD after you have set up your machine and connected it to your computer.
Printer driver features System requirements Your printer drivers support the following standard features: • Paper source selection Before you begin, ensure that your system meets the following requirements: • Paper size, orientation and media type Windows • Number of copies Item In addition, you can use various special printing features.
4 Network setup Supported operating systems The following table shows the network environments supported by the machine: This chapter gives you step-by-step instructions for setting up your machine for network connections.
6 When you have finished, press OK. 3 7 Repeat steps 5 and 6 to configure the other TCP/IP parameters: subnet mask and gateway address. Press the Scroll buttons until the speed you want appears and press OK. 4 Press Stop/Clear to return to Standby mode. 8 Press the Scroll buttons until Static appears and press OK. 9 Press the Scroll buttons until Primary DNS appears and press OK. Restoring the network configuration 10 Enter each byte of the address and press OK.
5 Loading originals and print 2 Place the original face down on the scanner glass and align it with the registration guide at the top left corner of the glass. 3 Close the scanner lid. media This chapter introduces you to how to load originals and print media into your machine.
To load an original into the ADF: 1 Selecting print media Load the original face up into the ADF. Make sure that the bottom of the original stack matches the paper size marked on the document input tray. You can print on a variety of print media, such as plain paper, envelopes, labels, and transparencies. Always use print media that meet the guidelines for use with your machine.
Supported print media types and sizes Type Plain paper Size Dimensions Weight1 Capacity2 • 60 to 90 g/m2 (16 to 24 lb bond) for the tray • 60 to 163 g/m2 (16 to 43 lb bond) for the multi-purpose tray • 250 sheets of 75 g/m2 (20 lb bond) paper for the tray • 50 sheets for the multipurpose tray 75 to 90 g/m2 (20 lb to 24 lb bond) 5 sheets of 75 g/m2 (20 lb bond) in the multi-purpose tray Letter 216 x 279 mm (8.5 x 11 inches) Legal 216 x 356 mm (8.5 x 14 inches) Folio 216 x 330.2 mm (8.
Media sizes supported in each mode Mode Size Guidelines for special print media Media type Source Copy mode Letter, A4, Legal, Folio, Executive, ISO B5, JIS B5, A5, A6 • tray 1 • optional tray 2 • multi-purpose tray Single side printing All sizes supported by the machine • tray 1 • optional tray 2 • multi-purpose tray Duplex printing Letter, A4, Legal, Folio • tray 1 • optional tray 2 • multi-purpose tray1 Fax mode Letter, A4, Legal • tray 1 • optional tray 2 Envelopes 1.
Media type Guidelines Transparencies • To avoid damaging the machine, use only transparencies designed for use in laser printers. • Transparencies used in the machine must be able to withstand 180 °C, the machine’s fusing temperature. • Place them on a flat surface after removing them from the machine. • Do not leave them in the paper tray for long periods of time. Dust and dirt may accumulate on them, resulting in spotty printing. • To avoid smudging caused by fingerprints, handle them carefully.
Loading paper in the tray 1 or optional tray 2 1 1 Press and hold the guide lock, and slide the paper length guide to locate it in the correct paper size slot. 2 After inserting paper into the tray, adjust the support guide so that it lightly touches the paper stack. 3 Squeeze the paper width guides, as shown and slide them to the stack of paper until it lightly touches the side of the stack. Pull open the paper tray and load paper. You can load letterhead with the design side face down.
In the multi-purpose tray Notes The multi-purpose tray can hold special sizes and types of print material, such as transparencies, postcards, note cards, and envelopes. It is useful for single page printing on letterhead or colored paper. Depending on the media type you are using, keep the following loading guidelines: • Envelopes: Flap side down and with the stamp area on the top left side. • Transparencies: Print side up and the top with the adhesive strip entering the machine first.
Tips on using the multi-purpose tray Selecting an output location • Load only one size of print media at a time in the multi-purpose tray. The machine has two output locations: the rear cover (face up) and the output tray (face down). • To prevent paper jams, do not add paper when there is still paper in the multi-purpose tray. This also applies to other types of print media.
Printing to the rear cover Using the rear cover, paper comes out of the machine face up. Printing from the multi-purpose tray to the rear cover provides a straight paper path. Using the rear cover might improve the output quality with special print media. To use the rear cover, open it by pulling down. Note The fuser area inside the rear cover of your machine becomes very hot when in use. Take care when you access this area. 5.
6 Copying Note You can cancel the copy job during an operation. Press Stop/ Clear, and the copying will stop. This chapter gives you step-by-step instructions for copying documents.
Reduced or enlarged copy Using special copy features By using the Reduce/Enlarge button, you can reduce or enlarge the size of a copied image from 25% to 400% when you copy original documents from the scanner glass, or from 25% to 100% from the ADF. You can use the following copy features: To select from the predefined copy sizes: Collation 1 Press Reduce/Enlarge. 2 Press Reduce/Enlarge or the Scroll buttons until the size setting you want appears and press OK.
ID card copying Poster copying Your machine can print 2-sided originals on one sheet of A4-, Letter-, Legal-, Folio-, Executive-, B5-, A5-, or A6-sized paper. Your machine can print an image onto 9 sheets of paper (3x3). You can paste the printed pages together to make one poster-sized document. When you copy using this feature, the machine prints one side of the original on the upper half of the paper and the other side on the lower half without reducing the size of the original.
Clone copying Copying on both sides of paper Your machine can print multiple image copies from the original document on a single page. The number of images is automatically determined by the original image and paper size. By using the Duplex button on your machine, you can set the machine to print copies on both sides of paper. This copy feature is available only when you place originals on the scanner glass. 1 Press Copy. 2 Place a single original face down on the scanner glass. 1 Press Duplex.
7 Basic printing This chapter explains common printing tasks. Printing a document Your machine allows you to print from various Windows or Macintosh. The exact steps for printing a document may vary depending on the application you use. For details about printing, see the Software section. Canceling a print job If the print job is waiting in a print queue or print spooler, such as the printer group in Windows, delete the job as follows: 1 Click the Windows Start menu. 2 For Windows 98/NT 4.
8 Scanning Scanning to an application using a local connection Scanning with your machine lets you turn pictures and text into digital files that can be stored on your computer. Then you can fax or email the files, upload them to your website, or use them to create projects that you can print.
Note Scanning using a network connection You can change the scanner properties of your machine and the scan settings from the ScanClair window. Click Properties and set the options in each tab. If you have connected your machine to a network and set up network parameters correctly, you can scan and send images over the network.
4 Click Add. 13 Enter the domain name of the SMB server. 5 Select the index number, from 1 to 20. 6 Enter a name in Alias for the Setup for the corresponding Server List entry. This name will be displayed on your machine. 14 Enter the location the scanned image will be stored. This is the location you have entered in the step 6. 7 Select IP Address or Host Name. 8 Enter the server address in dotted decimal notation or as a host name. 9 Enter the server port number, from 1 to 65535.
Setting network scan timeout 9 If the ScanClair program on your computer does not send a refresh request and does not scan a job within a specified timeout period, your machine cancels the scan job. You can change this timeout setting as needed. Press the Scroll buttons until the file format you want appears and press OK or Start. The machine begins scanning and then sends the email. 10 If the machine asks if you want to log off your account, press the Scroll buttons to select Yes or No and press OK.
Scanning to an SMB server 6 Repeat steps 4 and 5 to set other setting options. You can scan an image and then send it to an SMB server. You need to set up parameters for access to SMB servers from Web Image Monitor Type 104. See page 8.3. 7 When you have finished, press Stop/Clear to return to Standby mode. Before scanning, you can set the scan options for your scan job. See page 8.5. 1 Make sure that your machine is connected to a network.
Configuring group email numbers 1 Enter your machine’s IP address as the URL in a browser and click Go to access the web site of your machine. 2 Click Machine Settings and Group Address Book. 3 Click Add. 4 Select a group number and enter the group name you want. 5 Select speed email numbers that will be included in the group. 6 Click Apply. 5 Press the Scroll buttons until the name and address you want appears.
9 Faxing Sending a fax This chapter gives you information about using your machine as a fax machine. Setting the fax header This chapter includes: In some countries, you are required by law to indicate your fax number on any fax you send. The Machine ID, containing your telephone number and name or company name, will be printed at the top of each page sent from your machine.
Recommended resolution settings for different original document types are described in the table below: Mode Sending a fax automatically Recommended for: Standard Originals with normal sized characters. Fine Originals containing small characters or thin lines or originals printed using a dot-matrix printer. Super Fine Originals containing extremely fine detail. Super Fine mode is enabled only if the machine with which you are communicating also supports the Super Fine resolution. 1 Press Fax.
Receiving a fax Confirming a transmission When the last page of your original has been sent successfully, the machine beeps and returns to Standby mode. Selecting the paper tray When something goes wrong while sending your fax, an error message appears on the display. For a list of error messages and their meanings, see page 14.7. If you receive an error message, press Stop/Clear to clear the message and try to send the fax again.
7 Press Stop/Clear to return to Standby mode. Receiving automatically in Ans/Fax mode Notes To use this mode, you must attach an answering machine to the EXT socket on the back of your machine. • When the memory is full, the printer can no longer receive any incoming fax. Secure free memory to resume by removing data stored in the memory. • To use the Ans/Fax mode, attach an answering machine to the EXT socket on the back of your machine.
5 Call your fax number from another telephone. It is not necessary to place the call from a fax machine. 6 When your machine begins to ring, do not answer the call. The machine requires several rings to learn the pattern. Printing received faxes When the machine completes learning, the display shows Completed DRPD Setup. 1 Access the Secure Receive menu by following steps 1 through 3 in “Activating secure receiving mode”. 2 Press the Scroll buttons until Print appears and press OK.
Other ways to fax Printing received faxes on both sides of paper By using the Duplex button on your machine, you can set the machine to print received faxes on both sides of paper. 1 Press Duplex. 2 Press the Scroll buttons until the binding option you want appears. Sending a fax to multiple destinations You can use the Multiple Send feature, which allows you to send a fax to multiple locations. Originals are automatically stored in memory and sent to a remote station.
Adding pages to a delayed fax Sending a delayed fax You can add pages to the delayed transmissions previously reserved in your machine’s memory. You can set your machine to send a fax at a later time when you will not be present. 1 Press Fax. 2 Load originals face up into the ADF, or place a single original face down on the scanner glass. For details about loading an original, see page 5.1. 1 Load the originals to be added and adjust document settings.
8 9 Enter the job name you want and press OK. Subsequent sent faxes will be forwarded to the specified email address. The original is scanned into memory before transmission. The display shows memory capacity and the number of pages being stored in memory. 9 Press Stop/Clear to return to Standby mode. Forwarding received faxes to another fax machine If an original is placed on the scanner glass, select Yes to add another page. Load another original and press OK.
10 Fax setup Option This chapter gives you information on setting up your machine for receiving and sending faxes. Sent Report You can set your machine to print a confirmation report showing whether a transmission was successful, how many pages were sent, and more. The available options are On, Off, and On-Error, which prints only when a transmission is not successful.
Option Auto Reduction Discard Size Description When receiving a fax containing pages as long as or longer than the paper loaded in the paper tray, the machine can reduce the size of the original to fit the size of the paper loaded in the machine. Turn on this feature if you want to automatically reduce an incoming page. With this feature set to Off, the machine cannot reduce the original to fit onto one page. The original will be divided and printed in actual size on two or more pages.
Using speed buttons Setting up Phone Book When you are prompted to enter a fax number while sending a fax: You can set up Phone Book with the fax numbers you use most frequently. Your machine provides you with the following features for setting up Phone Book: • To retrieve a number from speed buttons 1 to 15, press the corresponding speed button and press OK. • To retrieve a number from speed buttons 16 to 30, press Shift and then the corresponding speed button, and press OK.
Using group dial numbers You can also search through memory for an entry by pressing Address Book. See page 10.4. To use a group dial entry, you need to search for and select it from memory. Group dial numbers When you are prompted to enter a fax number while sending a fax, press Address Book. See below. If you frequently send the same document to several destinations, you can group these destinations and set them under a group dial number.
Select Search ID to search for an entry by the first few letters of the name. 4 Press the Scroll buttons until the name you want appears and press OK. Or, enter the first letters and press OK. Press the Scroll buttons until the name you want appears and press OK. 5 Press OK. 6 Press OK when Yes appears to confirm the deletion. 7 Press Stop/Clear to return to Standby mode. Printing Phone Book You can check your Phone Book settings by printing a list.
11 Using USB flash memory Note There are two USB plug types. This chapter explains how to use a USB memory device with your machine. This chapter includes: • About USB memory • Plugging in a USB memory device • Scanning to a USB memory device • Printing from a USB memory device • Backing up data • Managing USB memory Insert a USB memory device into the USB memory port on the front of your machine.
5 Press OK or Start when USB appears. Printing from a USB memory device Your machine begins scanning the original, and then asks if you want to scan another page. 6 You can directly print files stored on a USB memory device. You can print TIFF, BMP, JPEG, PDF, and PRN files. Press OK when Yes appears to scan more pages. Load an original and press Start. Direct Print option supported file types: • PRN: PCL 6 compatible. Otherwise, press the Scroll buttons to select No and press OK.
Printing on both sides of paper Restoring data By using the Duplex button on your machine, you can set the machine to print documents on both sides of paper. 1 Insert the USB memory device on which the backup data is stored in to the USB memory port. 1 Press Duplex. 2 2 Press the Scroll buttons until the binding option you want appears. Press Menu until System Setup appears on the bottom line of the display and press OK. • Off: Prints in Normal mode. 3 Press OK when Machine Setup appears.
7 Press OK when Yes appears to confirm your selection. 8 Press Stop/Clear to return to Standby mode. Formatting a USB memory device 1 Insert the USB memory device into the USB memory port on your machine. 2 Press Scan/Email. 3 Press OK when Scan to USB appears on the bottom line of the display. 4 Press the Scroll buttons until File Manage appears and press OK. 5 Press the Scroll buttons until Format appears and press OK. 6 Press OK when Yes appears to confirm your selection.
12 Supplies and accessories Accessories You can purchase and install accessories to enhance your machine’s performance and capacity. This chapter provides information on purchasing toner cartridges and accessories available for your machine.
13 Maintenance This chapter provides information for maintaining your machine and the toner cartridge. Report/List Description NetScan Report This report shows information for the Network Scan records including IP address, time and date, the number of pages scanned, and results. This report is automatically printed every 50 network scan jobs. User Auth List This list shows authorized users who are allowed to use the email function.
Clearing memory Cleaning your machine You can selectively clear information stored in your machine’s memory. To maintain print and scan quality, follow the cleaning procedures below each time the toner cartridge is replaced or if print and scan quality problems occur. Note Before clearing the memory, make sure that all fax jobs have been completed, or you will lose those jobs. 1 Press Menu until System Setup appears on the bottom line of the display and press OK.
3 Cleaning the scan unit With a dry lint-free cloth, wipe away any dust and spilled toner from the toner cartridge area and the toner cartridge cavity. Keeping the scan unit clean helps ensure the best possible copies. We suggest that you clean the scan unit at the start of each day and during the day, as needed. 1 Slightly dampen a soft lint-free cloth or paper towel with water. 2 Open the scanner lid. 3 Wipe the surface of the scanner glass and ADF glass until it is clean and dry.
Expected cartridge life 3 The toner cartridge yield depends on the amount of toner that print jobs require. Average yield for a new toner cartridge is 8,000 standard pages in accordance with the ISO/IEC 19752 standard. (Average yield for the original toner cartridge supplied with the machine is 4,000 standard pages.
5 Close the front cover. Make sure that the cover is securely closed. 4 Remove the packing tape and roll the cartridge 5 or 6 items to distribute the toner. Thoroughly roll the cartridge to assure maximum copies per cartridge. Save the box and the plastic bag for shipping. Notes • If toner gets on your clothing, wipe it off with a dry cloth and wash clothing in cold water. Hot water sets toner into fabric. • Do not touch the green underside of the toner cartridge.
Printing continuously when the Toner Empty message appears Managing your machine from the website If you have connected your machine to a network and set up TCP/IP network parameters correctly, you can manage the machine via Web Image Monitor Type 104, an embedded web server. Use Web Image Monitor Type 104 to: When the toner cartridge is nearly empty, the machine shows the Toner Empty message and stops printing.
14 Troubleshooting 3 Pull the jammed paper gently out of the ADF. This chapter gives helpful information for what to do if you encounter an error. This chapter includes: • Clearing document jams • Clearing paper jams • Understanding display messages • Solving other problems Clearing document jams When an original jams while passing through the ADF, Document Jam appears on the display. Note Caution If you do not see the paper in this area, refer to Roller misfeed. See page 14.2.
Roller misfeed In the tray 1 1 Open the scanner lid. 1 2 Seize the misfed paper, and remove the paper from the feed area by carefully pulling it to the right using both hands. Open and close the front cover. The jammed paper is automatically ejected from the machine. If the paper does not exit, go to the next step. 2 Pull the tray 1 open. 3 Remove the jammed paper by gently pulling it straight out. 1 1 3 scanner lid Close the scanner lid. Then load the removed pages back into the ADF.
In the optional tray 2 In the multi-purpose tray 1 Pull the optional tray 2 open. 1 If the paper is not feeding properly, pull the paper out of the machine. 2 Remove the jammed paper from the machine. 2 Open and close the front cover to resume printing. In the fuser area or around the toner cartridge If the paper does not move when you pull, or if you do not see the paper in this area, stop and go to step 3. 3 Pull the tray 1 half. 4 Pull the paper straight up and out.
2 Remove the jammed paper by gently pulling it straight out. 4 If you see the jammed paper, push the pressure lever on each side up and remove the paper. Skip to step 9. 1 3 Replace the toner cartridge and close the front cover. Printing automatically resumes. 1 If you still do not see the paper, go to the next step. In the paper exit area 1 Open and close the front cover. The jammed paper is automatically ejected from the machine. 2 Gently pull the paper out of the output tray.
6 8 Unfold the duplex guide fully. Pull the jammed paper out. If the jammed paper does not move when you pull, push the pressure lever on each side up to loose the paper, and then remove it. 1 1 1 7 duplex guide While pushing the fuser lever to the right, open the fuser door. 1 9 pressure lever Return the lever, door, stopper, and guide to their original position. 10 Close the rear cover. Printing automatically resumes.
2 Remove the jammed paper from the duplex unit. 3 Pull the jammed paper out. If the paper does not come out with the duplex unit, remove the paper from the bottom of the machine. Tips for avoiding paper jams By selecting the correct media types, most paper jams can be avoided. When a paper jam occurs, follow the steps outlined on page 14.2. • Follow the procedures on page 5.5. Ensure that the adjustable guides are positioned correctly. • Do not overload the tray.
Understanding display messages Message Meaning Suggested solutions Duplex Jam 0 Check Inside Paper has jammed during duplex printing. Clear the jam. See page 14.5. Note Duplex Jam 1 Open/Close Door Clear the jam. See page 14.6. When you call for service, it is very convenient to tell the service representative the display message. Paper has jammed during duplex printing. Enter Again You entered an unavailable item. Enter the correct item again.
Message Meaning Suggested solutions Invalid Server Address The server address you have entered is invalid. Enter the correct server address. Line Busy The receiving fax machine did not answer or the line is already engaged. Try again after a few minutes. Your machine cannot connect with the receiving fax machine or has lost contact because of a problem with the phone line. Try again. If the problem persists, wait an hour or so for the line to clear and try again.
Message Meaning Suggested solutions Retry Redial? The machine is waiting for a specified time interval to redial a previously busy station. You can press OK to immediately redial, or Stop/Clear to cancel the redial operation. Scanner locked The scanner module is locked Unlock the scanner and press Stop/Clear. Self Diagnostic LSU The LSU (Laser Scanning Unit) in your printer is checking some problems detected. Please wait a few minutes.
Toner cartridge-related messages Message Meaning Suggested solutions Install Toner A toner cartridge is not installed. Install a toner cartridge. Invalid Toner The toner cartridge you have installed is not for your printer. Install a genuine toner cartridge, designed for your printer. Toner Low The toner cartridge is almost empty. Take out the toner cartridge and thoroughly shake it. By doing this, you can temporarily reestablish printing operations.
Solving other problems The following chart lists some conditions that may occur and the recommended solutions. Follow the suggested solutions until the problem is corrected. If the problem persists, please call for service. Paper feeding problems Condition Clear the paper jam. See page 14.2. Paper sticks together. • Ensure that there is not too much paper in the tray. The tray can hold up to 250 sheets of paper, depending on the thickness of your paper.
Condition Possible cause Suggested solutions For many software applications, the paper source selection is found under the Paper tab within the printer properties. Select the correct paper source. See the printer driver help screen. The machine selects print materials from the wrong paper source. The paper source selection in the printer properties may be incorrect. A print job is extremely slow. The job may be very complex.
Printing quality problems Condition If the inside of the machine is dirty or paper has been loaded improperly, you may notice a reduction in print quality. See the table below to clear the problem. Condition Light or faded print If a vertical white streak or faded area appears on the page: Dropouts • The paper may not meet specifications; for example, the paper is too moist or too rough. See page 5.8. • The transfer roller may be dirty. Clean the inside of your machine. See page 13.2.
Condition Suggested solutions Condition Background scatter Background scatter results from bits of toner randomly distributed on the printed page. • The paper may be too damp. Try printing with a different batch of paper. Do not open packages of paper until necessary so that the paper does not absorb too much moisture. • If background scatter occurs on an envelope, change the printing layout to avoid printing over areas that have overlapping seams on the reverse side.
Condition Horizontal stripes Curl An unknown image repetitively appears on a next few sheets or loose toner, light print, or contamination occurs. Suggested solutions Copying problems If horizontally aligned black streaks or smears appear: • The toner cartridge may be installed improperly. Remove the cartridge and reinsert it. • The toner cartridge may be defective. Remove the toner cartridge and install a new one. See page 13.5. • If the problem persists, the machine may require repair.
Scanning problems Condition Suggested solutions The scanner does not work. • Make sure that you place the original to be scanned face down on the scanner glass, or face up in the ADF. • There may not be enough available memory to hold the document you want to scan. Try the Prescan function to see if that works. Try lowering the scan resolution rate. • Check that the USB or parallel cable is connected properly. • Make sure that the USB or parallel cable is not defective.
ScanClair problems Condition Condition Suggested solutions I cannot find a scanned image file. You can check the scanned file’s destination in the Advanced page in the ScanClair program’s Properties screen. I cannot find the scanned image file after scanning. • Check if the scanned file’s application is on your computer.
Common Windows problems Condition Suggested solutions Problem Possible Cause Solution “Limit Check Error” message appears. The print job was too complex. You might need to reduce the complexity of the page or install more memory. A PostScript error page prints. The print job may not be PostScript. Make sure that the print job is a PostScript job. Check to see whether the software application expected a setup or PostScript header file to be sent to the machine.
15 Installing accessories 2 Grasp the control board cover and slide toward you to open it. Your machine is a full-featured one that has been optimized to meet most of your printing needs. Recognizing that each user may have different requirements, however, we make several accessories available to enhance your machine’s capabilities.
6 Activating the added memory in the PS printer properties Push the DIMM straight into the DIMM slot until it snaps into place. Make sure the latches fit over the notches located on either side of the DIMM. After installing the memory DIMM, you need to select it in the printer properties of the PostScript printer driver so that you can use it. 7 1 Make sure that the PostScript printer driver is installed on your computer. For details about installing the PS printer driver, see the Software section.
16 Specifications Item This chapter includes: • General specifications • Scanner and copier specifications • Printer specifications • Facsimile specifications Description ADF Up to 50 sheets (75 g/m2) ADF document size Width: 142 to 216 mm Output tray: 150 sheets (face down) Rear cover: 1 sheet (face up) Consumables 1-piece toner cartridge system Power rating 110 - 127 VAC, 50/60 Hz, 6.4 A 220 - 240 VAC, 50/60 Hz, 3.
Scanner and copier specifications Item Facsimile specifications Description Item Description Compatibility TWAIN standard / WIA standard Compatibility ITU-T Group 3 Scanning method ADF and Flat-bed Color CCD (Charge Coupled Device) module Applicable line Public Switched Telephone Network (PSTN) or behind PABX Resolution Optical: 600 x 1,200 dpi (mono and color) Enhanced: 4,800 x 4,800 dpi Data coding MH/MR/MMR/JBIG/JPEG Color fax transmission: JPEG Effective scanning length Scanner glass:
INDEX Numerics D I 2/4-up, special copy 6.2 date and time, set 2.2 default mode, change 2.2 delayed fax 9.7 DIMM, install 15.1 display language, change 2.2 DRPD (Distinctive Ring Pattern Detection) 9.4 drum, clean 13.5 ID card, special copy 6.3 installing accessories memory 15.1 A accessories installing memory DIMM 15.1 order information 12.1 Address Book, use 8.5 ADF 1.2 ADF, load 5.1 alarm sound 2.3 Ans/Fax mode, receiving mode 9.4 E Erasing background, special copy 6.4 error messages 14.
PostScript errors 14.18 printing 14.11 printing quality 14.13 ScanClair Type 104 14.17 scanning 14.16 Windows 14.18 operating systems 4.1 TCP/IP 4.1 n-up (multiple pages per sheet) copying 6.2 O originals jam, clear 14.1 loading 5.1 output location, select 5.8 output tray 5.8 P paper guidelines 5.4 paper jam, clear duplex area 14.5 fuser area or around toner cartridge 14.3 multi-purpose tray 14.3 optional tray 2 14.3 paper exit area 14.4 tray 1 14.2 paper level indicator 5.
Software section
SOFTWARE SECTION CONTENTS Chapter 1: Installing Printer Software in Windows Installing Printer Software ........................................................................................................ 4 Installing Software for Local Printing ................................................................................. 4 Installing Software for Network Printing ............................................................................. 7 Reinstalling Printer Software .........................
Editing a Watermark ..................................................................................................... 21 Deleting a Watermark ................................................................................................... 21 Using Overlays ...................................................................................................................... 22 What is an Overlay? ......................................................................................................
Chapter 8: Using Your Printer with a Macintosh Installing Software for Macintosh ............................................................................................. 30 Printer driver ............................................................................................................... 30 Scan driver .................................................................................................................. 31 Setting Up the Printer ..................................................
1 Typical Installation Installing Printer Software in Windows This is recommended for most users. All components necessary for printer operations will be installed. This chapter includes: • Installing Printer Software 1 Make sure that the printer is connected to your computer and powered on. 2 Insert the supplied CD-ROM into your CD-ROM drive. The CD-ROM should automatically run, and an installation window appears.
4 7 Select Typical installation for a local printer. Click Next. Click Finish. NOTE: After setup is complete, if your printer driver doesn’t NOTE: If your printer is not already connected to the work properly, reinstall the printer driver. See “Reinstalling Printer Software” on page 10. computer, the following window will appear. Custom Installation You can choose individual components to install. 1 Make sure that the printer is connected to your computer and powered on.
3 Click Next. NOTE: If your printer is not already connected to the • If necessary, select a language from the drop-down list. computer, the following window will appear. • View User’s Guide: Allows you to view the User’s Guide. If your computer doesn’t have Adobe Acrobat, click on this option and it will automatically install Adobe Acrobat Reader for you. 4 5 Select Custom installation. Click Next. • After connecting the printer, click Next.
9 If the AutoPlay window appears in Windows Vista, click Run Setup.exe in Install or run program field, and click Continue in the User Account Control window. Click Finish. Installing Software for Network Printing 3 Click Next. • If necessary, select a language from the drop-down list. • View User’s Guide: Allows you to view the User’s Guide. If your computer doesn’t have Adobe Acrobat, click on this option and it will automatically install Adobe Acrobat Reader for you.
5 Custom Installation The list of printers available on the network appears. Select the printer you want to install from the list and then click Next. You can choose individual components to install and set a specific IP address. 1 Make sure that the printer is connected to your network and powered on. For details about connecting to the network, see the supplied printer’s User’s Guide. 2 Insert the supplied CD-ROM into your CD-ROM drive.
4 Select Custom installation. Click Next. NOTE: If you want to set a specific IP address on a specific network printer, click the Set IP Address button. The Set IP Address window appears. Do as follows: 5 The list of printers available on the network appears. Select the printer you want to install from the list and then click Next. a. Select a printer to be set with a specific IP address from the list. b.
7 After the installation is finished, a window appears asking you to print a test page. If you so desire, select the checkbox and click Finish. Reinstalling Printer Software Otherwise, just click Finish. You can reinstall the software if installation fails. 1 Start Windows. 2 3 4 From the Start menu select Programs or All Programs → Type 104 → Maintenance. Select Repair and click Next. The list of printers available on the network appears.
Removing Printer Software NOTE: If your printer is not already connected to the computer, the following window will appear. 1 2 3 4 5 6 Start Windows. From the Start menu select Programs or All Programs → Type 104 → Maintenance. Select Remove and click Next. You will see a component list so that you can remove any item individually. Select the components you want to remove and then click Next. When your computer asks you to confirm your selection, click Yes.
2 1 2 Basic Printing This chapter explains the printing options and common printing tasks in Windows. Open the document you want to print. Select Print from the File menu. The Print window is displayed. It may look slightly different depending on your application. The basic print settings are selected within the Print window. These settings include the number of copies and print range.
Printing to a file (PRN) Printer Settings You will sometimes need to save the print data as a file for your purpose. You can use the printer properties window, which allows you to access all of the printer options you need when using your printer. When the printer properties are displayed, you can review and change the settings needed for your print job. To create a file: 1 Check the Print to file box at the Print window. Your printer properties window may differ, depending on your operating system.
Layout Tab Paper Tab The Layout tab provides options to adjust how the document appears on the printed page. The Layout Options includes Multiple Pages per Side and Poster Printing. See “Printing a Document” on page 12 for more information on accessing printer properties. Use the following options to set the basic paper handling specifications when you access the printer properties. See “Printing a Document” on page 12 for more information on accessing printer properties.
Graphics Tab Color Paper: 20 lb to 24 lb (75~90 g/m2) color-backgrounded paper. Use the following Graphic options to adjust the print quality for your specific printing needs. See “Printing a Document” on page 12 for more information on accessing printer properties. First Page This property allows you to print the first page using a different paper type from the rest of the document. You can select the paper source for the first page.
Advanced Options Extras Tab You can set advanced settings by clicking the Advanced Options button. • TrueType Options: This option determines what the driver tells the printer about how to image the text in your document. Select the appropriate setting according to the status of your document. - Download as Outline: When this option is selected, the driver will download any TrueType fonts that are used in your document not already stored (resident) on your printer.
About Tab Using Help Use the About tab to display the copyright notice and the version number of the driver. See “Printing a Document” on page 12 for more information about accessing printer properties. Your printer has a help screen that can be activated by clicking the Help button in the printer properties window. These help screens give detailed information about the printer features provided by the printer driver.
3 Advanced Printing Printing Multiple Pages on One Sheet of Paper (N-Up Printing) This chapter explains printing options and advanced printing tasks. 1 2 3 4 NOTE: • Your printer driver Properties window that appears in this User’s Guide may differ depending on the printer in use. However the composition of the printer properties window is similar. • If you need to know the exact name of your printer, you can check the supplied CD-ROM.
Printing Posters Printing Booklets This feature allows you to print a single-page document onto 4, 9, or 16 sheets of paper, for the purpose of pasting the sheets together to form one poster-size document. 1 2 3 8 To change the print settings from your software application, access printer properties. See “Printing a Document” on page 12. Click the Layout tab, select Poster Printing in the Layout Type drop-down list.
Printing on Both Sides of Paper Printing a Reduced or Enlarged Document You can print on both sides of a sheet of paper. Before printing, decide how you want your document oriented. You can change the size of a page’s content to appear larger or smaller on the printed page. The options are: • None • Long Edge, which is the conventional layout used in book binding. • Short Edge, which is the type often used with calendars.
Editing a Watermark Using Watermarks 1 The Watermark option allows you to print text over an existing document. For example, you may want to have large gray letters reading “DRAFT” or “CONFIDENTIAL” printed diagonally across the first page or all pages of a document. 2 There are several predefined watermarks that come with the printer, and they can be modified, or you can add new ones to the list.
Using a Page Overlay Using Overlays After an overlay has been created, it is ready to be printed with your document. To print an overlay with a document: 1 2 What is an Overlay? Dear ABC Regards WORLD BEST An overlay is text and/or images stored in the computer hard disk drive (HDD) as a special file format that can be printed on any document. Overlays are often used to take the place of preprinted forms and letterhead paper.
4 Advanced Using Windows PostScript Driver You can use advanced settings by clicking the Advanced button. If you want to use the PostScript driver provided with your system CD-ROM to print a document. PPDs, in combination with the PostScript driver, access printer features and allow the computer to communicate with the printer. An installation program for the PPDs is provided on the supplied software CD-ROM.
5 Sharing the Printer Locally Setting Up a Host Computer 1 2 3 4 5 6 You can connect the printer directly to a selected computer, which is called “host computer,” on the network. The following procedure is for Windows XP. For other Windows OS, refer to the corresponding Windows User's Guide or online help. NOTES: • Check the Operating System(s) that are compatible with your printer. Please refer to the OS Compatibility section of Printer Specifications in your Printer User’s Guide.
6 Using Utility Applications Changing the Status Monitor Program Settings If an error occurs while printing, the Status Monitor window appears, showing the error. Select the Status Monitor icon on the Windows task bar and right-click on the Status Monitor icon. Select Options. NOTES: The following window opens. • To use the this program, you need: - Windows 98 or higher (Windows NT 4.0 can be used only for network-supported printers.
7 Scanning Scanning Using SmarThru SmarThru is the accompanying software for your machine. With SmarThru, scanning is the proverbial piece of cake. Scanning with your machine lets you turn pictures and text into digital files on your computer. Then you can fax or e-mail the files, display them on your web site or use them to create projects that you can print using SmarThru software or the WIA driver. NOTE: You can use SmarThru 4 in Windows 98 or higher.
Using SmarThru 4 Follow these steps to start scanning using the SmarThru: 1 Make sure that your machine and computer are turned on and properly connected to each other. 2 Place your photograph or page on the document glass or ADF. 3 Once you have installed SmarThru, you will see the SmarThru 4 icon on your desktop. Double-click the SmarThru 4 icon. Click Scan To. The Scan To menu bar appears on the SmarThru 4 window. Scan To menu bar Adjust the scan settings. Double-click this icon.
5 Click the service icon according to your job. 6 SmarThru 4 opens for the selected service. Adjust the scan settings. 7 To start scanning, click Scan. Scanning Using the WIA Driver Your machine also supports the Windows Image Acquisition (WIA) driver for scanning images. WIA is one of the standard components provided by Microsoft Windows XP and works with digital cameras and scanners.
NOTE: To view scanners, user can click on View scanners and cameras. 4 Click Scan and then scan driver is opened. 5 Choose your scanning preferences and click Preview to see your preferences affect the picture. 6 Click Scan. NOTE: If you want to cancel the scan job, press the Cancel button on the Scanner and Camera Wizard.
8 Using Your Printer with a Macintosh Installing Software for Macintosh The PostScript driver CD-ROM that came with your machine provides you with the PPD file to use the PS driver, Apple LaserWriter driver, for printing on a Macintosh computer. Your machine supports Macintosh systems with a built-in USB interface or a 10/100 Base-TX network interface card. When you print a file from a Macintosh computer, you can use the PostScript driver by installing the PPD file.
Scan driver Setting Up the Printer Installing the Scan driver 1 2 3 Make sure that you connect your printer to the computer. Turn on your computer and printer. Insert the CD-ROM which came with your printer into the CD-ROM drive. Double-click CD-ROM icon that appears on your Macintosh desktop. Double-click the MAC_Installer folder. Set up for your printer will be different depending on which cable you use to connect the printer to your computer—the network cable or the USB cable.
Changing Printer Settings Printing You can use advanced printing features when using your printer. From your Macintosh application, select Print from the File menu. The printer name which appears in the printer properties window may differ depending on the printer in use. Except for the name, the composition of the printer properties window is similar. NOTES: • The Macintosh printer’s properties window that appears in this User’s Guide may differ depending on the printer in use.
Printing Multiple Pages on One Sheet of Paper Printer Features Setting The Printer Features tab provides options for selecting the paper type and adjusting print quality. You can print more than one page on a single sheet of paper. This feature provides a cost-effective way to print draft pages. Select Printer Features from the Presets drop-down list to access the following features: 1 2 From your Macintosh application, select Print from the File menu. Select Layout. ▲ Mac OS 10.
Duplex Printing Scanning You can print on both sides of the paper. Before printing in the duplex mode, decide on which edge you will be binding your finished document. The binding options are: If you want to scan documents using other software, you will need to use TWAIN-compliant software, such as Adobe PhotoDeluxe or Adobe Photoshop. The first time you scan with your machine, select it as your TWAIN source in the application you use.
SOFTWARE SECTION INDEX A L advanced printing, use 18 Layout properties, set Macintosh 32 Windows 14 B booklet printing 19 C canceling scan 29 M Macintosh driver install 30 printing 32 scanning 34 setting up the printer 31 D document, print Macintosh 32 Windows 12 double-sided printing 20 E Extras properties, set 16 F favorites settings, use 17 N n-up printing Macintosh 33 Windows 18 O orientation, print Windows 14 overlay create 22 delete 22 print 22 S G Graphics properties, set 15 H help, us
Windows 4 reinstall Windows 10 system requirements Macintosh 30 uninstall Windows 11 status monitor, use 25 T toner save, set 15 TWAIN, scan 28 U uninstall, software Windows 11 W watermark create 21 delete 21 edit 21 print 21 WIA, scan 28 36
Laser MFP: User’s Guide G960-8650