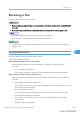
Using the Fax Function from a Computer (LAN-Fax) 3. Click the [Specify Destination] tab, and then click [Edit Cover Sheet]. 4. Configure settings as necessary, and then click [OK]. • For details about settings, see p.237 "Settings you can configure for the fax cover sheets". Settings you can configure for the fax cover sheets This section describes the settings you can configure for the fax cover sheets. 1 2 PerMF3 のドライバー画面です。 後日差し替えます。 8 6 7 3 6 4 5 CES253 1.
6. Using the Fax Function • FAX: Enter your fax number. Can contain up to 64 characters. 3. Import Bitmap Specify a bitmap image you want to show on the cover sheet. The image will be shown in the position as follows: Left=180, Right=800, Top=50, Bottom=180 (pixel). If the image is larger than this area, excess part is trimmed. 4. User Template Select the template for the cover sheet. There are three templates. 5. Buttons • Preview... Click to preview the cover sheet before sending the fax.
Using the Fax Function from a Computer (LAN-Fax) 2. Select the LAN-Fax driver as the printer, and then click a button such as [Preferences] or [Properties] to open the driver's properties. LAN-Fax driver properties dialog box appears. 3. Click the [Setup] tab. 4. Configure settings as necessary, and then click [OK]. • For details about settings, see p.239 "Settings you can configure in the LAN-Fax driver's properties".
6. Using the Fax Function 2. Orientation Specifies the page orientation. 3. Resolution Specifies the resolution. • Standard Select this for a document with normal-sized characters. • Fine Select this for a document with small print. • Photo Select this for a document with images such as photographs or shaded drawings. 4. User Code If sending faxes via LAN-Fax is restricted, select this check box and enter a user code before sending a fax. 5. About... Displays the version of the LAN-Fax driver. 6.
Receiving a Fax Receiving a Fax This section describes fax reception functions. • When receiving an important fax, we recommend you confirm the contents of the received fax with the sender. • The machine may not be able to receive faxes when the amount of free memory space is low. • An external telephone is required to use this machine as a telephone. • Only A4, Letter, or Legal size paper can be used for printing faxes. • For details about connecting an external telephone with this machine, see p.
. Using the Fax Function In this mode, you can use the machine with an external telephone answering device. 1. Press the [User Tools] key. 操作部イラストは現状 PerMF3 のままです CES184 2. Press the [ ][ ] keys to select [Fax Features], and then press the [OK] key. 3. Press the [ ][ ] keys to select [Reception Settings], and then press the [OK] key. 4. Press the [ ][ ] keys to select [Switch Reception Mode], and then press the [OK] key. 6 5.
Receiving a Fax 4. Press the [Start] key. 5. Replace the handset. Receiving a fax in Fax Only mode When the reception mode is set to Fax Only mode, the machine automatically answers all incoming calls in fax reception mode. • You can specify the number of times the machine rings before answering a call in the [Number of Rings] setting under [Fax Features]. • If you answer a call with the external telephone while the machine is ringing, a normal telephone call starts.
6. Using the Fax Function • For details about manually receiving a fax, see p.242 "Receiving a fax in FAX/TEL Manual mode". Receiving a fax in FAX/TAD mode When the reception mode is set to FAX/TAD mode, the external telephone answering device answers and records messages when the machine receives telephone calls. If the incoming call is a fax call, the machine receives the fax automatically. 1.
Receiving a Fax Manual reception When [Automatic POP] is disabled, use the control panel to manually connect to the POP3 server and check for new e-mails. 1. Press the [User Tools] key. 操作部イラストは現状 PerMF3 のままです CES184 2. Press the [ ][ ] keys to select [Fax Features], and then press the [OK] key. 3. Press the [ ][ ] keys to select [Reception Settings], and then press the [OK] key. 4. Press the [ ][ ] keys to select [Manual POP], and then press the [OK] key. 6 5. In the confirmation screen, press [Yes].
6. Using the Fax Function 2. Configure what to do after forwarding in [Print Forwarded File] under fax feature settings: • [On]: Store the faxes in memory for printing. • [Off]: Delete the faxes from memory. 3. Configure the print setting for faxes stored in memory in [Print Received File] under fax feature settings. • [On]: Automatically print out the received faxes and delete from memory. • [Off]: Store the received faxes in memory for later manual printing. 4.
Receiving a Fax • If the machine is unable to print out a fax due to machine errors such as an empty paper tray or a paper jam, the fax will remain in memory and the Fax Received indicator will flash. The remaining pages will start printing as soon as the problem is resolved. • The number of forwarding attempts and the attempt interval time can be specified using Web Image Monitor. • For details about the control panel settings, see p.272 "Fax Feature Settings".
6. Using the Fax Function • If the machine remains turned off for a certain period of time (for example, when the power switch is turned off or when there is a power failure), all documents stored in memory will be lost. If the Fax Received indicator is lit or flashing, make sure to print out the stored documents before turning off the power (for example, prior to relocating the machine). When the Fax Received indicator is lit, there is a fax stored in machine's memory.
Receiving a Fax Receiving or Rejecting Faxes from Special Senders You can set the machine to receive (or reject) faxes only from the registered Special Senders. This helps you screen out unwanted documents, such as junk faxes, and prevents the wasting of fax paper. To use this function, you must first register Special Senders using Web Image Monitor, and then select whether to accept or reject faxes from them. • This function is not available with Internet Fax.
6. Using the Fax Function 7. Click [Apply]. 8. Close the Web browser. • A fax number can contain 0 to 9, “ ”, and space. Limiting the incoming faxes This section describes how to set the machine to receive (or reject) faxes only from the programmed Special Senders. 1. Start the Web browser, and access the machine by entering its IP address. 2. Click [System Settings]. 3. Click the [Fax] tab. 6 4. For [Authorized Reception], click [Active]. 5.
When the Machine Prints a Power Failure Report 追加 When the Machine Prints a Power Failure Report If the power supply for this machine is cut off while sending or receiving a fax (due to a power failure, etc.), the fax communication will fail. Also, if the machine remains turned off for about an hour, all documents stored in memory will be lost.
6. Using the Fax Function 6 252 rinmei-mf2_com_user_guide_gb_00059798_eng.
7. Configuring the Machine Using the Control Panel This chapter describes how to configure and adjust the machine's operational settings using the control panel. The machine can be operated using its default, but the configuration can be changed depending on the needs of the user. Changes to settings are stored even if the machine is turned off. Basic Operation Using the Menu Screen This section describes the basic procedure for specifying and changing the machine's settings.
7. Configuring the Machine Using the Control Panel 4. Press the [ ][ ] keys to select the document type of the original, and then press the [OK] key. 5. Press the [User Tools] key to return to the initial screen. • You can press the [Escape] key to exit to the previous level of the menu tree. • If LDAP authentication is specified, you must first log in to the machine by entering a user name and password. • For details about how to log in to the machine, see p.448 "When LDAP Authentication is Specified".
Menu Chart Menu Chart This section lists the parameters included in each menu. • Some items might not appear depending on the model type or machine's configuration. • Some items can also be configured using Web Image Monitor. Copy Settings ([ ][ ] key setting) Select Paper Sort Original Type Density Reduce/Enlarge Duplex/Combine Manual Duplex Scan Mode Scan Settings ([ ][ ] key setting) 7 Scan Size Scanning Mode Max.
7. Configuring the Machine Using the Control Panel Density Pause Time Auto Redial Print Fax Header Original Fax Feature Settings ([User Tools] key setting) Reception Settings Select Paper Tray Delete TX Standby File Communication Settings Report Print Settings 7 Fax Address Book Settings ([User Tools] key setting) Quick Dial Dest. Fax Speed Dial Dest.
Menu Chart Auto Cleaning Image Density Network Settings ([User Tools] key setting) Ethernet IPv4 Configuration IPv6 Configuration Printing Lists/Reports ([User Tools] key setting) Configuration Page Fax Journal TX/RX Standby File List Quick Dial Dest. List Fax Speed Dial Dest. List Scanner Dest.
7. Configuring the Machine Using the Control Panel Language Country Reset Settings Admin. Tools Lock IPsec Fax Number Confirmation Scan to USB Short Cut Key Settings Printer Feature Settings ([User Tools] key setting) List/Test Print System PCL Menu 7 PS Menu • For details about configuring the machine using Web Image Monitor, see p.313 "Using Web Image Monitor". 258 rinmei-mf2_com_user_guide_gb_00059802_eng.
Copy Settings Copy Settings This section describes how to configure the copy settings. Changing Copy Settings The procedure for changing the sort copy setting is provided as an example. 1. Press the [Copy] key. 操作部イラストは現状 PerMF3 のままです CES174 7 2. Press the [ ][ ] keys. 操作部イラストは現状 PerMF3 のままです CES168 3. Press the [ ][ ] keys to select [Sort], and then press the [OK] key. 4. Press the [ ][ ] keys to select [On] or [Off], and then press the [OK] key. 5.
7. Configuring the Machine Using the Control Panel Copy Setting Parameters This section describes the copy setting parameters. Select Paper Specifies the paper size used for printing copies. When a tray is selected, the machine prints from that tray only. When a paper size is selected, the machine checks the trays for the paper of the specified size in the order of priority as set in [Paper Tray Priority] under system settings.
Copy Settings • Pages that are entirely or mainly photographs or pictures, such as magazine pages. Density Specifies the image density for photocopying. Default: • (Lightest) • • • • (Darkest) Reduce/Enlarge Specifies the percentage by which copies are enlarged or reduced. Also, ID card copying can be specified.
7. Configuring the Machine Using the Control Panel 追加 Duplex/Combine Specifies combined/2-sided copying. Select a copy mode according to your original and how you want the copy outputs to appear. For more details, see p.158 "Combining Pages and Making 2-sided Copies". Note that enabling 2-sided copying automatically disables ID card copying. Default: [Off] • Off • 1 Sided 2 Orig > 2in1 Sim Copy will be made on 1 side, on which 2 pages of 1-sided original will be printed.
Copy Settings • Portrait: T to B, T to B • Landscape: L to R, T to T • Landscape: L to R, T to B • Landscape: T to B, T to T • Landscape: T to B, T to B • 2 Sided 1 Orig > 2in1 Sim (Type 2 model only) Copy will be made on 1 side, on each of which 2 pages of 2-sided original will be printed. • Portrait: T to T • Portrait: T to B • Landscape: T to T • Landscape: T to B • 2 Sided 2 Orig > 4in1 Sim (Type 2 model only) Copy will be made on 1 side, on each of which 4 pages of 2-sided original will be printed.
7. Configuring the Machine Using the Control Panel • 2 Sided 4 Orig > 4in1 Dup (Type 2 model only) Copy will be made on 2 sides, on each of which 4 pages of 2-sided original will be printed. • Portrait: L to R, T to T • Portrait: L to R, T to B • Portrait: T to B, T to T • Portrait: T to B, T to B • Landscape: L to R, T to T • Landscape: L to R, T to B • Landscape: T to B, T to T • Landscape: T to B, T to B Manual Duplex Scan Mode Enables the machine to copy both sides of original with the exposure glass.
Scanner Settings Scanner Settings This section describes how to configure the scanner settings. Changing Scanner Settings The procedure for changing the file type setting is provided as an example. 1. Press the [Scanner] key. 操作部イラストは現状 PerMF3 のままです CES175 7 2. Press the [ ][ ] keys. 操作部イラストは現状 PerMF3 のままです CES168 3. Press the [ ][ ] keys to select [File Type], and then press the [OK] key. 4. Press the [ ][ ] keys to select [Multi-page] or [Single Page], and then press the [OK] key. 5.
7. Configuring the Machine Using the Control Panel Scanner Setting Parameters This section describes the scanner setting parameters. Scan Size Specifies the scanning size according to the size of the original. Default: [A4], [8 1/2 × 11] • 8 1/2 × 14, 8 1/2 × 11, 8 1/2 × 5 1/2, 7 1/4 × 10 1/2, A4, B5, A5, Custom Size Scanning Mode B&W Scanning Mode から変更 Specifies the scanning mode using the control panel. Default: [Color] • Mono The machine creates 1-bit black-and-white images.
Scanner Settings • (Darkest) Resolution Specifies the resolution for scanning the original. Default: [300 × 300dpi] • 100 × 100dpi • 150 × 150dpi • 200 × 200dpi • 300 × 300dpi • 400 × 400dpi • 600 × 600dpi Compression (Colour) Specifies the color compression ratio for JPEG files. The lower the compression ratio, the higher the quality but greater the file size. Default: [Medium] • Low • Medium 7 • High Limitless Scan Sets the machine to request next originals when scanning with the exposure glass.
7. Configuring the Machine Using the Control Panel This setting appears only for the Type 2 model. Default: [Sim. Portrait] • Sim. Portrait • Sim. Landscape • Dup. Portrait: T to T • Dup. Portrait: T to B • Dup. Landscape: T to T • Dup. Landscape: T to B 7 268 rinmei-mf2_com_user_guide_gb_00059806_eng.
Fax Transmission Settings Fax Transmission Settings This section describes how to configure the fax transmission settings. Changing Fax Transmission Settings The procedure for setting the resolution for scanning the original is provided as an example. 1. Press the [Facsimile] key. 操作部イラストは現状 PerMF3 のままです CES176 7 2. Press the [ ][ ] keys. 操作部イラストは現状 PerMF3 のままです CES168 3. Press the [ ][ ] keys to select [Resolution], and then press the [OK] key. 4.
7. Configuring the Machine Using the Control Panel Fax Transmission Setting Parameters This section describes fax transmission setting parameters. Immediate TX Sets the machine to send a fax immediately when the original is scanned. Default: [Off] • Off Select this when using Memory Transmission. • On Select this when using Immediate Transmission. • Next Fax Only Select this when using Immediate Transmission for the next transmission only. Resolution Specifies the resolution to use for scanning originals.
Fax Transmission Settings Auto Redial Sets the machine to redial the fax destination automatically when the line is busy or a transmission error occurs, if the machine is in Memory Transmission mode. The number of redial attempts is preset to two or three times, depending on the [Country] setting under [Admin. Tools], in five-minute intervals. Default: [On] • Off • On Print Fax Header Sets the machine to add a header to every fax you send.
7. Configuring the Machine Using the Control Panel Fax Feature Settings This section describes how to configure the fax feature settings. Changing Fax Feature Settings The procedure for setting the tray for printing faxes is provided as an example. 1. Press the [User Tools] key. 操作部イラストは現状 PerMF3 のままです CES184 7 2. Press the [ ][ ] keys to select [Fax Features], and then press the [OK] key. 3. Press the [ ][ ] keys to select [Select Paper Tray], and then press the [OK] key. 4.
Fax Feature Settings • Fax Only The machine automatically answers all incoming calls in fax reception mode. • FAX/TEL(Mnl.) The machine rings when it receives incoming calls. The machine receives faxes only when you manually receive faxes. • FAX/TAD The machine receives faxes automatically when a fax call is received. Otherwise, the connected telephone answering device answers the call. • FAX/TEL(Auto) The machine receives faxes automatically when a fax call is received.
7. Configuring the Machine Using the Control Panel • Authorized Reception Sets the machine to receive (or reject) faxes only from the programmed Special Senders. This helps you screen out unwanted documents, such as junk faxes, and prevents the wasting of fax paper. Default: [Inactive] • Active • Inactive • Auth.RX: Receive Conditions Specifies whether to receive or reject faxes from the programmed Special Senders. This setting is available when [Authorized Reception] is enabled.
Fax Feature Settings • On Store the faxes in memory for printing after forwarding. • Off Delete the faxes from memory after forwarding. • Notify Forward Status Sets the machine to send e-mail notifications after faxes are forwarded. The e-mail notification destination depends on how the forwarding destination is configured using Web Image Monitor (for details, see p.324 "Configuring the Fax Settings"). Default: [Inactive] 削除 ・This function is available for the Type 2 model only.
7. Configuring the Machine Using the Control Panel To delete the fax jobs, select [Yes]. Selecting [No] exits to the previous level of the menu tree without deleting the fax job. Communication Settings • ECM Transmission Sets the machine to automatically resend parts of the data that are lost during transmission. This function is not available with Internet Fax transmission. Default: [On] • Off • On • ECM Reception Sets the machine to automatically receive parts of the data that are lost during reception.
Fax Feature Settings • 14.4 Kbps • 9.6 Kbps • 7.2 Kbps • 4.8 Kbps • 2.4 Kbps • JBIG Enables transmission and reception of JBIG-compressed images, which require less communication time than MMR-/MR-/MH-compressed images. Note that to use this function, [ECM Transmission] and [ECM Reception] must also be enabled. This function is not available with Internet Fax.
7. Configuring the Machine Using the Control Panel The fax journal will be printed using the tray set for [Facsimile] under [Paper Tray Priority] in system settings, on A4 or Letter size paper. Default: [Auto Print] • Auto Print • Do not Auto Print 7 278 rinmei-mf2_com_user_guide_gb_00059812_eng.
Fax Address Book Settings Fax Address Book Settings This section describes the fax Quick Dial/Speed Dial settings. Registering Fax Destinations in Fax Quick Dial/Speed Dial Register fax destinations in the Address Book using this menu. • A password for accessing the [Address Book] menu can be specified in [Admin. Tools Lock]. • For details about the procedure for registering fax destinations, see p.205 "Registering Fax Destinations Using the Control Panel". • For details about [Admin. Tools Lock], see p.
7. Configuring the Machine Using the Control Panel Specifies the name for Speed Dial entries. The name can contain up to 20 characters. 7 280 rinmei-mf2_com_user_guide_gb_00059815_eng.
System Settings System Settings This section describes the machine's operational settings. Changing System Settings The procedure for changing the volume of the panel key sound is provided as an example. 1. Press the [User Tools] key. 操作部イラストは現状 PerMF3 のままです CES184 2. Press the [ ][ ] keys to select [System Settings], and then press the [OK] key. 3. Press the [ ][ ] keys to select [Adjust Sound Volume], and then press the [OK] key. 7 4.
7. Configuring the Machine Using the Control Panel Specifies the volume of the beep that sounds when a key is pressed. • Off • Low • Middle • High • Ring Volume Specifies the volume of the ring when a call is received. • Off • Low • Middle • High • On Hook Mode Specifies the volume of the sound from the speaker during on hook mode. • Off • Low 7 • Middle • High • Job End Tone Specifies the volume of the beep that sounds when a job is complete.
System Settings • Middle • High Tray Paper Settings • Paper Type: Tray 1 Specifies the paper type for tray 1. 削除 Middle Thick Paper、Envelope Default: [Plain Paper] Thin Paper, Plain Paper, Recycled Paper, Colour Paper, Letterhead, Preprinted Paper, Prepunched Paper, Label Paper, Bond Paper, Cardstock, Thick Paper 1, Thick Paper 2 • Paper Type: Tray 2 Specifies the paper type for tray 2. This setting appears only when tray 2 is installed.
7. Configuring the Machine Using the Control Panel • Bypass Tray Priority Specifies how print jobs using the bypass tray are handled. Default: [Machine Setting(s)] • Machine Setting(s) The machine prints all print jobs according to the machine’s settings. An error will occur if the paper size/type settings of the machine and printer driver do not match. • Any Size/Type The machine prints all print jobs according to the printer driver’s settings.
• Tray 1 • Tray 2 No.19【コピー優先トレイ/自動トレイ選択】 『PRO Copy Functional Spec v0.03̲20110624』「2.4.2 Auto Tray Selection」では手差しを自動トレイ選択に含まず、優先順は System Settings トレイ1→トレイ2と書いてあります。 『PRO2 System Functional Specification V0.11̲20110630』「3.25. Priority Tray」では、手差しも優先トレ イとして選択可能となっています。 ① コピーの自動トレイ選択は手差しも含み、優先トレイは設定可 能と思いますが正しいですか? ② 優先トレイが用紙切れになったとき、残りのトレイ2つの選択 順はトレイ1→トレイ2→手差しで正しいですか? • Bypass Tray • Facsimile Select a tray to check first when [Auto] is selected for [Select Paper Tray] under fax feature settings.
7. Configuring the Machine Using the Control Panel Specifies whether the same printer/LAN-Fax driver can be used for multiple machines or not under USB connection. Default: [Off] • On The same printer/LAN-Fax driver you have installed in your computer can be used with any machine other than the one originally used for installation, if the machine is of the same model.
System Settings Displays the remaining life of the intermediate transfer belt. (New), (Needs replacing) , , , , , , , • Transfer Roller: Displays the remaining life of the transfer roller. (New), (Needs replacing) , Scanner Carriage • Lock Scnr. Carriage Returns the scanning unit inside the machine to its original position. Before transporting the machine, use this function to return the scanning unit to its original position. 追加 Press [Yes] to return the scanning unit to its original position.
7. Configuring the Machine Using the Control Panel Select this to adjust the duplex back side registration vertically. Scan warming up time If the machine is used in a room where the temperature is low, the machine may not be able to scan originals clearly. Selecting [Longer] for this setting may improve the scanning quality. Default: [Normal] • Normal Select this if the room temperature is about 19 °C (66.2 °F) or higher. • Longer Select this if the room temperature is about 18 °C (64.4 °F) or lower.
Network Settings Network Settings This section describes the network settings. Changing Network Settings The procedure for changing the network speed is provided as an example. 1. Press the [User Tools] key. 操作部イラストは現状 PerMF3 のままです CES184 2. Press the [ ][ ] keys to select [Network Settings], and then press the [OK] key. 3. If you are requested to enter a password, enter the password using the number keys, and then press the [OK] key. 7 4.
7. Configuring the Machine Using the Control Panel Displays the machine's MAC address. • Ethernet Speed Displays the current Ethernet speed setting. • 100Mbps Full Duplex • 100Mbps Half Duplex • 10Mbps Full Duplex • 10Mbps Half Duplex • Ethernet Unavailable Appears when a network cable is not connected. • Set Ethernet Speed Specifies the speed for Ethernet communication. Select a speed that matches your network environment. For most networks, the default setting is the optimum setting.
Network Settings Default: XXX.XXX.XXX.XXX The numbers represented by "X" vary according to your network environment. • Gateway Address Specifies the machine's default gateway address when DHCP is not used. Use this menu to check the current default gateway address when DHCP is used. Default: XXX.XXX.XXX.XXX The numbers represented by "X" vary according to your network environment. • IP Address Method Displays the IP address acquisition method. • DHCP • Auto IP • Manual Config.
7. Configuring the Machine Using the Control Panel Specifies the IPv6 address of the default gateway. Can contain up to 39 characters. • Stateless Address Displays the IPv6 stateless addresses obtained from a Router Advertisement. • Stateless Address 1 • Stateless Address 2 • Stateless Address 3 • Stateless Address 4 • Link-local Address Displays the IPv6 link local address. • Contact your network administrator for information about the network configuration.
Printing Lists/Reports Printing Lists/Reports This section describes the types of reports that can be printed. Printing the Configuration Page Follow the procedure below to print the configuration page. 1. Press the [User Tools] key. 操作部イラストは現状 PerMF3 のままです CES184 2. Press the [ ][ ] keys to select [Print List/Report], and then press the [OK] key. 3. Press the [ ][ ] keys to select [Configuration Page], and then press the [OK] key. 7 4. Press [Yes] in the confirmation screen.
7. Configuring the Machine Using the Control Panel Fax Speed Dial Dest. List Prints a list of Speed Dial entries. • Sort by Speed Dial No. Prints the list with the entries sorted by Speed Dial registration number. • Sort by Name Prints the list with the entries sorted by name. Scanner Dest. List Prints a list of scan destinations. Scanner Journal Prints a scanner journal for the last 100 Scan to E-mail, Scan to FTP, and Scan to Folder transmissions. Maintenance Page Prints the maintenance page.
Printing Lists/Reports Shows the version of the machine's bootloader. • Firmware Version Shows the version of the machine's firmware. • Engine FW Version Shows the version of firmware for the machine engine. Paper Input Information about tray 2 appears only when it is installed. • Tray 1 Shows paper size and type settings. • Tray 2 Shows paper size and type settings. • Bypass Tray Shows paper size and type settings. • Tray Priority Shows the fax, printer, and copy priority tray settings.
7. Configuring the Machine Using the Control Panel System Settings Shows the system settings. Admin Tools Shows the administrator settings. Copy Settings Shows the copy settings. Scan Settings Shows the scanner settings. Internet Fax (T.37) Shows the Internet Fax settings. • SMTP Server Address • E-mail Address • POP Server Address • POP Account • Admin. E-mail Address 7 • Automatic POP • POP Interval • Auth.(Internet Fax TX) • Auth.
Printing Lists/Reports IPv6 Configuration Shows the IPv6 settings. • IPv6 • DHCP • IP Address • Stateless Address • Link-local Address • Manual Address • Prefix Length • DNS Method • Primary DNS Server • Secondary DNS Server • Domain Name • Default Gateway • Gateway (Manual Addr.) LDAP Configuration 7 Shows the LDAP settings. • LDAP Server Addr. 1 • LDAP Server Addr. 2 • LDAP Server Addr. 3 • LDAP Server Addr. 4 • LDAP Server Addr.
7. Configuring the Machine Using the Control Panel • Transmission: a fax was sent. • Reception: a fax was received. • LAN-Fax: a fax was sent by LAN-Fax. • Internet Fax TX: a fax was sent via Internet Fax. • Internet Fax RX: a fax was received via Internet Fax. • Forwarding: a fax was forwarded. Duration Shows the time taken for fax transmission or reception to complete.
Printing Lists/Reports • Redial: sending was done by automatic redial. • Broadcast: sending was done by broadcast. • LAN-Fax: sending was done by LAN-Fax. • Forwarding: sending was done by forwarding. • Memory TX: sending was done by any other method. Sender/Destination For a received fax, shows the fax number registered by the sender or an e-mail address if the fax was received via Internet Fax.
7. Configuring the Machine Using the Control Panel Format Shows the file format. Results Shows whether the transmission successfully ended or failed. 7 300 rinmei-mf2_com_user_guide_gb_00059824_eng.
Administrator Settings Administrator Settings This section describes administrator settings. Changing Administrator Settings The procedure for changing the start-up mode after power-on is provided as an example. 1. Press the [User Tools] key. 操作部イラストは現状 PerMF3 のままです CES184 2. Press the [ ][ ] keys to select [Admin. Tools], and then press the [OK] key. 3. If you are requested to enter a password, enter the password using the number keys, and then press the [OK] key. 7 4.
7. Configuring the Machine Using the Control Panel Specifies the date of the machine’s internal clock. Only dates that correspond with the year and month can be set. Incompatible dates will be refused. Default date format: 表記を変更 [Day/Month/Year], [Month/Day/Year] • Date format: Month/Day/Year, Day/Month/Year, or Year/Month/Day Year: 2000 to 2099 Month: 1 to 12 Day: 1 to 31 • Set Time Sets the time of the machine’s internal clock.
Administrator Settings Default: [PSTN] • PSTN • PBX PBX Access Number Specifies the dial number to access the outside line when the machine is connected to a PBX. Make sure that this setting matches the setting of your PBX. Otherwise, you may not be able to send faxes to outside destinations.
7. Configuring the Machine Using the Control Panel • On (30 seconds) • EnergySaverMode 2 The machine enters Energy Saver mode 2 after the period of time specified for this setting is passed. The machine consumes less power in Energy Saver mode 2 than in Energy Saver mode 1, but it takes longer to recover from Energy Saver mode 2 than from Energy Saver mode 1.
Administrator Settings Admin. Tools Lock Specifies a four-digit password for accessing the [Address Book], [Network Settings], and [Admin. Tools] menus. Do not forget this password. • On (0000 to 9999) • Off IPsec Selects whether to enable or disable IPsec. This function appears only when a password is specified under [Admin. Tools Lock]. Default: [Inactive] • Active • Inactive Fax Number Confirmation Sets the machine to require a fax number to be entered twice when specifying a destination manually.
7. Configuring the Machine Using the Control Panel • FAX Immediate TX • Scan to Address • Dup/Comb Copy 7 306 rinmei-mf2_com_user_guide_gb_00059831_eng.
Printer Feature Settings Printer Feature Settings This section describes the printer feature settings. Changing Printer Feature Settings 削除 Important • Printer feature settings are only available for the Type 2 model. The procedure for changing the setting for duplex printing is described as an example. 1. Press the [User Tools] key. 操作部イラストは現状 PerMF3 のままです CES184 2. Press the [ ][ ] keys to select [Printer Features], and then press the [OK] key. 3.
7. Configuring the Machine Using the Control Panel The lists will be printed using the tray set for [Printer] under [Paper Tray Priority] in system settings on A4 or Letter size paper. • Config. Page Prints general information and the current configurations of the machine. • Menu List Prints the machine's function menus. • Test Page Prints a test page for checking the single-sided printing condition. The test page contains network settings. • PCL Font List Prints installed PCL font list.
Printer Feature Settings • Duplex Sets the machine to print on both sides of paper according to the specified binding method. Default: [None] • None • Long Edge Bind • Short Edge Bind • Blank Page Print Sets the machine to print blank pages. When cover sheet printing is enabled from the printer driver, cover sheets are inserted even if you select [Off].
7. Configuring the Machine Using the Control Panel Default: 0 • 0 to 89 • Point Size Specifies the point size for the default font. This setting is effective only for a variable-space font. Default: 12.00 points • 4.00 to 999.75, in 0.25 increments • Font Pitch Specifies the number of characters per inch for the default font. This setting is effective only for fixed-space fonts. Default: 10.00 pitch • 0.44 to 99.99 • Symbol Set Specifies the character set for the default font.
Printer Feature Settings • On • Off • Resolution Specifies the print resolution in dots per inch. Default: [600 × 600 1bit] • 600 × 600 1bit PS Menu 削除 • 600 × 600 2bit • 600 × 600 4bit Specifies conditions when using PostScript for printing. • Resolution Specifies the print resolution in dots per inch. Default: [600 × 600 1bit] • 600 × 600 1bit • 600 × 600 2bit • 600 × 600 4bit 削除 • Colour Profile rinmei-mf2_com_user_guide_gb_00059834_eng.
7. Configuring the Machine Using the Control Panel 7 312 rinmei-mf2_com_user_guide_gb_00059834_eng.
8. Configuring the Machine Using Web Image Monitor You can check the machine's status or change its settings by accessing the machine directly using Web Image Monitor. Using Web Image Monitor • Some items might not appear, depending on the model type you are using. • Some items can also be configured using the control panel.
8. Configuring the Machine Using Web Image Monitor • To operate the machine via Web Image Monitor, you must first configure the machine's TCP/IP settings. • For details about configuring the machine using the control panel, see p.253 "Basic Operation Using the Menu Screen". • For details about TCP/IP settings, see p.70 "Configuring the Machine". 8 314 rinmei-mf2_com_user_guide_gb_00059839_eng.
Displaying Top Page Displaying Top Page When you access the machine using Web Image Monitor, the top page appears in your browser's window. 1. Launch the Web browser. 2. In the Web browser’s address bar, enter “http://(machine’s IP address)/” to access the machine. If a DNS or WINS server is used and the machine’s host name has been specified, you can enter the host name instead of the IP address. The top page of Web Image Monitor appears.
8. Configuring the Machine Using Web Image Monitor Information in the main area is not automatically updated. Click [Refresh] at the upper-right in the main area to update the information. Click the Web browser's [Refresh] button to refresh the entire browser screen. • If you use an older version of a supported Web browser or the Web browser has JavaScript and cookies disabled, display and operation problems may occur. • If you are using a proxy server, configure the Web browser settings as necessary.
Checking the System Information Checking the System Information Click [Home] to display the main page of Web Image Monitor. You can check the current system information on this page. This page contains three tabs: [Status], [Counter], and [Machine Information]. Checking the Status Information Click the [Status] tab on the main page to display system information, paper tray status and toner levels. Item Description Model Name Shows the name of the machine.
8. Configuring the Machine Using Web Image Monitor Item Transfer Roller Unit Description Shows the remaining life of the transfer roller unit, as "Status OK", "Replacement Required Soon" or "Replacement Required". For replacing, contact your sales or service representative. Paper Feed Roller Unit Shows the remaining life of the paper feed roller unit, as "Status OK", "Replacement Required Soon" or "Replacement Required". For replacing, contact your sales or service representative.
Checking the System Information No.
8. Configuring the Machine Using Web Image Monitor Checking the Machine Information Click the [Machine Information] tab on the main page to display machine information. Machine Information Item 8 Description Firmware Version Shows the version of firmware installed on the machine. Engine FW Version Shows the version of firmware for the machine engine. Serial Number Shows the serial number of the machine. Fax Card Shows whether or not the fax card is installed.
Configuring the System Settings Configuring the System Settings Click [System Settings] to display the page for configuring the system settings. This page contains the following tabs: [Sound Volume Adjustment], [Tray Paper Settings], [Copier], [Fax], [Priority Tray], [Toner Saving], [I/O Timeout], and [Short Cut Key]. Configuring the Sound Volume Click the [Sound Volume Adjustment] tab on the system settings page to configure the sound volume settings.
8. Configuring the Machine Using Web Image Monitor Configuring the Paper Settings Click the [Tray Paper Settings] tab on the system settings page to configure the paper settings.
Configuring the System Settings Bypass Tray Item Paper Size Description Select the paper size for the bypass tray from the following: 削除 8 × 13, 8 1/2 × 13, 8 1/4 × 13 A4, B5 JIS, A5, B6 JIS, A6, 8 1/2 × 14, 8 1/2 × 11, 5 1/2 × 8 1/2, 7 1/4 × 10 1/2, 16K, 4 1/8 × 9 1/2, 3 7/8 × 7 1/2, C5 Env, C6 Env, DL Env, Custom Size Paper Type Select the paper type for the bypass tray from the following: Thin Paper (52-64g/m2), Thick Paper 1 (100-130g/m2), Thick Paper 2 (131-162g/m2), Plain Paper, Recycled Paper, C
8. Configuring the Machine Using Web Image Monitor • The information about tray 2 appears only when it is installed. Specifying the Size of Paper for Printing Copies Click the [Copier] tab on the system settings page to specify the size of paper for printing copies. No.
Configuring the System Settings Select Paper Tray Item Select Paper Tray Description Select the tray for printing faxes from the following: [Auto], [Tray 1], or [Tray 2]. If [Auto] is selected, the machine uses tray 1 and tray 2 if they contain paper of the same size. In this case, the machine starts to print from the tray specified as the priority tray for [Fax] in the [Priority Tray] page. If that tray runs out of paper, the machine automatically switches to the other tray to continue printing.
No.111【WIM Forwardin Destination の有効文字数】(MF2 FW v0.24) Configuring theSpec Machine Using Web Image Monitor 『PRO2 Web8. Page Function V0.11』では、39文字となって いますが、FW v0.24 の実機では64文字入力可能です。 PerMF3でも同様の状況でしたが、設計確認の結果64が正しいと回 答がありましたので、RinMF2 でも64文字と記載します。 Item Description Print Automatically Select whether the faxes received into the machine’s memory are printed automatically or stored for later manual printing. Print Forwarded File Select whether the forwarded faxes are printed or not.
Configuring the System Settings 削除 Note ・ [Fax Received File Processing] appears only for the Type 2 model. Item Receive Conditions Description Specifies whether to receive or reject faxes from the programmed Special Senders. • Special Sender Receive faxes from the Special Senders and reject faxes from all other senders. • Other Than Special Sender Reject faxes from the Special Senders and receive faxes from all other senders. • For details about the priority tray settings, see p.
8. Configuring the Machine Using Web Image Monitor Item Copier Description Select the tray that the machine checks first for paper that can be used for the job from [Tray 1], [Tray 2], or [Bypass Tray]. If [A4] or [8 1/2 × 11] is selected for [Select Paper] in the [Copier] page and multiple trays contain valid paper, the first tray the machine finds will be used for printing; when that tray runs out of paper, the machine automatically switches to the next tray to continue printing.
Configuring the System Settings Toner Saving Item Toner Saving Description Enable this setting to print using a reduced amount of toner when printing out copies. Configuring the I/O Timeout Settings Click the [I/O Timeout] tab on the system settings page to configure the I/O timeout settings. 削除 Note • [Locked Print Timeout (seconds)] appears only for the Type 2 model.
8. Configuring the Machine Using Web Image Monitor Short Cut Key Item Short Cut Key Setting Description Assigns one of the following functions to the [Short Cut] key on the control panel. • [ID Card Copy Mode] • [Fax Auto Print Setting] • [Fax Immediate TX] • [Scan to Address] • [Duplex/Combine Copy] 8 330 rinmei-mf2_com_user_guide_gb_00059846_eng.
Registering Destinations Registering Destinations Scan and fax destinations can be registered using Web Image Monitor. A maximum of 100 scan destinations and 200 fax destinations can be registered. See the scan and fax sections for more information on registering destinations. • For details about registering scan destinations, see p.175 "Registering Scan Destinations". • For details about registering fax destinations using Web Image Monitor, see p.208 "Registering Fax Destinations Using Web Image Monitor".
8. Configuring the Machine Using Web Image Monitor Registering Fax Special Senders Fax Special Senders can be registered using Web Image Monitor. A maximum of 30 Special Senders be registered. • For details about registering Special Senders, see p.249 "Receiving or Rejecting Faxes from Special Senders". 8 332 rinmei-mf2_com_user_guide_gb_00059856_eng.
Restricting Machine Functions According to User 削除 ・This function is available for the Type 2 model only. Restricting Machine Functions According to User You can set the machine to require a user code when someone tries to use certain machine functions. • When print jobs are restricted, you can only authenticate through the PCL6 printer driver. Printing from the PostScript 3 printer driver will not be possible.
8. Configuring the Machine Using Web Image Monitor Configuring the Network Settings Click [Network Settings] to display the page for configuring the network settings. This page contains the following tabs: [Network Status], [IPv6 Configuration], [Network Application], [DNS], [Auto E-mail Notification], [SNMP], [SMTP], [POP3], and [Internet Fax]. Checking the Network Status Click the [Network Status] tab on the network settings page to display network information.
Configuring the Network Settings Item Gateway Description Enter the IPv4 address of the network gateway. Configuring the IPv6 Settings Click the [IPv6 Configuration] tab on the network settings page to configure the IPv6 settings. IPv6 Item IPv6 Description Select whether to enable or disable IPv6. You cannot disable IPv6 using Web Image Monitor if the machine is currently in use in an IPv6 environment. In this case, use the control panel to disable [IPv6] under network settings.
8. Configuring the Machine Using Web Image Monitor Item Description Manual Configuration Address Enter the machine's IPv6 address. Can contain up to 39 characters. Prefix Length Enter the prefix length, using a value between 0 and 128. Gateway Address Enter the default gateway's IPv6 address. Can contain up to 39 characters. • For details about [IPv6], see p.289 "Network Settings".
Configuring the Network Settings Network Print Setting Item Description IPP Select to enable network printing using Internet Print Protocol (via TCP port 631/80). FTP Select to enable network printing using an embedded FTP server in the machine (via TCP port 20/21). RAW Select to enable network raw printing. Port No. Enter the TCP port number to use for raw printing. The valid range is 1024 to 65535, except 53550 and 49999 (default is 9100).
8. Configuring the Machine Using Web Image Monitor DNS Item Description DNS Method Select whether to specify domain name servers manually or receive DNS information from the network automatically. When set to [Auto], [Primary DNS Server], [Secondary DNS Server], and [Domain Name] below become unavailable. Primary DNS Server Enter the IPv4 address of the primary DNS. Secondary DNS Server Enter the IPv4 address of the secondary DNS. Domain Name Enter the IPv4 domain name for the machine.
Configuring the Network Settings E-mail Notification 1/E-mail Notification 2 Item Description Display Name Enter a sender name for notification e-mail. Can contain up to 32 characters. E-mail Address Enter the address of the recipient of the alert email. Can contain up to 64 characters. Paper Misfeed Select to send an alert e-mail to the specified address if a paper jam occurs. Out of Paper Select to send an alert e-mail to the specified address if paper runs out.
8. Configuring the Machine Using Web Image Monitor SNMP Item SNMP Description Select whether to enable the machine to use SNMP services. Trap Item Target Trap Description Select whether to enable the machine to send traps to the management host (NMS). When disabled, [SNMP Management Host 1] and [SNMP Management Host 2] below become unavailable. 8 SNMP Management Host 1 Enter the IP address or host name of a management host. Can contain up to 64 characters.
Configuring the Network Settings Item Contact Description Enter the contact information of the machine. The contact information entered here is displayed on the main page. Can contain up to 64 characters. Configuring the SMTP Settings Click the [SMTP] tab on the network settings page to configure the SMTP settings. SMTP Item Description Primary SMTP Server Enter the IP address or host name of the SMTP/POP3 server. Can contain up to 64 characters. Port No.
8. Configuring the Machine Using Web Image Monitor Item Device E-mail Address Description Enter the machine’s e-mail address. This address is used as the sender's address of e-mail messages sent from this machine, such as notification e-mails and Internet Faxes. Can contain up to 64 characters. Server Timeout (seconds) Enter the number of seconds the machine waits before considering an SMTP operation to have timed out (1 to 999). Time Zone Select a time zone according to your geographic location.
Configuring the Network Settings Item Authentication Description Select an authentication method from the following: [None]: Password will not be encrypted. [APOP Authentication]: Password will be encrypted. [Auto]: Password will be encrypted or not encrypted according to the POP3 server’s settings. Configuring the Internet Fax Settings Click the [Internet Fax] tab on the network settings page to configure the Internet Fax settings.
8. Configuring the Machine Using Web Image Monitor Item POP Server: E-mail Reception Setting Description Select whether to leave or delete e-mails in the POP3 server after receiving them. [No]: Delete e-mails from the server after receiving them. [Save E-mail]: Leave e-mails on the server after receiving them. [Save Only Error Info]: Delete e-mails that are successfully received from the server only.
Configuring the LDAP Server Settings 追加 Configuring the LDAP Server Settings Click [LDAP Server] to display the page for configuring the LDAP settings. This page contains the following tabs: [LDAP Settings] and [Program/Change/Delete LDAP Server]. Configuring the LDAP Settings Click the [LDAP Settings] tab on the LDAP server page to configure the LDAP settings. Item Description LDAP Authentication Select whether to enable or disable LDAP authentication.
8. Configuring the Machine Using Web Image Monitor Item Description LDAP Search Select whether to enable or disable LDAP search to retrieve addresses for scanner and fax destinations. LDAP Search Timeout Enter the number of seconds before the machine considers the LDAP search to have timed out (1 to 60). To configure LDAP server settings, select the desired LDAP server from the list under "Program/Change/ Delete", and then click [Change] to open the "Edit LDAP Server" page.
Configuring the LDAP Server Settings Item Authentication Description Select whether or not to perform authentication when the machine connects to the LDAP server. • [Inactive]: Anonymous (no authentication) • [Active]: Cleartext authentication • [High Security]: CRAM-MD5 authentication If [Active] or [High Security] is selected, you must also set [Login Name Attribute (Optional)], [User Name (Optional)], and [Password (Optional)].
8. Configuring the Machine Using Web Image Monitor Item Description Company Name (Required) Enter an attribute type by which the user's company (or organization) name can be distinguished. Can contain up to 16 characters. Department Name (Required) Enter an attribute type by which the user's department name can be distinguished. Can contain up to 16 characters. Search Options Item Attribute (Optional) Description Enter an attribute type by which the user can be distinguished.
Configuring the IPsec Settings Configuring the IPsec Settings Click [IPsec Settings] to display the page for configuring the IPsec settings. This page contains the following tabs: [IPsec Global Settings] and [IPsec Policy List]. • This function is available only when an administrator password is specified. Configuring the IPsec Global Settings Click the [IPsec Global Settings] tab on the IPsec settings page to configure the IPsec global settings.
8. Configuring the Machine Using Web Image Monitor • For details about which ICMP message types will be bypassed when setting [All ICMP Bypass] to [Inactive], see Web Image Monitor Help. Configuring the IPsec Policy Click the [IPsec Policy List] tab on the IP security settings page to display the list of registered IPsec policies. Item 8 Description No. IPsec policy number. Name Displays the name of the IPsec policy.
Configuring the IPsec Settings IP Policy Settings Item Description No. Specify a number between 1 and 10 for the IPsec policy. The number you specify will determine the position of the policy in the IPsec Policy List. Policy searching is performed according to the order of the list. If the number you specify is already assigned to another policy, the policy you are configuring will take the number of the earlier policy, and the earlier policy and any subsequent policies will be renumbered accordingly.
8. Configuring the Machine Using Web Image Monitor Item Action Description Specify how the IP packets are processed from the following: • [Allow]: IP packets are both sent and received without IPsec applied to them. • [Drop]: IP packets are discarded. • [Require Security]: IPsec is applied to IP packets that are both sent and received. If you have selected [Require Security], you must configure [IPsec Settings] and [IKE Settings].
Configuring the IPsec Settings Item Authentication Algorithm for ESP Description Specify the authentication algorithm to be applied when [ESP] is selected for [Security Protocol] from the following: [MD5], [SHA1] Life Time Specify the life time of the IPsec SA (Security Association) as a time period or data volume. The SA will expire when the time period you specify elapses or the volume of data you specify reaches the volume carried.
8. Configuring the Machine Using Web Image Monitor • For details about IPsec, see p.437 "Transmission Using IPsec". 8 354 rinmei-mf2_com_user_guide_gb_00059868_eng.
Printing Lists/Reports Printing Lists/Reports Click [Print List/Report] to display the page for printing reports. Then, select an item and click [Print] to print out information for that item. Print List/Report Item Description Configuration Page Prints general information about the machine and its current configuration. Fax Journal Prints a fax transmission and reception journal for the last 50 jobs.
8. Configuring the Machine Using Web Image Monitor • Reports will be printed on A4 or Letter size paper. Load one of these sizes of paper into the tray before printing reports. • For details about automatic fax journal printing, see p.272 "Fax Feature Settings". • For details about priority tray settings, see p.327 "Specifying the Priority Tray". • For details about loading paper, see p.96 "Loading Paper". 8 356 rinmei-mf2_com_user_guide_gb_00059871_eng.
Configuring the Administrator Settings Configuring the Administrator Settings Click [Administrator Tools] to display the page for configuring the administrator settings. This page contains the following tabs: [Administrator], [Reset Settings], [Backup Setting], [Restore Setting], [Set Date/Time], and [Energy Saver Mode]. Configuring the Administrator Password and E-mail Address Click the [Administrator] tab on the administrator settings page to configure the administrator password and e-mail address.
8. Configuring the Machine Using Web Image Monitor Resetting the Machine’s Settings Click the [Reset Settings] tab on the administrator settings page to reset the machine's settings. Reset Settings 【クリア/バックアップの対象】 WIM の設定クリア/バックアップの対象について確認をさせてください (『PRO2 System Functional Specification V1.
Configuring the Administrator Settings • When sending the machine for repair, it is important that you create backup files in advance. The machine's settings are returned to the default after repair. Backup Setting Item Back up Network Settings Description Backs up the following Web Image Monitor settings to a file: • Settings under [Network Settings] • Settings under [LDAP Server] • Settings under the [Administrator] tab of [Administrator Tools] Note that, however, [Max.
8. Configuring the Machine Using Web Image Monitor 4. Click [Save] in the confirmation dialog box. 5. Navigate to the location to save the backup file. 6. Specify a name for the file, and click [Save]. • [Back up IPsec Settings] appears only when a password is specified in [Administrator Password]. Restoring the Machine's Settings from a Backup File Click the [Restore Setting] tab on the administrator settings page to restore the machine's settings from a previously created backup file.
Configuring the Administrator Settings • If the settings are not restored successfully, an error message appears. Try again to restore the file completely. Configuring the Date and Time Settings Click the [Set Date/Time] tab on the administrator settings page to configure the date and time settings. Set Date Item Description Year Enter the current year (2000 to 2099). Month Enter the current month (1 to 12). Day Enter the current day (1 to 31).
8. Configuring the Machine Using Web Image Monitor Configuring the Energy Saver Mode Settings Click the [Energy Saver Mode] tab on the administrator settings page to set the machine to enter Energy Saver mode, Energy Saver mode 1 or Energy Saver mode 2, to reduce power consumption. Energy Saver Mode Item Energy Saver Mode 1 8 Description Select [Active] to set the machine to enter Energy Saver mode 1 if the machine has been idle for about 30 seconds.
9. Troubleshooting This chapter provides a guide for solving problems in operating the machine. Overview Troubleshooting is divided into the following sections: • p.364 "Common Problems" • p.366 "Paper Feed Problems" • p.386 "Print Quality Problems" • p.387 "Printer Problems" • p.392 "Copier Problems" • p.394 "Scanner Problems" • p.395 "Fax Problems" • p.401 "Error and Status Messages on the Screen" • p.412 "Replacing the Print Cartridge" 削除 ・p.
9. Troubleshooting Common Problems This section describes how to troubleshoot common problems that may occur while operating the machine. Problem 9 Possible cause Solution • Make sure that the power plug is firmly inserted into the wall outlet. The machine does not turn on. The power cord is not connected properly. An error message is shown on the machine's screen. An error has occurred. See p.401 "Error and Status Messages on the Screen". Pages are not printed.
Common Problems • If any of these problems persist, turn off the power, pull out the power cord, and contact your sales or service representative. 9 rinmei-mf2_com_user_guide_gb_00059882_eng.
9. Troubleshooting Paper Feed Problems If the machine is operating but paper will not feed or paper jams occur frequently, check the condition of the machine and paper. Problem Solution • Use supported types of paper. See p.84 "Supported Paper for Each Tray". Paper does not feed smoothly. • Load paper correctly, making sure that the paper guides are properly adjusted. See p.96 "Loading Paper". • If the paper is curled, straighten the paper. • Take out the paper from tray and fan it well.
Paper Feed Problems Problem Solution • Fan the paper well before loading. Also make sure that the edges are even by tapping the stack on a flat surface such as a desk. • Make sure that the paper guides are in the right position. • Use supported types of paper. See p.84 "Supported Paper for Each Tray". Multiple sheets of paper are fed at one time. • Load paper only as high as the upper limit markings on the paper guide. • Make sure that the friction pads and paper feed rollers are clean. See p.
9. Troubleshooting Removing Printing Jams If a paper jam occurs, one of the following messages appears on the screen: • "Misfeed: Paper Tray" • "Misfeed: Dup. Unit Remove Paper" • "Internal Misfeed" • "Misfeed: Stnd. Tray" • "Misfeed: Tray 1" • "Misfeed: Tray 2 No.70【ジャムメッセージ】 印刷時のジャム発生時のメッセージについてご教示ください。 RinMF1のマニュアルでは以下を記載していて、MF2のメッセージとの対応は以下の通りと考えていま す。 • Bypass Tray Paper Misfeed Jam → ? • Duplex Jam Duplex Misfeed Jam → Misfeed: Dup.
Paper Feed Problems 1. Pull tray 1 halfway out, and check for jammed paper. If there is jammed paper, remove it carefully. CMF067 2. Carefully slide tray 1 back in until it stops. 3. If paper is loaded in the bypass tray, remove the paper. 4. Close the bypass tray. 5. Push the side button to open the front cover, and then carefully lower it. 9 CMF068 6. Carefully pull out the print cartridge horizontally, holding its center. CMF069 • Do not shake the removed print cartridge.
9. Troubleshooting 7. Lifting the guide plate, remove the jammed paper carefully. CMF070 8. Slide the print cartridge in horizontally. When the cartridge can go no further, raise it slightly and push it fully in. Then push down on the cartridge until it clicks into place. CMF071 9. Using both hands, carefully push up the front cover until it closes. 9 CMF072 • If paper is jammed in tray 2 but is difficult to locate, pull out tray 2 to remove it.
Paper Feed Problems Removing paper tray jam (bypass tray jam) If "Misfeed: Paper Tray" appears on the display, follow the procedure below to remove it. • The inside of this machine becomes very hot. Do not touch the parts labeled " " (indicating a hot surface). • Some of this machine's internal components get very hot. For this reason, take care when removing misfed paper. Not doing so could result in burns. 1. If paper is jammed in the bypass tray input area, remove the jammed paper carefully.
9. Troubleshooting 4. Carefully pull out the print cartridge horizontally, holding its center. CMF069 • Do not shake the removed print cartridge. Doing so can cause remaining toner to leak. • Place the print cartridge on paper or similar material to avoid dirtying your workspace. 5. Lifting the guide plate, remove the jammed paper carefully. CMF070 9 6. Slide the print cartridge in horizontally. When the cartridge can go no further, raise it slightly and push it fully in.
Paper Feed Problems 7. Using both hands, carefully push up the front cover until it closes. CMF072 • When closing the front cover, push the upper area of the cover firmly. After closing the cover, check that the error is cleared. Removing standard tray/duplex unit jam If "Misfeed: Stnd. Tray" or "Misfeed: Dup. Unit Remove Paper" appears on the display, follow the procedure below to remove it. • The inside of this machine becomes very hot. Do not touch the parts labeled " " (indicating a hot surface).
9. Troubleshooting 2. Remove the jammed paper carefully. CMF075 3. Close the rear cover. CMF076 4. Pull tray 1 halfway out, and check for jammed paper. If there is jammed paper, remove it carefully. 9 CMF067 374 rinmei-mf2_com_user_guide_gb_00059883_eng.
Paper Feed Problems 5. Pull tray 1 out completely with both hands. CMF077 Place the tray on a flat surface. 6. Push the lever. Pushing the lever lowers the duplex transport unit. CMF078 7. If there is jammed paper, carefully remove it. 9 CMF079 rinmei-mf2_com_user_guide_gb_00059883_eng.
9. Troubleshooting 8. With the duplex transport unit still lowered, carefully slide tray 1 back in until it stops. CMF080 9. If paper is loaded in the bypass tray, remove the paper and close the bypass tray. 10. Push the side button to open the front cover, and then carefully lower it. CMF068 11. Carefully pull out the print cartridge horizontally, holding its center. 9 CMF069 • Do not shake the removed print cartridge. Doing so can cause remaining toner to leak.
Paper Feed Problems 12. Lifting the guide plate, remove the jammed paper carefully. CMF070 13. Slide the print cartridge in horizontally. When the cartridge can go no further, raise it slightly and push it fully in. Then push down on the cartridge until it clicks into place. CMF071 14. Using both hands, carefully push up the front cover until it closes. 9 CMF072 • When closing the covers, push the covers firmly. After closing the covers, check that the error is cleared.
9. Troubleshooting Removing Scanning Jams (Type 2 model) When the following message appears on the screen, follow the procedure below to remove the original jammed in the ARDF: • "ADF Original Misfeed Open ADF Cover and Remove paper." 1. Open the ARDF cover. CMF081 2. Gently pull the jammed original to remove it. Be careful not to pull the original too hard, as it may rip. 9 CMF082 3.
Paper Feed Problems 4. Lift the paper feed roller slightly and pull it out toward you. CMF084 5. Gently pull the jammed original to remove it. CMF085 6. If you cannot pull out the jammed original easily, raise the input tray to see if the original is jammed in the output area. 9 CMF086 rinmei-mf2_com_user_guide_gb_00059883_eng.
9. Troubleshooting 7. Gently pull the jammed original to remove it. CMF087 8. Put the paper feed roller back in with the roller part facing downwards. CMF088 9. Lower the lever to lock the paper feed roller. 9 CMF089 380 rinmei-mf2_com_user_guide_gb_00059883_eng.
Paper Feed Problems 10. Close the ARDF cover. CMF090 11. Lift the ARDF, and if there is original remaining in the ARDF, gently pull the jammed original to remove it. Be careful not to hold the input tray when lifting the ARDF, for the tray might be damaged. CMF091 12. Close the ARDF. 9 Removing Scanning Jams (Type 1 model) When the following message appears on the screen, follow the procedure below to remove the original jammed in the ADF: • "ADF Original Misfeed Open ADF Cover and Remove paper.
9. Troubleshooting 1. Open the ARDF cover. 本体B機になっているので、A機に 修正します。 CMF081 2. Gently pull the jammed original to remove it. Be careful not to pull the original too hard, as it may rip. CMF082 9 3. If you cannot pull out the jammed original easily, move the lever slightly to the machine rear, and then raise it to unlock the paper feed roller. CMF083 382 rinmei-mf2_com_user_guide_gb_00059883_eng.
Paper Feed Problems 4. Lift the paper feed roller slightly and pull it out toward you. CMF084 5. Gently pull the jammed original to remove it. CMF085 6. If you cannot pull out the jammed original easily, raise the input tray to see if the original is jammed in the output area. 9 CMF086 rinmei-mf2_com_user_guide_gb_00059883_eng.
9. Troubleshooting 7. Gently pull the jammed original to remove it. CMF087 8. Put the paper feed roller back in with the roller part facing downwards. CMF088 9. Lower the lever to lock the paper feed roller. 9 CMF089 384 rinmei-mf2_com_user_guide_gb_00059883_eng.
Paper Feed Problems 10. Close the ARDF cover. CMF090 11. Lift the ARDF, and if there is original remaining in the ARDF, gently pull the jammed original to remove it. Be careful not to hold the input tray when lifting the ARDF, for the tray might be damaged. CMF091 12. Close the ARDF. rinmei-mf2_com_user_guide_gb_00059883_eng.
9. Troubleshooting Print Quality Problems This section describes likely causes of and possible solutions for problems with print quality. Checking the Condition of the Machine If there is a problem with the quality of printing, first check the condition of the machine. Possible Cause 9 Solution There is a problem with the machine's location. Make sure that the machine is on a level surface. Place the machine where it will not be subject to vibration or shock. Unsupported types of paper is used.
Printer Problems Printer Problems This section describes printing problems and possible solutions. Problem Solution If an error occurs when printing, change the computer or printer driver settings. • Check the printer icon name does not exceed 32 alphanumeric characters. If it does, shorten it. An error occurs. • Check whether other applications are operating. Close any other applications, as they may be interfering with printing. If the problem is not resolved, close unneeded processes too.
9. Troubleshooting 機器カラー調整中の記述削除 Problem There is considerable delay between the print start command and actual printing. Solution • Processing time depends on data volume. High volume data, such as graphics-heavy documents, take longer to process. • If "Processing..." is displayed on the screen, the machine is receiving data. Wait for a while. • To speed up printing, reduce the printing resolution using the printer driver. For details, see the printer driver Help.
項目削除 Printed Colors Do Not Match Displayed Colors Printer Problems Possible Cause Solution Cannot print properly when using a certain application, or cannot print image data properly. • Increase the print quality settings. Some characters are printed faintly or not printed. • Increase the print quality settings. • Adjust the image density. • Set the document to print in gray-scale. • Set the document to print in gray-scale.
9. Troubleshooting 1. Press the [User Tools] key. BSP051S 2. Press the [ ] [ ] keys to select [Printer Features], and then press the [OK] key. 3. Press the [ ] [ ] keys to select [List/Test Print], and then press the [OK] key. 4. Press the [ ] [ ] keys to select [Test Page] or [Duplex Test Page], and then press the [OK] key. Print a duplex test page to adjust duplex printing position (Type 2 model only). 5. Press [Yes] to print the test page to preview the settings. 9 6. Press the [User Tools] key. 7.
Printer Problems 10. Press the [ ] [ ] keys to set the registration value from -15 to +15 (that is, from -1.5 to +1.5 mm, in 0.1 mm increments). Increase the value to shift the print area in the positive direction, and decrease to shift in the negative direction. Adjust the margins of the test page so that they are equal in size. 2 1 3 4 CMF098 1. Feed Direction 2. Vertical Adjustment 3. Horizontal Adjustment 4. Print Area 11. Press the [User Tools] key to return to the initial screen. 12.
9. Troubleshooting Copier Problems This section describes photocopy problems and possible solutions. Problem Photocopied pages are not in correct order. Solution On the control panel, change the [Sort] setting under copy settings to collate pages as you require. For details about [Sort], see p.259 "Copy Settings". The original is not set correctly. Photocopied paper is blank. 9 When using the exposure glass, place originals copy side down. When using the ARDF or ADF, place them copy side up. See p.
Copier Problems Problem Solution • Image density is too high. Adjust the image density. See p.169 "Adjusting Image Density". • Toner on the printed surface is not dry. Do not touch printed surfaces immediately after copying. Remove freshly printed sheets one by one, taking care not to touch printed areas. Photocopied paper is dirty. • The exposure glass or ARDF or ADF is dirty. See p.419 "Cleaning". • Before placing originals on the exposure glass, make sure that toner or correction fluid is dry.
9. Troubleshooting Scanner Problems This section describes scanner problems and possible solutions. Problem The machine does not start scanning. The scanned image is dirty. 9 394 Solution The ARDF/ADF or its cover is open. Close the ARDF/ADF or its cover. • The exposure glass or ARDF/ADF is dirty. See p.419 "Cleaning". • Before placing originals on the exposure glass, make sure that toner or correction fluid is dry. The scanned image is distorted or out of position.
Fax Problems Fax Problems This section describes fax problems and possible solutions. When an error code appears on the fax journal or transmission status report The table below describes the meaning of error codes that appear under "Results" on the fax journal or transmission status report, and what to do when a particular error code appears. "X" indicates a number in an error code that appear differently depending on a specific situation.
9. Troubleshooting Error Code Solution An error occurred while sending a fax. • Confirm that the telephone line is properly connected to the machine. 1XXX32 to 1XXX84 • Disconnect the telephone line from the machine, and connect a standard telephone in its place. Confirm that you can make calls using the telephone. If you cannot make calls this way, contact your telephone company. • If the problem persists, contact your sales or service representative.
Fax Problems Error Code 3XXX11 Solution Connection to the server failed while sending an Internet Fax. • Confirm that the network cable is properly connected to the machine. • Confirm that the network settings such as IP address, DNS, and SMTP settings have been configured properly (make sure that no double-byte character is used). See p.334 "Configuring the Network Settings". 3XXX12 E-mail transmission failed while sending an Internet Fax. • There was an error in the header of the e-mail.
9. Troubleshooting Error Code 4XXX21 Solution Connection to the server failed while receiving an Internet Fax. • Confirm that the network cable is properly connected to the machine. • Confirm that the network settings such as IP address, DNS, and POP3 settings have been configured properly (make sure that no double-byte character is used). See p.334 "Configuring the Network Settings". 4XXX22 E-mail reception failed while receiving an Internet Fax. • LIST command to the POP3 server failed.
Fax Problems Error Code 4XXX43 Solution A TIFF file could not be received via Internet Fax properly. • The compression method of the received TIFF file was other than MH/MR/MMR. Ask the sender to check the TIFF file. 4XXX44 A TIFF file could not be received via Internet Fax properly. • The resolution of the TIFF file was not supported, or the width of the TIFF file was A3 or B4. Ask the sender to check the TIFF file. 4XXX45 A TIFF file could not be received via Internet Fax properly.
9. Troubleshooting Problem Cannot print received faxes. Faxes you sent appear spotty or dirty when received. Solution • The paper tray is empty. Load paper in the paper tray. See p.96 "Loading Paper". • The paper tray does not contain paper of the right size. Load paper of the right size in the paper tray. • The exposure glass or ARDF/ADF is dirty. See p.419 "Cleaning". • Before placing originals on the exposure glass, make sure that ink or correction fluid is dry.
削除メッセージ: Almost Full Waste Toner Bottle、Available: 2 Sided Copy Tray 1 or Tray 2、Density Sensor Require Cleaning、Replace: Waste Toner Bottle、Setting Error: Waste Toner Bottle Error and Status Messages on the Screen Error and Status Messages on the Screen This section describes the meaning of messages that appear on the screen and what to do when a particular message appears. Messages are listed in alphabetical order in the table below.
No.77【両面コピーの用紙サイズエラー】 『Pro2 StatusList Spec V1.02 20110803』の以下の メッセージについて教えてください。 Available: 2 Sided Copy̲$̲A4/B5/LG/LT/EXE/̲$ ̲8x13/8.25x13/8.5x13/16K 両面コピーの対応用紙サイズは A4、LTR、Legal だと 思いますが、その他の用紙サイズが表示されるのはな ぜでしょうか。 9. Troubleshooting Message ADF Original Misfeed Open ADF Cover and Causes An original has been jammed inside the ARDF or ADF. 9 402 • Remove jammed originals, and then place them again. See p.378 "Removing Scanning Jams (Type 2 model)" or p.381 "Removing Scanning Jams (Type 1 model)".
Error and Status Messages on the Screen No.76【集約コピーの用紙サイズエラー】 『Pro2 StatusList Spec V1.02 20110803』 ① "Ppr.Size: B6 / 7 1/4x10 1/2"は必要でしょうか? ② 集約コピーの対応用紙サイズは A4、LTR、Legal Message Causesだと思いますが、B6 と EXEC のサイズが表示されるのはなぜでしょうか。 Cannot Copy This Setting Comb.: 2 on 1 / 4 on 1 Ppr.Size: B6 / 7 1/4x10 1/2 Cannot copy. Set Original to ADF Combined copying could not be performed because the tray does not contain the valid size paper, which are A4, Letter, or Legal size.
9. Troubleshooting Message Causes Solutions • Confirm that the fax number you dialed is correct. • Confirm that the destination is a fax machine. Dial Failed The fax could not be sent. • Confirm that the line is not busy. • You may need to insert a pause between dial digits. Press the [Pause/ Redial] key after, for example, the area code. 9 404 Disconnected Telephone line was disconnected while sending a fax. Eng.
Error and Status Messages on the Screen Message Causes Solutions Failed to Create File Press Clear key The Scan to USB function failed because there was not enough memory on the USB flash disk. Use a USB flash disk with enough memory. Fax Job Memory Overflow The number of fax jobs in memory (unsent or unprinted faxes) has reached maximum, so new jobs cannot be stored. Wait until pending jobs have been transmitted or printed. • Confirm that the network cable is properly connected to the machine.
9. Troubleshooting Message Causes • The data is too large or complex to print. Memory Overflow • If you try to print a Locked Print file stored in the machine with the printer driver's [Resolution] set to [1200 × 600 dpi] or higher in the [Print Quality] tab, printing may be canceled depending on the machine's current memory usage. Legal仕様時の制約 (4ビット印刷)を原因 から削除 Memory Overflow • Select [600 × 600 1bit] in [Resolution] under [Printer Features] to reduce the size of data. See p.
Error and Status Messages on the Screen Message Causes Solutions Misfeed: Tray 1 Paper has been jammed in the tray 1 paper input area. Remove the jammed paper. See p.368 "Removing Printing Jams". Misfeed: Tray 2 Paper has been jammed in the tray 2 paper input area. Remove the jammed paper. See p.368 "Removing Printing Jams". Net Communication Error Connection with the server was lost while sending or receiving data. Contact the network administrator.
9. Troubleshooting Message Causes Replacement Required: Fusing Unit Replacement Required: Intermediate Transfer Unit Replacement Required: Transfer Roller Replacement Required: Contact your sales or service representative. The intermediate transfer unit is no longer usable, and must be replaced. Contact your sales or service representative. The transfer roller is no longer usable, and must be replaced. Contact your sales or service representative.
Error and Status Messages on the Screen Message Causes Server Response Error An error occurred in communication with the server before beginning transmission. Service call - X A fatal hardware error has occurred, and the machine cannot function. Solutions Confirm that the destination is registered correctly, and then try the operation again. If the problem could not be solved, contact the network administrator. Contact your sales or service representative.
9. Troubleshooting Message Causes The print cartridge has not been Toner Set Error: Black installed or has not been installed correctly. Tray 2 was selected for printing, Tray Uninstalled Auto but tray 2 was not installed in Tray?Y/N the machine. TX Comm. Error A transmission error occurred, and the fax could not be transmitted correctly. Solutions Reinstall the print cartridge. See p.412 "Replacing the Print Cartridge". • Install tray 2. • Select a tray other than tray 2 using the printer driver.
Error and Status Messages on the Screen Message Causes Solutions USB Disconnected Press Clear key The Scan to USB function failed because the USB flash disk was removed before the operation could be completed. Check that the USB flash disk is securely inserted in the machine. Do not pull out the USB flash disk until "Ready" appears on the display. USB Memory Overflow Press Clear key The Scan to USB function failed because there was not enough memory on the USB flash disk.
9. Troubleshooting Replacing the Print Cartridge • Do not incinerate toner (new or used) or toner containers. Doing so risks burns. Toner will ignite on contact with naked flame. • Do not store toner (new or used) or toner containers anywhere near naked flames. Doing so risks fire and burns. Toner will ignite on contact with naked flame. • The following explains the warning messages on the plastic bag used in this product's packaging. 追加 • Keep the polythene materials (bags, gloves, etc.
Replacing the Print Cartridge • When removing jammed paper or replacing toner, avoid getting toner (new or used) on your clothing. If toner comes into contact with your clothing, wash the stained area with cold water. Hot water will set the toner into the fabric and make removing the stain impossible. • When removing jammed paper or replacing toner, avoid getting toner (new or used) on your skin. If toner comes into contact with your skin, wash the affected area thoroughly with soap and water.
9. Troubleshooting • Do not allow paper clips, staples, or other small objects to fall inside the machine. • Do not expose the print cartridge without its cover to direct sunlight for a long time. • Do not touch the print cartridge's photo conductor unit. CMC013 • Do not touch the ID chip on the side of the print cartridge as indicated in the illustration below. 9 CMC014 • If toner runs out, you cannot print until the print cartridge is replaced. 1.
Replacing the Print Cartridge 3. Carefully pull out the print cartridge horizontally, holding its center. CMF069 • Do not shake the removed print cartridge. Doing so can cause remaining toner to leak. • Place the old print cartridge on paper or similar material to avoid dirtying your workspace. 4. Take the new print cartridge out of the box, and then take it out of the plastic bag. No.69【サプライトナーの開梱状態】 サプライトナー開梱時のイラストが現在 のイラストのままでよいかご確認をお願 いします。 CMC081 5.
9. Troubleshooting 6. Hold the print cartridge and shake it from side to side five or six times. CMC020 Even distribution of toner within the bottle improves print quality. 7. Slide the print cartridge in horizontally. When the cartridge can go no further, raise it slightly and push it fully in. Then push down on the cartridge until it clicks into place. CMF071 9 8. Carefully push up the front cover until it closes. Be careful not to you’re your fingers.
Replacing the Print Cartridge 9. Put the protective sheet you removed in step 5 on the old print cartridge. Then, put the old print cartridge into the bag, and then put it into the box. CMC083 • Make sure to cover the old print cartridge with the protective cover for recycling and environmental purposes. • Comply with the print cartridge Recycling Program, whereby used print cartridges are collected for processing. For details, ask your sales or service representative.
9. Troubleshooting 9 418 rinmei-mf2_com_user_guide_gb_00059900_eng.
10. Maintenance This chapter describes how to maintain the machine. Cleaning Cautions to Take When Cleaning • Do not remove any covers or screws other than those explicitly mentioned in this manual. Inside this machine are high voltage components that are an electric shock hazard and laser components that could cause blindness. Contact your sales or service representative if any of the machine's internal components require maintenance, adjustment, or repair.
10. Maintenance Cleaning the Friction Pad and Paper Feed Roller If the friction pad or paper feed roller is dirty, a multi-feed or jam might occur. In this case, clean the friction pad and paper feed roller as follows: • Unplug the power cord from the wall outlet before you move the machine. While moving the machine, take care that the power cord is not damaged under the machine. Failing to take these precautions could result in fire or electric shock. • Do not pull out the paper tray forcefully.
Cleaning 4. Wipe the friction pads with a damp cloth. CMC084 5. Wipe the rubber part of the roller with a soft damp cloth. After that, wipe it with a dry cloth to remove the moisture. CMF092 6. Reload the removed paper into the tray, and then push the tray carefully into the machine until it clicks into place. 10 CMF080 7. Insert the plug of the power cord into the wall socket securely. Connect all the interface cables that were removed. 8. Turn on the power.
10. Maintenance • If jams or multi-sheet feeds occur after cleaning the friction pad, contact your sales or service representative. • If the optional tray 2 is installed, clean its friction pad and paper feed roller in the same way as you did for tray 1. Cleaning the Exposure Glass The following procedure describes how to clean the exposure glass. 1. Lift the ARDF or ADF. Be careful not to hold the input tray when lifting the ARDF or ADF, for the tray might be damaged. 2.
Cleaning 2. Clean the parts indicated with arrows with a soft damp cloth and then wipe the same parts with a dry cloth to remove any remaining moisture. CMF094 10 rinmei-mf2_com_user_guide_gb_00059903_eng.
10. Maintenance Moving the Machine This section provides cautions that you must follow when moving the machine both short and long distances. • If you have to move the machine when the optional paper tray unit is attached, do not push on the main unit's top section. Doing so can cause the optional paper tray unit to detach, possibly resulting in injury. • The machine weighs approximately 18.0 kg (39.6 lb.). When moving the machine, use the inset grips on both sides, and lift slowly.
Moving the Machine Moving over a Short Distance • Do not remove the print cartridge when moving the machine. 1. Be sure to check the following points: • The power switch is turned off. • The power cord is unplugged from the wall outlet. • All other cables are unplugged from the machine. 2. If tray 2 is installed, remove it. 3. Return the scanning unit inside the machine to its original position using [Scanner Carriage] under [System Settings]. 4.
10. Maintenance 1. Be sure to check the following points: • The power switch is turned off. • The power cord is unplugged from the wall outlet. • All other cables are unplugged from the machine. • All paper trays are empty. 2. If tray 2 is installed, remove it. 3. Return the scanning unit inside the machine to its original position using [Scanner Carriage] under [System Settings]. • Toner might spill inside the machine if the machine is not kept level during transit.
Disposal Disposal Ask your sales or service representative for information about correct disposal of this machine. 10 rinmei-mf2_com_user_guide_gb_00059912_eng.
10. Maintenance If the Machine is Not Going to Be Used for a Long Time If the machine is going to be inactive for a long time, follow the procedure shown here. • It is dangerous to handle the power cord plug with wet hands. Doing so could result in electric shock. • The inside of this machine becomes very hot. Do not touch the parts labeled " " (indicating a hot surface). • Unplug the power cord from the wall outlet before you move the machine.
If the Machine is Not Going to Be Used for a Long Time 2. Pull out the plug from the socket. CMF097 3. Open the rear cover. CMF095 4. Lower the levers for printing envelopes on both side to the position indicated with an envelope mark. 10 CMF047 rinmei-mf2_com_user_guide_gb_00063190_eng.
10. Maintenance 5. Close the rear cover. CMF076 • This step is not necessary if the machine's power switch is on but the machine has been inactive for a long time. Using the Machine Again After It Has Been Inactive for a Long Period Use the following procedure to start using the machine again after it has been inactive for a long period. 1. Plug in the power cable. 10 CMF026 430 rinmei-mf2_com_user_guide_gb_00063190_eng.
If the Machine is Not Going to Be Used for a Long Time 2. Open the rear cover. CMF095 3. Pull up the levers for printing envelopes on both sides to the position indicated with a paper mark. CMF096 4. Close the rear cover. 10 CMF076 rinmei-mf2_com_user_guide_gb_00063190_eng.
10. Maintenance 5. Turn the power switch to “ On”. CMF027 10 432 rinmei-mf2_com_user_guide_gb_00063190_eng.
Where to Inquire Where to Inquire Contact your sales or service representative for further information about topics covered in this manual or to inquire about topics not covered in this manual. 10 rinmei-mf2_com_user_guide_gb_00059913_eng.
削除 ・Cyan ・Magenta ・Yellow 10. Maintenance Consumables • Our products are engineered to meet high standards of quality and functionality, and we recommend that you use only the expendable supplies available at an authorized dealer. Print Cartridge Print cartridge Black Average printable number of pages per cartridge *1 2,500 pages, 5,000 pages *1 The printable number of pages is based on pages that are compliant with ISO/IEC 19752 and the image density set as the factory default.
11. Appendix Functions and Network Settings Available in an IPv6 Environment The functions and network settings of this machine that are available in an IPv6 environment differ from those available in an IPv4 environment. Make sure the functions you use are supported in an IPv6 environment, and then configure the necessary network settings. • For details about specifying the IPv6 settings, see p.289 "Network Settings" or p.334 "Configuring the Network Settings".
11. Appendix Web Image Monitor Allows you to check the machine's status and configure its settings using a Web browser. Configuration Page Prints a configuration page that shows you the machine's configuration, IP address, and other details. Internet Fax Transmission and reception of Internet Faxes. 11 436 rinmei-mf2_com_user_guide_gb_00059917_eng.
Transmission Using IPsec Transmission Using IPsec For securer communications, this machine supports the IPsec protocol. When applied, IPsec encrypts data packets at the network layer using shared key encryption. The machine uses encryption key exchange to create a shared key for both sender and receiver. To achieve even higher security, you can also renew the shared key on a validity period basis. • IPsec is not applied to data obtained through DHCP, DNS, or WINS.
11. Appendix AH Protocol The AH protocol provides secure transmission through authentication of packets only, including headers. • For successful authentication, the sender and receiver must specify the same authentication algorithm and authentication key. The authentication algorithm and authentication key are specified automatically. AH Protocol + ESP Protocol When combined, the ESP and AH protocols provide secure transmission through both encryption and authentication.
Transmission Using IPsec Encryption Key Exchange Settings Configuration Flow This section explains the procedure for specifying encryption key exchange settings. Machine PC 1. Set the IPsec settings on Web Image Monitor. 1. Set the same IPsec settings as the machine on PC. 2. Enable IPsec settings. 2. Enable IPsec settings. 3. Confirm IPsec transmission. • After configuring IPsec, you can use "ping" command to check if the connection is established correctly.
11. Appendix Specifying IPsec Settings on the Computer Specify exactly the same settings for IPsec SA settings on your computer as are specified for the IPsec Settings on the machine. Setting methods differ according to the computer's operating system. The following procedure is based on Windows 7 in an IPv4 environment as an example. 1. On the [Start] menu, click [Control Panel], [Performance and Maintenance], and then click [Administrative Tools]. 2. Double-click [Local Security Policy]. 3.
Transmission Using IPsec 22. Select "My IP Address" in "Source address", and then click [Next]. 23. Select "A specific IP Address" in "Destination address", enter the machine's IP address, and then click [Next]. 24. For the IPsec protocol type, select "Any", and then click [Next]. 25. Click [Finish]. 26. Click [OK]. 27. Select the IP filter that you have just created, and then click [Next]. 28. Select the IPsec security filter, and then click [Edit]. 29.
11. Appendix [58] as the protocol number for the "Other" target protocol type, and then set [Negotiate security] to [Permit]. 38. Click [OK]. 39. Click [Close]. The new IP security policy (IPsec settings) is specified. 40. Select the security policy that you have just created, right click on it, and then click [Assign]. IPsec settings on the computer are enabled. • To disable the computer's IPsec settings, select the security policy, right click, and then click [Unassign].
Using the LDAP Authentication and Address Search Functions 追加 Using the LDAP Authentication and Address Search Functions By configuring the LDAP settings, you will be able to use the LDAP authentication and address search functions. LDAP authentication LDAP authentication enables you to prevent unauthorized access to the machine, by limiting its use to users who can log in to the machine with correct login user names and passwords.
11. Appendix • For details about how to log in to the machine when LDAP authentication is specified, see p.448 "When LDAP Authentication is Specified". • For details about supplies status information, see p.281 "System Settings". • For details about user restriction settings, see p.125 "Restricting Machine Functions According to User". Programming the LDAP Server This section describes how to specify the LDAP server settings. Use Web Image Monitor to program the LDAP server settings.
Using the LDAP Authentication and Address Search Functions 2. Click [LDAP Server]. 3. Under "LDAP Settings", select [Active] for [LDAP Authentication] to enable LDAP authentication. If necessary, also configure [Auto Logout Time (seconds)]. 4. Enter the administrator password if required. 5. Click [Apply]. 6. Click [Program/Change/Delete LDAP Server]. 7. Select [Active] for [LDAP Search] to enable LDAP address search. If necessary, also configure [LDAP Search Timeout]. 8.
11. Appendix Search base registration may be required depending on your server environment. When registration is required, unspecified searches will result in error. Check your server environment and enter any required specifications. 12. Enter the port number used to connect to the LDAP server in [Port Number (Required)]. Specify a port according to your environment. 13. Select whether or not to use SSL with the LDAP server in [SSL].
Using the LDAP Authentication and Address Search Functions 22. Under "Search Options", enter an attribute type by which the user can be distinguished in [Attribute (Optional)]. The attribute value may change depending on the server environment. 23. Enter the name shown on the machine's control panel, which is used for LDAP search to search a user based on the attribute type specified in [Attribute (Optional)], in [Key Display (Optional)]. 24. Enter the administrator password if required. 25. Click [Apply].
11. Appendix 7. Close the Web browser. When LDAP Authentication is Specified When LDAP authentication is specified, only the users who can log in to the machine with correct user name and password can use the machine. If you want to enter the [User Tools] menu or use the copier, scanner, or fax functions, you must enter a valid user name and password to log in to the machine. When you are finished with using the machine, be sure to log out to prevent unauthorized users from using the machine.
Using the LDAP Authentication and Address Search Functions 2. Press [Yes]. Logging in using the printer, LAN-Fax, TWAIN driver When LDAP authentication is specified, make sure the user authentication settings are made on the printer, LAN-Fax, or TWAIN driver. • To configure printer or LAN-Fax driver’s default settings, log on using an account that has Manage Printers permission. Members of the Administrators group have Manage Printers permission by default.
11. Appendix • For details about TWAIN scanning operation, see p.195 "Scanning from a Computer". Specifying the LDAP Address Search Conditions LDAP address search allows you to retrieve addresses from the server when using the scanner or fax functions. To search for specific destinations from the programmed LDAP servers, you can configure search conditions using the control panel. 1. Press the [Scanner] key or [Facsimile] key.
Using the LDAP Authentication and Address Search Functions 2. Press the [Address Book] key. 操作部イラストは現状 PerMF3 のままです CES180 3. Press the [ ][ ] keys to select [Search LDAP], and then press the [OK] key. 4. To select a specific LDAP server, press the [ ][ ] keys to select [Select Server], and then press the [OK] key. 5. Press the [ ][ ] keys to select the desired LDAP server, and then press the [OK] key. 6.
11. Appendix The result of fuzzy search depends on the search method implemented in the LDAP server. To specify more search options, return to step 7. 10. Press the [User Tools] key to return to the initial screen. • If you perform LDAP address search without any specific search conditions, the search result will contain all destinations registered in the LDAP servers. • For details about entering characters, see p.123 "Entering Characters".
Specifications of the Machine Specifications of the Machine This section lists the machine's specifications. General Function Specifications Configuration Desktop Print process Laser electrostatic transfer Maximum paper size for scanning • Exposure glass A4, Letter (81/2 " × 11 ") • ARDF/ADF Legal (81/2 " × 14 ") Maximum paper size for printing Legal (81/2 " × 14 ") Warm-up time Less than 30 seconds (23 °C, 71.
11. Appendix Paper output capacity (80 g/m2, 20 lb.) Standard 125 sheets Paper input capacity (80 g/m2, 20 lb.) • Tray 1 250 sheets • Tray 2 (option) 250 sheets • Bypass tray 50 sheets ARDF/ADF capacity (80 g/m2, 20 lb.) • ARDF 50 sheets • ADF 35 sheets Paper weight • Tray 1 52 to 162 g/m2 (14 to 43.1 lb.) • Tray 2 (option) 60 to 105 g/m2 (16.0 to 28.0 lb.) • Bypass tray 52 to 162 g/m2 (14 to 43.1 lb.
Specifications of the Machine 70 W • Energy Saver mode 2 10 W Machine dimensions (Width × Depth × Height) 420 × 397 × 442 *1 mm (16.6 × 15.6 × 17.4 *1 inches) *1 If tray 2 is installed, the height increases by 89 mm (3.5 inches). Weight (machine body with consumables) • Type 1 model Approximately 17.1 kg (37.4 lb.) • Type 2 model Approximately 18.0 kg (39.6 lb.
11.
Specifications of the Machine 600 × 600 dpi Maximum resolution when scanning from a computer (TWAIN) • Exposure glass 19200 × 19200 dpi • ARDF/ADF 600 × 600 dpi Maximum resolution when scanning from a computer (WIA) • Exposure glass 600 × 600 dpi • ARDF/ADF 600 × 600 dpi Gradation Input: 16 bit color processing Output: 8 bit color processing Scanning time (600 dpi) Black and white: 5 seconds or less Color: 10 seconds or less 削除: (A4/200 dpi/Compressed) Not including transfer time.
11. Appendix Fax Function Specifications Fax transmission and reception Access line • Public switched telephone networks (PSTN) • Private branch exchange (PBX) Transmission mode ITU-T Group 3 (G3) Scan line density 8 dots per mm × 3.85 line per mm (200 × 100 dpi) 8 dots per mm × 7.7 line per mm (200 × 200 dpi) Transmission time 3–4 seconds (8 dots per mm × 3.85 line per mm, 33.6 kbps, MMR, ITU-T # 1 chart) Transfer rate 33.
Specifications of the Machine SMTP, TCP/IP • Reception POP3, TCP/IP Transmission function E-mail E-mail format Single/Multi-part, MIME Conversion Attached file forms (transmission): TIFF-S (MH encoding) Attached file forms (reception): TIFF-S/TIFF-F (MH/MR/MMR encoding) Authentication method SMTP-AUTH, POP before SMTP, A-POP Original size A4 (Length is up to 356 mm) Scan line density 8 dots per mm × 3.85 line per mm (200 × 100 dpi) 8 dots per mm × 7.
11. Appendix • Original size A4 • Resolution (dpi) 200 × 100, 200 × 200 11 460 rinmei-mf2_com_user_guide_gb_00059930_eng.
Specifications of Options Specifications of Options This section lists the specifications of the various options. Paper Feed Unit TK1080 Paper capacity 250 sheets Paper size A4, B5 JIS, A5, Legal (81/2 " × 14 "), Letter (81/2 " × 11 "), Half Letter (51/2 " × 81/2 ") Dimensions (Width × Depth × Height) 420 × 397 × 89 mm (16.6 × 15.6 × 3.5 inches) Paper weight 60 to 105 g/m2 (16.0 to 28.0 lb.) Weight Less than 2.4 kg (5.3 lb.) 11 rinmei-mf2_com_user_guide_gb_00059938_eng.
11. Appendix Electromagnetic Interference If this machine is located close to another electronic device, both devices may malfunction due electromagnetic interference. Televisions and radios may produce noise if located too close to this machine. If this happens, do the following: • Move the television or radio as far as possible from the machine. • Change the position of the antenna of the television or radio. • Use a different wall outlet on a different circuit.
No.91 並川さんより以下の連絡を頂きました。後日対応します。 ----------------------------------------------Copyright Information about Installed Applications LADP対応のためOpenLDAP、OpenSSLのオープンソースを使用しております。 詳細については別途、ご連絡させて頂きます。 Perseus-MF3/P2からの追加は、上記のOpenLDAP、OpenSSLになります。 Copyright Information about Installed Applications expat Copyright (c) 1998, 1999, 2000 Thai Open Source Software Centre, Ltd. and Clark Cooper. Copyright (c) 2001, 2002 Expat maintainers.
11. Appendix 1章から移動 アルファベット順にソート Trademarks Adobe, Acrobat, PostScript, and Reader are either registered trademarks or trademarks of Adobe Systems Incorporated in the United States and/or other countries. Apple, Bonjour, Macintosh, Mac OS, TrueType, and Safari are trademarks of Apple Inc., registered in the U.S. and other countries. Firefox® is a registered trademark of the Mozilla Foundation. LINUX® is the registered trademark of Linus Torvalds in the U.S. and other countries.
Trademarks Microsoft® Windows® 7 Ultimate Microsoft® Windows® 7 Enterprise • The product names of Windows Server 2003 are as follows: Microsoft® Windows Server® 2003 Standard Edition Microsoft® Windows Server® 2003 Enterprise Edition Microsoft® Windows Server® 2003 Web Edition Microsoft® Windows Server® 2003 Datacenter Edition • The product names of Windows Server 2003 R2 are as follows: Microsoft® Windows Server® 2003 R2 Standard Edition Microsoft® Windows Server® 2003 R2 Enterprise Edition Microsoft® Win
11. Appendix 11 466 rinmei-mf2_com_user_guide_gb_00059944_eng.
INDEX C 2-sided copy.................................................25, 158 2-sided copy (manual).......................................168 A About originals....................................................117 Address book..............................................175, 279 Address book (LAN-Fax)........227, 228, 229, 230, 231, 232 Address Book key..................................................38 ADF.........................................................................
Document type....................................................170 DupComb............................................................260 Duplex..................................................................318 E E-mail notification 1............................................338 E-mail notification 2............................................338 Economy color prints..........................................318 Electromagnetic interference..............................462 Encryption..................
IPv4 configuration...............................................289 IPv6 configuration...............................................289 IPv6 environment.................................................435 IPv6 settings.........................................................335 J JPEG LIBRARY......................................................463 L Label paper............................................................86 LAN-Fax.......................................
Paper mismatch..........................................136, 137 Paper recommendations.....................................117 Paper settings.......................................................322 Paper size....................................84, 113, 114, 115 Paper storage........................................................94 Paper tray............................................................317 Paper type...............................84, 86, 93, 113, 114 Paper weight............................
Search options.....................................................345 Select paper................................................260, 324 Select paper tray........................................272, 324 Selection key.......................................................... 38 Set date................................................................361 Set date/time......................................................301 Set time.................................................................
MEMO 472 EN GB EN US XXXX Draft 2011/08/29
Draft 2011/08/29
EN GB EN US XXXX © 2011 Draft 2011/08/29