Operating Instructions General Settings Guide 1 Getting Started 2 Combined Function Operations 3 User Tools ( System Settings ) 4 Troubleshooting 5 Other Functions 6 Specifications Read this manual carefully before you use this machine and keep it handy for future reference. For safe and correct use, be sure to read the Safety Information in the "Copy Reference" before using the machine. Downloaded From ManualsPrinter.
Introduction This manual contains detailed instructions and notes on the operation and use of this machine. For your safety and benefit, read this manual carefully before using the machine. Keep this manual in a handy place for quick reference. Important Contents of this manual are subject to change without prior notice. In no event will the company be liable for direct, indirect, special, incidental, or consequential damages as a result of handling or operating the machine.
Manuals for This Machine The following manuals describe the operational procedures of this machine. For particular functions, see the relevant parts of the manual. Note ❒ Manuals provided are specific to machine type. ❒ Adobe Acrobat Reader is necessary to view the manuals as a PDF file. ❖ General Settings Guide (this manual) Provides an overview of the machine and describes System Settings (paper trays, Key Operator Tools, etc.), and troubleshooting.
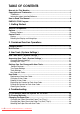
TABLE OF CONTENTS Manuals for This Machine ......................................................................................i Copyrights and Trademarks .................................................................................1 Trademarks ................................................................................................................1 Information about Installed Software..........................................................................1 How to Read This Manual ...........
. Other Functions Other Functions ...................................................................................................41 Displaying the Total Counter....................................................................................41 Changing the Language...........................................................................................41 6. Specifications Main Unit...............................................................................................................
iv Downloaded From ManualsPrinter.
Copyrights and Trademarks Trademarks Microsoft®, Windows® and Windows NT® are registered trademarks of Microsoft Corporation in the United States and/or other countries. Acrobat® is a registered trademark of Adobe Systems Incorporated. Bluetooth™ is a trademark of the Bluetooth SIG, Inc. (Special Interest Group) and is used by RICOH Company Limited under license. Copyright ©2001 Bluetooth SIG, Inc. The Bluetooth Trademarks are owned by Bluetooth SIG, Inc. USA.
• Information relating to the expat is available at: http://expat.sourceforge.net/ Copyright (c) 1998, 1999, 2000 Thai Open Source Software Centre, Ltd. and Clark Cooper.
NetBSD 1. Copyright Notice of NetBSD For all users to use this product: This product contains NetBSD operating system: For the most part, the software constituting the NetBSD operating system is not in the public domain; its authors retain their copyright. The following text shows the copyright notice used for many of the NetBSD source code. For exact copyright notice applicable for each of the files/binaries, the source code tree must be consulted. A full source code can be found at http://www.netbsd.org/.
2. Authors Name List All product names mentioned herein are trademarks of their respective owners. The following notices are required to satisfy the license terms of the software that we have mentioned in this document: • This product includes software developed by the University of California, Berkeley and its contributors. • This product includes software developed by Jonathan R. Stone for the NetBSD Project. • This product includes software developed by the NetBSD Foundation, Inc. and its contributors.
Sablotron Sablotron (Version 0.82) Copyright (c) 2000 Ginger Alliance Ltd. All Rights Reserve a) The application software installed on this product includes the Sablotron software Version 0.82 (hereinafter, “Sablotron 0.82”), with modifications made by the product manufacturer. The original code of the Sablotron 0.82 is provided by Ginger Alliance Ltd., the initial developer, and the modified code of the Sablotron 0.82 has been derived from such original code provided by Ginger Alliance Ltd.
SASL CMU libsasl Tim Martin Rob Earhart Rob Siemborski Copyright (c) 2001 Carnegie Mellon University. All rights reserved. Redistribution and use in source and binary forms, with or without modification, are permitted provided that the following conditions are met: A Redistributions of source code must retain the above copyright notice, this list of conditions and the following disclaimer.
MD4 Copyright (C) 1990-2, RSA Data Security, Inc. All rights reserved. License to copy and use this software is granted provided that it is identified as the “RSA Data Security, Inc. MD4 Message-Digest Algorithm” in all material mentioning or referencing this software or this function. License is also granted to make and use derivative works provided that such works are identified as “derived from the RSA Data Security, Inc.
How to Read This Manual Symbols The following set of symbols is used in this manual. R WARNING: This symbol indicates a potentially hazardous situation that might result in death or serious injury when you misuse the machine without following the instructions under this symbol. Be sure to read the instructions, all of which are described in the Safety Information section.
ENERGY STAR Program ENERGY STAR® Program The ENERGY STAR® Program encourages energy conservation by promoting energy efficient computers and other office equipment. The program backs the development and dissemination of products that feature energy saving functions. It is an open program in which manufacturers participate voluntarily. Targeted products are computers, monitors, printers, facsimiles, copiers, scanners, and multifunction devices. Energy Star standards and logos are internationally uniform.
• Duplex Priority To conserve paper, the Duplex function (1-Sided → 2-Sided) can be selected preferentially when you turn on the operation switch or the main power switch, press the {Clear Modes} key, or the machine resets itself automatically. To change Duplex Mode Priority, see Copy Reference.
1. Getting Started Guide to Components ARK023S 1. Exposure glass cover (optional) or ARDF (optional). 4. Ventilation holes Place originals here face down. Prevents overheating. Do not obstruct the ventilation holes by placing objects near them or leaning things against them. If the machine overheats, a fault might occur. 3. Internal tray 5. Main power switch See p.13 “External Options” 2. Exposure glass Copied or printed paper is delivered here. Downloaded From ManualsPrinter.
Getting Started 1 6. Main power indicator 9. Front cover Lights when the main power switch is turned on, and goes off when the switch is turned off. Open to access the inside of the machine. 7. Operation switch (On indicator) Press to turn the power on (the On indicator lights). To turn the power off, press again (the On indicator goes off). 8. Control panel See p.14 “Control Panel”. 10. Paper tray (Tray 1) Load paper here. 11. Paper tray unit (optional) See p.13 “External Options”. 12.
Options Options External Options 1 1 2 3 ARK025S 1. Exposure glass cover 3. Paper tray unit (Tray 2) Lower this cover over originals. Holds 500 sheets. 2. ARDF Place stacks of originals here. They will feed in automatically. This document feeder can be used for two-sided originals. Downloaded From ManualsPrinter.
Getting Started Control Panel 1 This illustration shows the control panel of the machine with options fully installed. 1 23 4 5 13 14 6 7 15 16 17 18 8 19 9 10 11 12 20 21 ARK001S 1. {Copy} key 8. {User Tools/Counter} key Press to activate the copy function. • User Tools Press to change default or operation parameters according to requirement. See p.21 “Accessing User Tools ( System Settings )”. • Counter Press to check or print the counter value. See p.41 “Other Functions”. 2.
Control Panel 13. {On Line} key Reference Printer/Scanner Reference 14. Copier function keys Reference Copy Reference 15. {Lighter} and {Darker} keys Press to change the image density setting. Select the image density in five increments, Lighter to Darker. 16. {Escape} key Press to cancel an operation or return to the previous display. 17. {Original Type} key Press to select the original type registered in [Original Type 1 (Text)] or [Original Type 2 (Photo)].
Getting Started Reading the Display and Using Keys This section explains how to read the display and use the Selection keys. 1 1 2 3 4 AAA001S 1. Selection keys 2. {Escape} key Correspond to items at the bottom line on the display. Example: The Copy display Press to cancel an operation or return to the previous display. • When the instruction “press [Reduce] ” appears in this manual, press the left selection key.
2. Combined Function Operations Changing Modes Note ❒ You cannot switch modes in any of the following situations: • During immediate transmission • When accessing User Tools • While scanning an original ❒ The copying screen is displayed as default when the power is turned on. You can change this default setting. See p.23 “Function Priority”. ARK003S -System Reset The machine returns automatically to its initial condition when the job is finished, after a certain period of time has elapsed.
Combined Function Operations Multi-Access 2 You can carry out another job using a different function while the current job is being performed. Performing multiple functions simultaneously like this is called “Multi-accessing”. This allows you to handle jobs efficiently, regardless of how the machine is being used. For example: • You can make copies while receiving printer data. • While printing, you can make operations for copying. Note ❒ See p.23 “Print Priority” for setting function priority.
3. User Tools ( System Settings ) User Tools Menu ( System Settings ) Reference For details about parallel interface, see Printer/Scanner Reference. ❖ General Features (See p.23 “General Features”.) Default (MFP) Default (Copier only) Panel Key Sound On Copy Count Display Up Function Priority Copier Print Priority Display mode Display Contrast Centre Key Repeat On Measurement Unit Metric version: mm Inch verion: inch ❖ Tray Paper Settings (See p.24 “Tray Paper Settings”.
User Tools ( System Settings ) ❖ Key Operator Tools (See p.26 “Key Operator Code”.) Default (MFP) Default (Copier only) User Code Man.:Copier Off Off Key Counter Management All Off Off Key Operator Code Off Display/Print Counter — Counter per User Code 3 Display — — Print — — Clear — — Program/Change User Code Program — Change — Delete — AOF (Always On) 20 Downloaded From ManualsPrinter.
Accessing User Tools ( System Settings ) Accessing User Tools ( System Settings ) This section is for key operators in charge of this machine. User Tools allow you to change or set defaults. Note ❒ Operations for system settings differ from normal operations. Always quit User Tools when you have finished. See p.22 “Quitting User Tools”. ❒ Any changes you make with User Tools remain in effect even if the main power switch or operation switch is turned off, or the {Clear Modes} key is pressed.
User Tools ( System Settings ) Quitting User Tools A Press the {User Tools/Counter} key. 3 ARK004S 22 Downloaded From ManualsPrinter.
Settings You Can Change with User Tools Settings You Can Change with User Tools Reference To access User Tools, see p.21 “Accessing User Tools ( System Settings )”. General Features ❖ Panel Key Sound The beeper (key tone) sounds when a key is pressed. 3 Note ❒ Default: On ❖ Copy Count Display The copy counter can be set to show the number of copies made (count up), or the number of copies yet to be made (count down).
User Tools ( System Settings ) ❖ Measurement Unit You can switch the measurement between “mm” and “inch”. Note ❒ Default: • Metric version: mm • Inch version: inch Tray Paper Settings 3 ❖ Paper Size: Tray 1–2 Select the size of the paper loaded in the paper tray.
Settings You Can Change with User Tools ❖ Ppr Tray Priority:Copier (copier) You can specify the tray to supply paper for output. Note ❒ Default: Tray 1 ❖ Ppr Tray Priority:Printer (printer) You can specify the tray to supply paper for output. Note ❒ Default: Tray 1 3 Timer Settings ❖ Auto Off Timer After a specified period has passed, following job completion, the machine automatically turns off, in order to conserve energy. This function is called “Auto Off”.
User Tools ( System Settings ) ❖ System Auto Reset Timer The System Reset setting automatically switches the screen to that of the function set in Function Priority when no operations are in progress, or when an interrupted job is cleared. This setting determines the system reset interval. See p.23 “Function Priority”. 3 Note ❒ Default: On, 60 sec. ❒ The time can be set from 10 to 999 seconds in 1 second increments, using the number keys.
Settings You Can Change with User Tools ❖ Key Operator Code Specify whether or not to use passwords (max. eight digits) to control Key Operator Tools settings for key operator code. Note ❒ Default: Off ❒ If you select [On], enter the key operator code (max. eight digits) using the number keys, and then select [On:Partial] or [On:All] to set the access limit.
User Tools ( System Settings ) C Select [Key Operator Tools] using {U} or {T}, and then press the {OK} key. D Select [Display/Print Counter] using {U} or {T}, and then press the {OK} key. E Press [Print]. F Press the {Start} key. G Press the {User Tools/Counter} key. 3 28 Downloaded From ManualsPrinter.
Settings You Can Change with User Tools ❖ Counter per User Code Allows you to view and print the numbers of prints accessed with user codes, and to set those values to 0. Note ❒ Press {U} and {T} to show all the numbers of prints. ❒ The number of prints may differ from the counter value shown in Display/Print Counter. • Print counter per user code Prints the number of prints made under each user code. • Clear counter per user code Sets the number of prints made under each user code to 0.
User Tools ( System Settings ) User Code Register user codes to restrict copier functions to certain users, and check on their use of copier functions: E Select [Program] using {U} or {T}, and then press the {OK} key. Registering a New User Code 3 A Press the {User Tools/Counter} key. F Enter the user code using the number keys, and then press the {OK} or {#} key. ARK004S B Select [System Settings] using {U} or {T}, and then press the {OK} key.
User Code F Enter the registered user code you want to change using the number keys, and then press the {OK} or {#} key. C Select [Key Operator Tools] using {U} or {T}, and then press the {OK} key. D Select [Program/Change User Code] using {U} or {T}, and then press the {OK} key. E Select [Delete] using {U} or {T}, and then press the {OK} key. Note ❒ When you select the user code from the User Code List, press [List].
User Tools ( System Settings ) Displaying the Counter for Each User Code You can check the counter for each user code. A Press the {User Tools/Counter} key. B Select [System Settings] using {U} 3 or {T}, and then press the {OK} key. D Select [Counter per User Code] using {U} or {T}, and then press the {OK} key. E Select [Print] using {U} or {T} and then press the {OK} key. F Press the {Start} key. The counter list prints out. G Press the {User Tools/Counter} key.
4. Troubleshooting If Your Machine Does Not Operate As You Want The following chart gives explanations of common problems and messages. If other messages appear, follow the instructions displayed. Note ❒ For further “Troubleshooting”, refer to the other manuals for this machine. See p.i “Manuals for This Machine”. Problem Causes Solutions “ Please wait. ” appears. This message appears Wait for the machine to get ready. when you turn on the operation switch or change the toner bottle.
Troubleshooting Problem Causes Solutions Misfeeds occur frequently. Copy paper size setting is not correct. Set the proper paper size. See p.24 “Paper Size: Tray 1–2” and p.48 “Copy Paper”. The tray's back fence may not be set properly. Check the back fence is set properly. See p.37 “Changing the Paper Size”. An error message remains, even if misfed paper is removed. When a misfeed message Clear misfed paper, and then open appears, it remains until and close the front cover. See p.
x Clearing Misfeeds x Clearing Misfeeds 4 ARK028S R CAUTION: • The fusing section of this machine might be very hot. Caution should be taken when removing misfed paper. Important ❒ When clearing misfeeds, do not turn off the power switch. If you do, your copy settings are cleared. ❒ To prevent misfeeds, do not leave any torn scraps of paper inside the machine. ❒ If paper misfeeds occur repeatedly, contact your service representative. Note ❒ More than one misfeed area may be indicated.
Troubleshooting 4 1 1 2 3 4 5 6 1 2 1 2 2 ARK029S 36 Downloaded From ManualsPrinter.
Changing the Paper Size Changing the Paper Size Preparation Be sure to select the paper size with User Tools and the paper size selector. If you do not, misfeeds might occur. See p.24 “Paper Size: Tray 1–2”. When using A4L size paper A Place the back fence in the corner pocket on the left. Reference For details about paper sizes and types, see p.48 “Copy Paper”. 4 Changing the Paper Size of the Paper Tray (Tray 1) ARK012S A Make sure the paper tray is not in use.
Troubleshooting F Square the paper and load it in the tray. H While pressing the release lever, set the back fence to the new size. ARK015S 4 Important ❒ Be sure to set the paper under the roller. ❒ Do not stack paper over the limit mark. G While pressing the release lever, adjust the side fences to the new paper size. ARK017S I Push the paper tray in until it stops. Changing the Paper Size in the Paper Tray Unit (Tray 2) A Make sure the paper tray is not in use.
Changing the Paper Size When loading 81/4" × 14"L or 81/2" × 14"L size paper A Pull the back fence off from the tray. B Place it in the corner pocket on the left. Important ❒ Do not stack paper over the limit mark. ❒ Load paper so that the paper touches the right side of the tray, or misfeeds might occur. F While pinching the release lever, adjust the side and back fences to the new paper size. 4 D While pressing the release lever, adjust the side fences.
Troubleshooting Selecting the Paper Size with User Tools E Select the paper size using the scroll keys, and then press the {OK} key. A Press the {User Tools/Counter} key. The “Programmed ” message appears. F Press the {User Tools/Counter} key. 4 ARK004S B Select [System Settings] using {U} or {T}, and then press the {OK} key. C Select [Tray Paper Settings] using {U} or {T}, and then press the {OK} key.
5. Other Functions Other Functions Displaying the Total Counter E Press the {User Tools/Counter} key. You can display the total counter value used for all functions. Changing the Language A Press the {User Tools/Counter} key. You can change the language used on the display. English is set as default. A Press the {User Tools/Counter} key. ARK004S B Select [Counter] using {U} or {T}, and then press the {OK} key. ARK004S B Select [Language] using {U} or {T}, and then press the {OK} key.
Other Functions 5 42 Downloaded From ManualsPrinter.
6.
Specifications ❖ Copy paper size: • Trays: A4L, B5 JISL, A5K, 81/2" × 11"L, 51/2" × 81/2"K, 16KL • Bypass: A4L, A5KL, B5 JISL, 81/2" × 14"L, 81/2" × 11"L, 51/2" × 81/2"KL, 71/4" × 101/2"L, 8" × 13"L, 81/2" × 13"L, 81/4" × 13"L, 81/4" × 14"L, 16KL, 41/8" × 91/2"L, 37/8" × 71/2"L, C5 EnvL, C6 EnvL, DL EnvL • Bypass (custom size): Vertical: 90 – 216 mm, 3.5" – 8.5" Horizontal: 140 – 600 mm, 5.6" – 23.
Main Unit ❖ Copy paper capacity: • Tray 1: 250 sheets (80 g/m2, 20 lb) • Bypass: 100 sheets (80 g/m2, 20 lb) ❖ Power consumption: Main unit only Complete system *1 Warm up Less than 900 W Less than 900 W Stand-by About 70 W About 75 W During printing About 360 W About 360 W Maximum Less than 900 W Less than 900 W *1 Main unit with the optional ARDF, printer/scanner unit, and paper tray unit. ❖ Dimensions (W × D × H up to exposure glass): Main unit only: 485 × 450 × 371 mm, 19.1 × 17.8 × 14.
Specifications Options Exposure Glass Cover Lower this over originals.
Options Paper Tray Unit (Tray 2) ❖ Paper weight: 60 – 90 g/m2 (16 – 24 lb.) ❖ Paper size: A4L, 81/2" × 14"L, 81/2" × 13"L, 81/2" × 11"L, 81/4" × 13"L, 81/4" × 14"L ❖ Maximum power consumption: 15 W (power is supplied from the main frame) ❖ Paper capacity: 500 sheets (80 g/m2, 20 lb) ❖ Dimensions (W × D × H): 430 × 414 × 140 mm, 17.0 × 16.3 × 5.6 inch ❖ Weight: 6 kg (13.3 lb) or less Note ❒ Specifications are subject to change without notice.
Specifications Copy Paper Recommended Paper Sizes and Types The following limitations apply to each tray: Metric version Paper tray 1 Inch version A4L, B5 JISL, A5K, 81/2" × 11"L, 51/2" × 81/2"K, 16KL Paper weight Paper capacity 60 – 90 g/m2, 16 – 24 lb 250 sheets *1 60 – 90 g/m2, 16 – 24 lb 500 sheets *1 72 – 90 g/m2, 19 – 24 lb 100 sheets *1 Note ❒ You can specify the paper size with the User Tools. See p.40 “Selecting the Paper Size with User Tools”.
Copy Paper Important ❒ If you use damp or curled paper, a misfeed might occur. In such a case, try turning over the paper stack in the paper tray. If there is no improvement, change to copy paper with less curl. Note ❒ When using the bypass tray, we recommend you set the copy paper direction to L. ❒ When printing on envelopes, note the following: • Load the envelope with the copy side face down on the bypass tray. • Check that envelope flap is securely folded up.
Specifications Unusable Paper R CAUTION: • Do not use aluminum foil, carbon paper, or similar conductive paper to avoid a fire or machine failure. Important ❒ Do not use any of the following kinds of paper or a fault might occur: • Art paper • Aluminum foil • Carbon paper • Conductive paper ❒ Do not use copy paper that has been already copied on. Otherwise, a paper misfeed might occur. Note ❒ Do not use any of the following kinds of paper or a misfeed might occur.
INDEX A Accessing user tools ( System Settings ), 21 AOF (Always On), 29 ARDF, 13, 46 Auto off timer, 25 Auto reset timer, 26 copier, 26 B Bypass tray, 12 C Changing a user code, 30 Changing default settings, 21 Changing modes, 17 Changing the language, 41 Changing the paper size, 37 Changing the Paper Size in the Paper Tray Unit (Tray 2), 38 Changing the Paper Size of the Paper Tray (Tray 1), 37 Clearing misfeeds, 35 Clearing the counter, 32 Combined function operations, 17 Common key operations, 16 Cont
P Panel Key Sound, 23 Paper size, 24 Paper Storage, 50 Paper tray, 12 Paper tray priority copier, 25 printer, 25 Paper tray unit, 12 Paper tray unit (Tray 2), 13, 47 Paper type Bypass tray, 24 Printing the counter for each user code, 32 Print Priority, 23 Program/Change User Code, 29 Q Quitting user tools, 22 R Reading the display and using keys, 16 Recommended paper sizes and types, 48 Registering a new user code, 30 Right cover, 12 S Settings you can change with user tools, 23 Specifications, 43 System
Declaration of Conformity “The Product complies with the requirements of the EMC Directive 89/336/EEC and its amending directives and the Low Voltage Directive 73/23/EEC and its amending directives.” In accordance with IEC 60417, this machine uses the following symbols for the main power switch: a means POWER ON. c means STAND BY. Copyright © 2006 Downloaded From ManualsPrinter.
Operating Instructions General Settings Guide GB GB B280-7600A Downloaded From ManualsPrinter.