
User's Manual


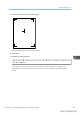


Table Of Contents
- 6. Troubleshooting
- 7. Maintenance and Specifications
- General Requirements
- Moving the Printer
- Cleaning the Printer
- Adjusting the Color Registration
- Correcting the Color Gradation
- Adjusting Printing Position
- Replenishing and Replacing Consumables
- Consumables
- Specifications
- Information for This Printer
- User Information on Electrical & Electronic Equipment
- EMC Directive
- Note for the Battery and/or Accumulator Symbol (For EU countries only)
- Environmental Advice for Users
- Notes for users in the state of California
- ENERGY STAR Program
- Environmental protection expiration date for use
- Fixed form sentences 11 _ china environmental labeling notice _ LP_Title Sentence 1
- Appendix

4. Setting value
The value displayed is the one currently set when the gradation correction sheet is printed. This value
matches the one set on the control panel.
Setting Gradation Correction Values
Correct the gradation in two areas: bright areas (highlights), and medium areas (midtones). [Print Test
Pattern 1] or [Print Test Pattern 1 for Calibration] is used to set the correction value for highlights, and
[Print Test Pattern 2] or [Print Test Pattern 2 for Calibration] is used for mid tones.
Press the [Menu] key, and then select the setting items using the [ ] or [ ] key.
1. Select [Maintenance] Press [OK]
2. Select [Quality Maintenance] Press [OK]
3. Select [Color Calibration] Press [OK]
4. Select [Adj.Auto Dens.] Press [OK]
A confirmation message appears. Press [OK] to adjust Auto Density.
A confirmation message appears when the adjustment is complete. Press [Exit].
The display returns to the [Color Calibration] screen.
5. Select [Print Test Pattern 1] Press [OK]
6. Press [Print].
7. Compare the colors printed on gradation correction sheet 1 with the colors you want to
reproduce.
When the selected sheet is printed, a confirmation message will appear.
8. Press [Continue].
9. Select the color you want to adjust Press [OK]
10. Adjust the correction value Press [OK]
11. Press [Result].
12. Press [Print].
13. Check the result by printing the calibration sheet.
14. Press [Yes].
15. Select [Print Test Pattern 2] Press [OK]
Adjust the midtones on gradation correction sheet 2 by repeating the procedure you used to adjust
the color values on gradation correction sheet 1.
Correcting the Color Gradation
midas-p3_com_operating_instructions_gb_00198792_eng.xml 443
Draft 2016/01/18