
User's Manual
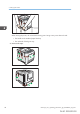
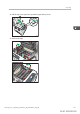
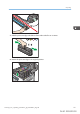
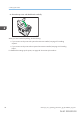

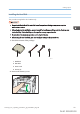
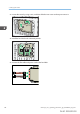
Table Of Contents
- TABLE OF CONTENTS
- 1. Getting Started
- Before You Start
- Manuals for This Machine
- Guide to Names and Functions of Components
- Using the Screen on the Control Panel
- Logging in to the Printer
- User Code Authentication Using the Control Panel
- User Code Authentication Using a Printer Driver
- Logging In Using the Control Panel
- Logging Out Using the Control Panel
- Logging In Using a Printer Driver
- Logging In Using Web Image Monitor
- Logging Out Using Web Image Monitor
- User Lockout Function
- Changing the Login Password
- Downloading Utility Software
- 2. Setting Up the Printer
- Printer Set Up Procedure
- Install Location
- Checking the Contents of the Box
- Unpacking
- Installing Options
- Connecting the Power Cord
- Turning On/Off the Power
- Selecting the Display Language
- Connecting the Printer
- Configuration
- Test Printing
- 3. Loading Paper

Installing the Hard Disk
This procedure is applied to SP C342DN only.
• Do not touch the inside of the controller board compartment. Doing so may cause a printer
malfunction or a burn.
• Before beginning the installation, ground yourself by touching something metal to discharge any
static electricity. Static electricity can damage the memory expansion units.
• Do not subject the memory expansion unit to physical shocks.
• Before using the new hard disk, you must configure settings in the printer driver.
1. Check the contents of the package.
4321
DPP016
1. Hard disk
2. Flat cable
3. Power cord
4. Screws (3)
2. Remove the memory cover.
DFP017
Installing Options
midas-p3_com_operating_instructions_gb_00198474_eng.xml 59
Draft 2016/01/18