
User's Manual
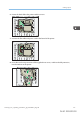
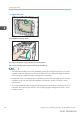

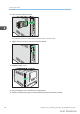
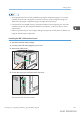
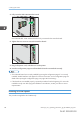

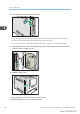

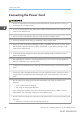
Table Of Contents
- TABLE OF CONTENTS
- 1. Getting Started
- Before You Start
- Manuals for This Machine
- Guide to Names and Functions of Components
- Using the Screen on the Control Panel
- Logging in to the Printer
- User Code Authentication Using the Control Panel
- User Code Authentication Using a Printer Driver
- Logging In Using the Control Panel
- Logging Out Using the Control Panel
- Logging In Using a Printer Driver
- Logging In Using Web Image Monitor
- Logging Out Using Web Image Monitor
- User Lockout Function
- Changing the Login Password
- Downloading Utility Software
- 2. Setting Up the Printer
- Printer Set Up Procedure
- Install Location
- Checking the Contents of the Box
- Unpacking
- Installing Options
- Connecting the Power Cord
- Turning On/Off the Power
- Selecting the Display Language
- Connecting the Printer
- Configuration
- Test Printing
- 3. Loading Paper

5. Fully insert the interface board.
DPP027
Check that the interface board is firmly connected to the controller board.
6. Tighten the two screws to secure the interface board.
DPP028
7. Attach the cable cover.
DPP029
8. Plug in the power cord, and then turn on the printer.
9. Print the configuration page to confirm that the board was attached correctly.
2. Setting Up the Printer
64 midas-p3_com_operating_instructions_gb_00198474_eng.xml
Draft 2016/01/18