
User's Manual
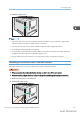
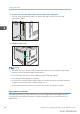
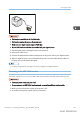
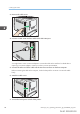
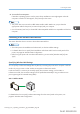
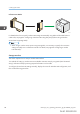
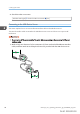

Table Of Contents
- TABLE OF CONTENTS
- 1. Getting Started
- Before You Start
- Manuals for This Machine
- Guide to Names and Functions of Components
- Using the Screen on the Control Panel
- Logging in to the Printer
- User Code Authentication Using the Control Panel
- User Code Authentication Using a Printer Driver
- Logging In Using the Control Panel
- Logging Out Using the Control Panel
- Logging In Using a Printer Driver
- Logging In Using Web Image Monitor
- Logging Out Using Web Image Monitor
- User Lockout Function
- Changing the Login Password
- Downloading Utility Software
- 2. Setting Up the Printer
- Printer Set Up Procedure
- Install Location
- Checking the Contents of the Box
- Unpacking
- Installing Options
- Connecting the Power Cord
- Turning On/Off the Power
- Selecting the Display Language
- Connecting the Printer
- Configuration
- Test Printing
- 3. Loading Paper

5. Attach the cable cover.
DPP029
• This printer does not come with a USB interface cable. Make sure you purchase the appropriate
cable for the printer (connector shape) and your computer.
• Use a five meter (16.4 foot) or shorter cable that supports USB 2.0 (Type B) interface.
• Check the type of the plug before connecting.
• Do not pull the connected cable forcefully. Make sure the cable is properly connected. Otherwise,
it might become disconnected or somebody might trip on it.
• Using a cable with some connectors or converters may result in an improper connection.
Connecting a Device to the Printer's USB Host Interface
This section explains how to connect a device to the printer's USB host interface.
• When connecting the card authentication device, be sure to turn off the main power.
• When connecting a digital camera, make sure the printer and the digital camera are turned on.
1. Make sure the power is switched off.
2. Remove the cable cover.
DPP025
Connecting the Printer
midas-p3_com_operating_instructions_gb_00198490_eng.xml 81
Draft 2016/01/18