
User's Manual

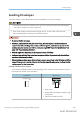


Table Of Contents
- TABLE OF CONTENTS
- 1. Getting Started
- Before You Start
- Manuals for This Machine
- Guide to Names and Functions of Components
- Using the Screen on the Control Panel
- Logging in to the Printer
- User Code Authentication Using the Control Panel
- User Code Authentication Using a Printer Driver
- Logging In Using the Control Panel
- Logging Out Using the Control Panel
- Logging In Using a Printer Driver
- Logging In Using Web Image Monitor
- Logging Out Using Web Image Monitor
- User Lockout Function
- Changing the Login Password
- Downloading Utility Software
- 2. Setting Up the Printer
- Printer Set Up Procedure
- Install Location
- Checking the Contents of the Box
- Unpacking
- Installing Options
- Connecting the Power Cord
- Turning On/Off the Power
- Selecting the Display Language
- Connecting the Printer
- Configuration
- Test Printing
- 3. Loading Paper
- 4. Printing
- Displaying the Printer Driver Settings Screen
- Standard Printing
- Convenient Print Functions
- Printing on Both Sides of a Page
- Combining Multiple Pages onto a Single Page
- Poster
- Booklet Printing
- Collate
- Conserving Toner when Printing
- Watermarks
- Printing Documents that Are Not Authorized for Duplication
- Cover Sheet
- Slip Sheets
- Registering Classification Codes
- Banner Page
- Using Convenient Print Functions with Windows (PCL 6/PostScript 3)
- Using Convenient Print Functions with Windows (PCL 5e/5c)
- Using Convenient Print Functions with Mac OS X
- Printing on Envelopes
- Spool Printing
- Specifying the Printer Behavior
- Printing Stored Documents
- Managing Jobs
- Printing Files from a Memory Storage Device
- Canceling a Print Job
- If an Error Occurs with the Specified Paper Size and Type
- Checking Error Logs
- 5. Configuring and Managing the Printer
- Displaying the Printer Configuration Screens Using the Control Panel
- Printer Configuration Items List (SP C340DN)
- Function Details of the Printer Configuration Items (SP C340DN)
- Printer Configuration Items List (SP C342DN)
- System Settings (SP C342DN)
- Printer Features (SP C342DN)
- XPS Menu (SP C342DN)
- Extended Feature Settings (SP C342DN)
- Address Book Mangmnt (SP C342DN)
- Tray Paper Settings (SP C342DN)
- Edit Home (SP C342DN)
- Remote Services (SP C342DN)
- Switch Display Language (SP C342DN)
- Maintenance: Print (SP C342DN)
- Maintenance: Image (SP C342DN)
- Function Details of the Printer Configuration Items (SP C342DN)
- Using a Print Server
- Monitoring and Configuring the Printer
- Registering the Address Book
- Setting Up LDAP Authentication
- 6. Troubleshooting
- 7. Maintenance and Specifications
- General Requirements
- Moving the Printer
- Cleaning the Printer
- Adjusting the Color Registration
- Correcting the Color Gradation
- Adjusting Printing Position
- Replenishing and Replacing Consumables
- Consumables
- Specifications
- Information for This Printer
- User Information on Electrical & Electronic Equipment
- EMC Directive
- Note for the Battery and/or Accumulator Symbol (For EU countries only)
- Environmental Advice for Users
- Notes for users in the state of California
- ENERGY STAR Program
- Environmental protection expiration date for use
- Fixed form sentences 11 _ china environmental labeling notice _ LP_Title Sentence 1
- Appendix
• For details about the available paper size, see page 106 "Paper Size Specifications".
Specifying Custom Size Paper
Press the [Menu] key, and then select the setting items using the [ ] or [ ] key.
1. Select [Paper Input] Press [OK]
2. Select [Paper Size: (tray name)] Press [OK]
3. Select [Custom Size] Press [OK]
4. Enter the horizontal value Press [OK]
5. Enter the vertical value Press [OK]
1. Press the [User Tools] key, and then display the [Tray Paper Settings] screen.
[System Settings] [Tray Paper Settings]
2. Specify the paper size and feed direction.
[Tray Paper Size: (tray name)] [Custom Size] [Vertical] Enter the vertical dimension of the
paper [OK] [Horizontal] Enter the horizontal dimension of the paper [OK]
3. Press [OK] twice.
• For details about the available paper size, see page 106 "Paper Size Specifications".
Specifying a Paper Type
You can improve printer performance by selecting the optimum paper type for the tray.
Press the [Menu] key, and then select the setting items using the [ ] or [ ] key.
1. Select [Paper Input] Press [OK]
2. Select [Paper Type: (tray name)] Press [OK]
3. Select the type of the paper set in the specified tray Press [OK]
The setting is complete when specifying the following types of paper:
3. Loading Paper
126 midas-p3_com_operating_instructions_gb_00198521_eng.xml
Draft 2016/01/18