User Guide Guide to the Machine Loading Paper Printing Documents Configuring the Machine Using Utilities Maintaining the Machine Troubleshooting Appendix For safe and correct use, be sure to read "Safety Information" before using the machine.
TABLE OF CONTENTS How to Read This Manual................................................................................................................................. 5 Introduction..................................................................................................................................................... 5 Legal Prohibition............................................................................................................................................. 5 Disclaimer....
Loading Envelopes.......................................................................................................................................34 Specifying Paper Type and Paper Size Using Smart Organizing Monitor.............................................37 3. Printing Documents Basic Operation............................................................................................................................................... 39 Canceling a Print Job....................................
6. Troubleshooting Common Problems........................................................................................................................................... 73 Paper Feed Problems....................................................................................................................................... 74 Removing Printing Jams............................................................................................................................... 76 Print Quality Problems..
Trademarks.....................................................................................................................................................110 INDEX...........................................................................................................................................................
How to Read This Manual Introduction This manual contains detailed instructions and notes on the operation and use of this machine. For your safety and benefit, read this manual carefully before using the machine. Keep this manual in a handy place for quick reference. Legal Prohibition Do not copy or print any item for which reproduction is prohibited by law.
Note to Administrator Password When you log in to this printer, you will be prompted to enter the password. We strongly recommend you to change the factory default password immediately to prevent information leakage and unauthorized operations by others. You will be prompted to enter your password when you attempt to change printer settings configured using Web Image Monitor. To use the factory default password, leave the password blank when using Web Image Monitor.
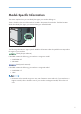
Model-Specific Information This section explains how you can identify the region your machine belongs to. There is a label on the rear of the machine, located in the position shown below. The label contains details that identify the region your machine belongs to. Read the label. CVW058 The following information is region-specific. Read the information under the symbol that corresponds to the region of your machine.
Important Safety Instructions User Information on Electrical & Electronic Equipment Users in the countries where this symbol shown in this section has been specified in national law on collection and treatment of E-waste Our Products contain high quality components and are designed to facilitate recycling. Our products or product packaging are marked with the symbol below. The symbol indicates that the product must not be treated as municipal waste.
Environmental Advice for Users Users in the EU, Switzerland and Norway Consumables yield Please refer to either the User’s Manual for this information or the packaging of the consumable. Recycled paper The machine can use recycled paper which is produced in accordance with European standard EN 12281:2002 or DIN 19309. For products using EP printing technology, the machine can print on 64g/m2 paper, which contains less raw materials and represents a significant resource reduction.
Note for the Battery and/or Accumulator Symbol (For EU countries only) In accordance with the Battery Directive 2006/66/EC Article 20 Information for end-users Annex II, the above symbol is printed on batteries and accumulators. This symbol means that in the European Union, used batteries and accumulators should be disposed of separately from your household waste. In the EU, there are separate collection systems for not only used electrical and electronic products but also batteries and accumulators.
Important Safety Instructions Notes to Users in the State of California Perchlorate Material - special handling may apply. See: www.dtsc.ca.
12
1. Guide to the Machine Guide to Components This section introduces the names of the various parts on the front and rear side of the machine and outlines their functions. Exterior 1 2 15 14 13 12 11 3 4 10 9 8 7 6 5 CVW036 1. Standard Tray Printed paper is output here. Up to 125 sheets of plain paper can be stacked here. 2. Stop Fences Raise this fence to prevent paper from falling off. 3. USB Port Use a USB cable to connect the printer to the host computer. 4.
1. Guide to the Machine 5. Rear Cover Open this cover to deliver sheets face up or remove jammed paper. 6. Tray 1 Rear Cover Remove this cover when loading paper longer than A4 in Tray 1. 7. Power Switch Use this switch to turn the power on or off. 8. Tray 1 This tray can hold up to 250 sheets of plain paper. 9. Front Cover Lift up this cover to replace consumables or clear a paper jam. 10. Bypass Tray This tray can hold 50 sheets of plain paper. 11.
Guide to Components Interior 1 CVW037 1. Print Cartridge A replacement consumable that is required to make prints on paper. It needs to be replaced when the Toner/ Paper End indicator flashes red. For details about replacing the cartridge, see page 65 "Replacing the Print Cartridge".
1. Guide to the Machine Installing the Printer This section describes how to install the printer and perform settings after installation. Where to Put the Printer The printer's location should be carefully chosen because environmental conditions greatly affect its performance. • Do not use flammable sprays or solvents in the vicinity of this machine. Doing so could result in fire or electric shock.
Installing the Printer • Make sure the room where you are using the machine is well ventilated and spacious. Good ventilation is especially important when the machine is used heavily. • Do not obstruct the machine's vents. Doing so risks fire caused by overheated internal components. • Keep the machine away from salt-bearing air and corrosive gases. Also, do not install the machine in places where chemical reactions are likely (laboratories, etc.), as doing so will cause the machine to malfunction.
1. Guide to the Machine CER119 • White area: Permissible Range • Blue area: Recommended Range To avoid possible build-up of ozone, locate this machine in large well ventilated room that has an air turnover of more than 30m3/hr/person.
Installing the Printer When you detect an odd smell, sufficiently ventilate and circulate the air in the room. Power requirements • 220 - 240 V, 4 A, 50/60 Hz • 120 V, 7 A, 60 Hz Please be sure to connect the power cord to a power source as above.
1. Guide to the Machine Installing the Driver and Software You can install the necessary driver for this machine using the included CD-ROM. The supplied drivers are supported by the following operating systems: • PCL 6 printer driver: Windows XP/Vista/7/8 and Windows Server 2003/ 2003 R2/2008/2008 R2/2012 • Smart Organizing Monitor: Windows XP/Vista/7/8 and Windows 2003/ 2003 R2/2008/2008 R2/2012 The procedure in this section is an example based on Windows 7.
Installing the Driver and Software Upgrading or Deleting the Printer Driver Upgrading the printer driver 1. On the [Start] menu, click [Devices and Printers]. 2. Right-click the icon of the printer model you want to modify, and then click [Printer properties]. 3. Click the [Advanced] tab. 4. Click [New Driver...], and then click [Next]. 5. Click [Have Disk...]. 6. Click [Browse...], and then select the printer driver location. 7. Click [OK], and then specify the printer model. 8. Click [Next]. 9.
1. Guide to the Machine Installing Smart Organizing Monitor Smart Organizing Monitor is a utility that allows you to modify the machine’s settings or view the machine’s status from your computer. For details, see page 23 "About Operation Tools". 1. Close all applications except this manual. 2. Insert the CD-ROM into the CD-ROM drive. 3. Select a language for the interface, and then click [OK]. 4. From the CD-ROM menu, click [Smart Organizing Monitor]. 5. Follow the instructions in the installation wizard.
About Operation Tools About Operation Tools This section explains the operation tools of this machine. Smart Organizing Monitor Install this utility on your computer from the included CD-ROM before using it. Using Smart Organizing Monitor, you can check the machine's status, configure its settings, and use other functions. For details about how to use Smart Organizing Monitor, see page 60 "Using Smart Organizing Monitor".
1.
2. Loading Paper Supported Paper Paper Size • A4 • 81/2 " × 11 " (Letter) • 81/2 " × 14 " (Legal) • B5 JIS • 51/2 " × 81/2 " (Half Letter) • 71/4 " × 101/2 " (Executive) • A5 • A6 • B6 JIS • 16K (195 ×267 mm) • 8"×13"(F) • 81/2 "×13"(Foolscap) • 81/4 "×13"(Folio) • Com10 (104.8×241.3 mm) • Monarch (98.4×190.5 mm) • C5 Env (162×229 mm) • C6 Env (114×162 mm) • DL Env (110×220 mm) • Custom Paper Size The following paper sizes are supported as custom paper sizes: • Approximately 90-216 mm (3.6-8.
2. Loading Paper • Color paper (75-90 g/m2 (20-24 lb.)) • Preprinted paper (75-90 g/m2 (20-24 lb.)) • Prepunched paper (75-90 g/m2 (20-24 lb.)) • Letterhead (100-130 g/m2 (27-35 lb.)) • Bond paper (105-160 g/m2 (28-43 lb.)) • Cardstock (100-130 g/m2 (27-35 lb.)) • Label paper (100-130 g/m2 (27-35 lb.)) • Envelope Paper Capacity • Tray1 250 sheets (80 g/m2, 20 lb.) • Bypass Tray 50 sheets (80 g/m2, 20 lb.
Non-Recommended Paper Types Non-Recommended Paper Types Do not use the following types of paper: • Ink-jet printer paper • Bent, folded, or creased paper • Curled or twisted paper • Torn paper • Wrinkled paper • Damp paper • Dirty or damaged paper • Paper that is dry enough to emit static electricity • Paper that has already been printed onto, except a preprinted letterhead paper. Malfunctions are especially likely when using paper printed on by other than a laser printer (e.g.
2. Loading Paper Print Area The diagram below shows the area of the paper that the machine can print on. From the printer driver 4 4 3 1 3 2 CHZ904 1. Print area 2. Feed direction 3. Approx. 4.2 mm (0.2 inches) 4. Approx. 4.2 mm (0.2 inches) Envelope 3 1 2 3 4 4 CMC044 1. Print area 2. Feed direction 3. Approximately 10 mm (0.4 inches) 4. Approximately 10 mm (0.
Print Area • The print area may vary depending on the paper size, printer language and printer driver settings. • For better envelope printing, we recommend you set the right, left, top, and bottom print margins to at least 15 mm (0.6 inches) each.
2. Loading Paper Loading Paper Loading Paper into Tray 1 The following example explains loading procedure for the standard paper tray (Tray 1). • Before printing on paper other than envelopes, make sure to pull up the levers on the machine rear, inside the rear cover. Leaving the levers lowered can cause print quality problems when printing on paper other than envelopes. 1. Pull out tray 1 carefully with both hands. CVW005 Place the tray on a flat surface. 2.
Loading Paper 3. Pinch the end paper guide and slide it inward to match the standard size. CVW046 When loading custom size paper, position the paper guide slightly wider than the actual paper size. 4. Load the new paper stack print side down. Make sure paper is not stacked higher than the upper limit marked inside the tray. CVW047 Slide the guides inward, until they are flush against the paper's sides. Make sure the paper is not stacked higher than the projection on the side paper guides.
2. Loading Paper 5. Check there are no gaps between the paper and the paper guides; both side and end paper guides. CVW033 6. Carefully push tray 1 straight into the machine. To avoid paper jams, make sure the tray is securely inserted. • The remaining paper indicator on the left front side of the paper tray shows approximately how much paper is remaining. Extending the Tray 1 to load paper This section explains how to load paper longer than A4 (297 mm) into the machine. 1.
Loading Paper CMC057 4. Lock the extender in the extended position. CMC055 5. Follow Steps 2 to 6 in "Loading Paper into Tray 1". • To reinsert the extender, you might have to push it with moderate force. • The remaining paper indicator on the left front side of the paper tray shows approximately how much paper is remaining. Loading Paper into Bypass Tray • Before printing on paper other than envelopes, make sure to pull up the levers on the machine rear, inside the rear cover.
2. Loading Paper CVW009 2. Slide the side guides outward, then load paper with the print side up, and push in until it stops against the machine. CVW010 3. Adjust the side guides to the paper width. CVW011 Loading Envelopes • Before printing on envelopes, make sure to lower the levers on the machine rear, inside the rear cover, to avoid envelopes coming out creased.
Loading Paper positions after printing. Leaving the levers lowered can cause print quality problems when printing on paper other than envelopes. • Avoid using self-adhesive envelopes. They may cause machine malfunctions. • Check there is no air in the envelopes before loading. • Load only one size and type of envelope at a time. • Before loading envelopes, flatten their leading edges (the edge going into the machine) by running a pencil or ruler across them.
2. Loading Paper 3. Adjust the side guides to the envelope width. CVW013 4. Open the rear cover. CVW015 5. Lower the levers for printing envelopes on both sides to the position indicated with an envelope mark. CVW016 Make sure to pull up the levers back to their original positions after printing. 6. Close the rear cover. • Be sure to load envelopes so that their flaps are on the left. If you do not, the envelopes will become creased.
Loading Paper • If printed envelopes come out badly creased, load the envelopes in the opposite direction, and then rotate the print object by 180 degrees using the printer driver before printing. For details, see the printer driver Help. Specifying Paper Type and Paper Size Using Smart Organizing Monitor The procedure in this section is an example based on Windows 7. The actual procedure may vary depending on the operating system you are using. Specifying the paper type and paper size 1.
2. Loading Paper 11. Click [Close].
3. Printing Documents Basic Operation The following procedure explains how to perform basic printing. 1. Open the printer properties dialog box in your document's application. For details about each setting, click [Help]. You can also click the information icons to show configuration information. 2. Set printing options as necessary, and then click [OK]. The printer properties dialog box closes. 3. Click [OK]. • If a paper jam occurs, printing stops after the current page has been printed out.
3. Printing Documents Canceling a print job before printing has started • Windows 1. Double-click the printer icon on the task tray of your computer. 2. Select the print job you want to cancel, click the [Document] menu, and then click [Cancel]. • If you cancel a print job that has already been processed, printing may continue for a few pages before being canceled. • It may take a while to cancel a large print job. Canceling a print job while printing 1. Press the [Job Reset] key.
If a Paper Mismatch Occurs If a Paper Mismatch Occurs The machine reports an error if: • The paper type does not match the print job's settings when [Input Tray;] is set to [Auto Tray Select]. • The paper size does not match the print job's settings when [Size Mismatch Detection] in [Tray Paper Settings] under system settings is enabled. There are two ways to resolve these errors: Continue printing using mismatched paper Use the form-feed function to ignore the error and print using mismatched paper.
3. Printing Documents Resetting the Print Job 1. If the Alert indicator lights up, press the [Job Reset] key.
Using Various Print Functions Using Various Print Functions This section briefly describes various print functions that you can configure with the printer driver to make printouts appropriate for your purposes. Print Quality Functions Print quality and color tone can be adjusted to suit the print data. Some of the print quality settings you can configure are described below. Changing the image printing method You can select to print with priority on print quality or print speed.
3. Printing Documents Print Output Functions You can specify the form of print outputs according to your purposes. This section briefly describes some of the settings that you can specify. Printing multiple sets of a document You can print multiple sets of the same document. Collating the output in document batches You can print complete sets of a multiple-page document one set at a time (P1, P2, P1, P2 ...).
Using Various Print Functions To specify a non-standard paper size, select [Custom Paper Size] from the [Document Size:] list, and then click the [Custom Paper Size...] button in the lower part of the dialog box to configure the paper size. Superimposing text on prints (watermark) You can superimpose watermark text on prints. Various predefined watermarks are provided. You can also create your own watermarks.
3.
4. Configuring the Machine Using Utilities Using Web Image Monitor • Some items might not appear, depending on the model type you are using.
4. Configuring the Machine Using Utilities Top page Every Web Image Monitor page is divided into the following areas: 2 3 3 1 4 CVW251 1. Menu area If you select menu, its content will be shown on the work area, or the sub area. 2. Tab area Contains menus for the Status and Counter modes and tabs for switching between them. 3. Help If you click this icon, help index page opens. 4. Main area Displays the contents of the item selected in the menu area.
Using Web Image Monitor Install the Help Source File Follow the procedure below to install the help. 1. Copy the [WIMHELP] folder on the CD-ROM to your computer's hard drive. The example procedures explain how to copy the [WIMHELP] folder to the C:\tmp\WIMHELP directory. 2. Access Web Image Monitor, and then click [Help Source File Setting] on the [Administrator Tools] page. 3. In the text box, enter “C:\tmp\WIMHELP\”. 4. Enter the administrator password if required. 5. Click [OK].
4. Configuring the Machine Using Utilities Network Settings Configure network settings. IPsec Settings Configure IPsec settings. Print List/Report Print a list/report related to the printer. Administrator Tools Configure administrator settings. Home [Status] tab Click the [Status] tab on the main page to display system information, paper tray status and toner levels. [Counter] tab Click the [Counter] tab on the main page to check the counter information.
Using Web Image Monitor • [Bypass Tray Setting Priority] Select how print jobs using the bypass tray are handled. • [Size Mismatch Detection] Select whether to set the machine to report an error if the paper size does not match the print job's settings. [I/O Timeout] tab • [Fixed USB Port] Specifies whether the same printer driver can be used for multiple machines or not under USB connection.
4. Configuring the Machine Using Utilities [Auto E-mail Notification] tab The settings on this tab are for sending a notification e-mail when the machine’s status changes. You can specify up to two recipients. • [Display Name] Enter a sender name for notification e-mail. • [E-mail Address] Enter the address of the recipient of the alert email. • [Paper Misfeed]/[Out of Paper]/[Replace Print Cartridge Soon]/[Call Service]/[Replace Print Cartridge]/[Cover Open] Select which items to send notifications about.
Using Web Image Monitor • [Wireless LAN Settings] • [SSID] Enter the SSID name. Can contain 32 characters. When you click [Scan List], a list of access points that is currently available is displayed. You can select the SSID name from the list. • [Communication Mode] Select Infrastructure mode or Ad Hoc mode • [Ad-Hoc Channel] Select a channel for Ad-Hoc mode. • [Authentication] Select an authentication method.
4. Configuring the Machine Using Utilities When this is selected, communication will be encrypted with WPA2 (WiFi Protected Access 2). Enter a value in [WPA Passphrase] that contains from 8 to 64 characters. • [Mixed Mode WPA/WPA2] When this is selected, communication will be encrypted with WPA (WiFi Protected Access) or WPA2 (WiFi Protected Access 2). Enter a value in [WPA Passphrase] that contains from 8 to 64 characters.
Using Web Image Monitor Select whether to enable or disable the policy. • [Name] Enter the name of the policy. Can contain up to 16 characters. • [Address Type] Select IPv4 or IPv6 as the type of IP address to be used in IPsec communication. • [Local Address] Displays the IP address of this printer. • [Remote Address] Enter the IPv4 or IPv6 address of the device with which to communicate. Can contain up to 39 characters.
4. Configuring the Machine Using Utilities Establishes secure communication that supports authentication only. • [ESP] Establishes secure communication that supports both authentication and data encryption. • [ESP&AH] Establishes secure communication that supports both data encryption and authentication of packets, including packet headers. Note that you cannot specify this protocol when [Tunnel] is selected for [Encapsulation Type].
Using Web Image Monitor • [IKE Life Time] Specify the life time of the ISAKMP SA as a time period. Enter a number of seconds. • [IKE Diffie-Hellman Group] Select the IKE Diffie-Hellman Group to be used in the generation of the IKE encryption key from the following: [DH1], [DH2] • [Pre-Shared Key] Specify the PSK (Pre-Shared Key) to be used for authentication of a communicating device. Can contain up to 32 characters.
4. Configuring the Machine Using Utilities • [Reset Menu Settings] Select to restore settings that are not related to the network. • [Reset IPsec Settings] Select to clear the IP security settings. Backup Settings Create backup files containing the printer's configuration settings. If necessary, these backup files can be used to restore previous configurations. • [Back up IPsec Settings] appears only when a password is specified in [Administrator].
Using Web Image Monitor 6. Reboot the printer if you are requested to do so. Help Source File Setting • [Help Source File] Enter the help source file path.
4. Configuring the Machine Using Utilities Using Smart Organizing Monitor The state and status information of the machine can be checked using Smart Organizing Monitor. Checking the Status Information 1 3 4 5 2 CVW252 1. Image area Displays the status of this machine with an icon. 2.
Using Smart Organizing Monitor Displays the system information about the printer, such as the model name, system version, and memory size. • Counter Displays information about the counters. • Network Displays network details such as the printer's IP address and network-related comments. 3. Message area Displays the status of this machine with a message. For details about error messages, see .page 90 "Error and Status Messages Appear on Smart Organizing Monitor" 4.
4. Configuring the Machine Using Utilities Only the [Paper Input] tab is available. Tab Settings This section provides a tab-by-tab overview of the machine settings that can be modified using Smart Organizing Monitor. For more information on each setting item, see the Smart Organizing Monitor Help. Paper Input tab • You can change paper size and other paper settings. Maintenance tab • You can adjust print starting positions. System tab • You can set basic functions required to use the printer.
Using Smart Organizing Monitor IPv6 automatic settings • A router with DHCP functionality or a DHCP server that is supported by IPv6 is required. 1. On the [Start] menu, click [All Programs]. 2. Click [Smart Organizing Monitor]. 3. Click [Smart Organizing Monitor Status]. 4. Click the [User Tools] tab. 5. Click Printer [Configuration]. 6. Enter the access code, and then click [OK]. 7. Click the [IPv6] tab. 8. Select [Active] in [IPv6 DHCP:], and the click [OK]. 9.
4. Configuring the Machine Using Utilities 7. Click the [IPv6] tab. 8. Select [Inactive] in [IPv6 DHCP:], and the click [OK]. 9. Enter values in [Manual address:], [Prefix length:], and [Gateway:], and then click [OK]. 10. Turn off the machine, and then disconnect the USB cable from the machine. 11. Connect the machine to the router or the hub using the Ethernet cable. 12. Follow Steps 1 to 3, and then start Smart Organizing Monitor. 13. Click [Connect Printer]. 14. Click [Search Network Printer].
5. Maintaining the Machine Replacing the Print Cartridge • Store print cartridge in a cool dark place. • Actual printable numbers vary depending on image volume and density, number of pages printed at a time, paper type and size, and environmental conditions such as temperature and humidity. Toner quality degrades over time. Early replacement of the print cartridge might be necessary. Therefore, we recommend you always keep a new print cartridge ready.
5. Maintaining the Machine CVW050 • If toner runs out, you cannot print until the print cartridge is replaced. 1. If paper is loaded in the bypass tray, remove the paper and close the bypass tray. 2. Push the side button to open the front cover, and then carefully lower it. CVW023 3. Carefully pull out the print cartridge horizontally, holding its center. CVW024 • Do not shake the removed print cartridge. Doing so can cause remaining toner to leak.
Replacing the Print Cartridge 4. Take the new print cartridge out of the box, and then take it out of the plastic bag. CMC081 5. Place the print cartridge on a flat surface, and then remove the protection sheet. CMC019 6. Hold the print cartridge and shake it from side to side five or six times. CMC020 Even distribution of toner within the bottle improves print quality.
5. Maintaining the Machine 7. Slide the print cartridge in horizontally. When the cartridge can go no further, raise it slightly and push it fully in. Then push down on the cartridge until it clicks into place. CVW026 8. Carefully push up the front cover until it closes. Be careful not to trap your fingers. After closing the front cover, wait until the print cartridge is ready to use. 9. Put the protective sheet you removed in Step 5 on the old print cartridge.
Cautions When Cleaning Cautions When Cleaning Clean the machine periodically to maintain high print quality. Dry wipe the exterior with a soft cloth. If dry wiping is not sufficient, wipe with a soft, damp cloth that has been wrung out thoroughly. If you still cannot remove the stain or grime, use a neutral detergent, wipe over the area with a thoroughly-wrung damp cloth, and then dry wipe the area and allow it to dry.
5. Maintaining the Machine Cleaning the Friction Pad and Paper Feed Roller 1. Turn off the power. 2. Unplug the power cord from the wall outlet. Remove all the cables from the machine. 3. Pull out tray 1 carefully with both hands. CVW039 Place the tray on a flat surface. If there is paper in the tray, remove it. 4. Wipe the friction pads with a damp cloth.
Cleaning the Friction Pad and Paper Feed Roller 5. Wipe the rubber part of the roller with a soft damp cloth. After that, wipe it with a dry cloth to remove the moisture. CVW040 6. Reload the removed paper into the tray, and then push the tray carefully into the machine until it clicks into place. CVW006 7. Insert the plug of the power cord into the wall socket securely. Connect all the interface cables that were removed. 8. Turn on the power.
5.
6. Troubleshooting Common Problems This section describes how to troubleshoot common problems that may occur while operating the machine. Problem The machine does not turn on. Possible cause The power cord is not connected properly. Solution • Make sure that the power plug is firmly inserted into the wall outlet. • Make sure that the wall outlet is not defective by connecting another working device. The red indicator is lit or flashing. An error has occurred.
6. Troubleshooting Paper Feed Problems If the machine is operating but paper will not feed or paper jams occur frequently, check the condition of the machine and paper. Problem Solution • Use supported types of paper. See page 25 "Supported Paper". Paper does not feed smoothly. • Load paper correctly, making sure that the paper guides are properly adjusted. See page 30 "Loading Paper". • If the paper is curled, straighten the paper. • Take out the paper from tray and fan it well.
Paper Feed Problems Problem Solution • Fan the paper well before loading. Also make sure that the edges are even by tapping the stack on a flat surface such as a desk. • Make sure that the paper guides are in the right position. Multiple sheets of paper are fed at one time. • Use supported types of paper. See page 25 "Supported Paper". • Load paper only as high as the upper limit markings on the paper guide. • Make sure that the friction pads and paper feed rollers are clean. page 25 "Supported Paper".
6. Troubleshooting Removing Printing Jams • Jammed paper may be covered in toner. Be careful not to get toner on your hands or clothes. • Toner on prints made immediately after clearing a paper jam may be insufficiently fused and can smudge. Make test prints until smudges no longer appear. • Do not forcefully remove jammed paper, as it may tear. Torn pieces remaining inside the machine will cause further jams and possibly damage the machine. • Paper jams can cause pages to be lost.
Paper Feed Problems 6. Carefully pull out the print cartridge horizontally, holding its center. CVW024 • Do not shake the removed print cartridge. Doing so can cause remaining toner to leak. • Place the print cartridge on paper or similar material to avoid dirtying your workspace. 7. Lifting the guide plate, remove the jammed paper carefully. CVW025 8. Slide the print cartridge in horizontally. When the cartridge can go no further, raise it slightly and push it fully in.
6. Troubleshooting • When closing the front cover, push the upper area of the cover firmly. After closing the cover, check that the error is cleared. Removing Jammed Paper from the Bypass Tray 1. If paper is jammed in the bypass tray input area, remove the jammed paper carefully. CVW027 2. Close the bypass tray. 3. Push the side button to open the front cover, and then carefully lower it. CVW023 4. Carefully pull out the print cartridge horizontally, holding its center.
Paper Feed Problems • Do not shake the removed print cartridge. Doing so can cause remaining toner to leak. • Place the print cartridge on paper or similar material to avoid dirtying your workspace. 5. Lifting the guide plate, remove the jammed paper carefully. CVW025 6. Slide the print cartridge in horizontally. When the cartridge can go no further, raise it slightly and push it fully in. Then push down on the cartridge until it clicks into place. CVW026 7.
6. Troubleshooting Removing Jammed Paper from the standard tray or duplex unit 1. Open the rear cover. CVW052 2. Remove the jammed paper carefully. CVW053 3. Close the rear cover.
Paper Feed Problems 4. Pull tray 1 halfway out, and check for jammed paper. If there is jammed paper, remove it carefully. CVW022 5. Pull tray 1 out completely with both hands. CVW039 Place the tray on a flat surface. 6. Push the lever. Pushing the lever lowers the duplex transport unit.
6. Troubleshooting 7. If there is jammed paper, carefully remove it. CVW044 8. With the duplex transport unit still lowered, carefully slide tray 1 back in until it stops. CVW006 9. If paper is loaded in the bypass tray, remove the paper and close the bypass tray. 10. Push the side button to open the front cover, and then carefully lower it.
Paper Feed Problems 11. Carefully pull out the print cartridge horizontally, holding its center. CVW024 • Do not shake the removed print cartridge. Doing so can cause remaining toner to leak. • Place the print cartridge on paper or similar material to avoid dirtying your workspace. 12. Lifting the guide plate, remove the jammed paper carefully. CVW025 13. Slide the print cartridge in horizontally. When the cartridge can go no further, raise it slightly and push it fully in.
6. Troubleshooting • When closing the covers, push the covers firmly. After closing the covers, check that the error is cleared.
Print Quality Problems Print Quality Problems Checking the Condition of the Machine If there is a problem with the quality of printing, first check the condition of the machine. Possible Cause Solution There is a problem with the machine's location. Make sure that the machine is on a level surface. Place the machine where it will not be subject to vibration or shock. Unsupported types of paper is used. Make sure that the paper being used is supported by the machine. See page 25 "Supported Paper".
6. Troubleshooting Printer Problems This section describes printing problems and possible solutions. Problem Solution If an error occurs when printing, change the computer or printer driver settings. • Check the printer icon name does not exceed 32 alphanumeric characters. If it does, shorten it. An error occurs. • Check whether other applications are operating. Close any other applications, as they may be interfering with printing. If the problem is not resolved, close unneeded processes too.
Printer Problems Problem Solution The toner is powdery and comes away from the paper, or the printed image has a matt appearance. Check if the levers for printing on envelopes inside the rear cover are properly set. Pull up the levers. Printed envelopes come out creased. Check if the levers for printing on envelopes inside the rear cover are properly set. Lower the levers. Documents are not printed properly when using a certain application, or image data is not printed properly.
6. Troubleshooting Error and Status Indicate on the Control Panel The LED on the operation panel indicates the machine status, including any errors. LED Toner/ Paper End Alarm Power - - On The power is on. The status is normal. - - Flashing Importing data. The status is normal. Flashing - On The print cartridge is almost empty. Replace the print cartridge before it becomes empty. On - On • The print cartridge is empty. Status • The print cartridge is not set correctly.
Error and Status Indicate on the Control Panel LED Toner/ Paper End Alarm Power - On On Another type of error has occurred. Use Web Image Monitor or Smart Organizing Monitor to check the error, and then take appropriate measures. See page 47 "Using Web Image Monitor" or page 60 "Using Smart Organizing Monitor". On On On A malfunction has occurred. Contact your sales or service representative.
6. Troubleshooting Error and Status Messages Appear on Smart Organizing Monitor Message No Response from I/O Device Check the cable, power cord, and main switch. Causes • The power cable of the machine is not plugged in. • The power of the machine is not turned ON. • The USB cable is not connected. Solutions • Check the printer power cord. • Check the printer power switch is on. • Check the USB cable is properly connected.
Error and Status Messages Appear on Smart Organizing Monitor Message Causes Solutions The paper type specified on the machine and the type specified in the printer driver do not match. For details about changing the paper type setting of the machine, see page 30 "Loading Paper". For details about changing the paper type setting in the printer driver, see the printer driver Help. Print Cartridge is near empty. The print cartridge is almost empty. Prepare a new print cartridge.
6.
7. Appendix Functions and Network Settings Available in an IPv6 Environment The functions and network settings of this machine that are available in an IPv6 environment differ from those available in an IPv4 environment. Make sure the functions you use are supported in an IPv6 environment, and then configure the necessary network settings. For details about specifying the IPv6 settings, see page 60 "Using Smart Organizing Monitor".
7. Appendix Transmission Using IPsec For securer communications, this machine supports the IPsec protocol. When applied, IPsec encrypts data packets at the network layer using shared key encryption. The machine uses encryption key exchange to create a shared key for both sender and receiver. To achieve even higher security, you can also renew the shared key on a validity period basis. • IPsec is not applied to data obtained through DHCP, DNS, or WINS.
Transmission Using IPsec • For successful authentication, the sender and receiver must specify the same authentication algorithm and authentication key. The authentication algorithm and authentication key are specified automatically. AH Protocol + ESP Protocol When combined, the ESP and AH protocols provide secure transmission through both encryption and authentication. These protocols provide header authentication.
7. Appendix Machine PC 1. Set the IPsec settings on Web Image Monitor. 1. Set the same IPsec settings as the machine on PC. 2. Enable IPsec settings. 2. Enable IPsec settings. 3. Confirm IPsec transmission. • After configuring IPsec, you can use "ping" command to check if the connection is established correctly. Because the response is slow during initial key exchange, it may take some time to confirm that transmission has been established.
Transmission Using IPsec 1. On the [Start] menu, click [Control Panel], [System and Security], and then click [Administrative Tools]. 2. Double-click [Local Security Policy], and then click [IP Security Policies on Local Computer]. 3. In the "Action" menu, click [Create IP Security Policy...]. The IP Security Policy Wizard appears. 4. Click [Next]. 5. Enter a security policy name in "Name", and then click [Next]. 6. Clear the "Activate the default response rule (earlier versions of Windows only).
7. Appendix 23. Click [Finish], and then click [OK]. 24. Select the IP filter that you have just created, and then click [Next]. 25. Click [Add...] in the Filter Action. The Filter Action Wizard appears. 26. Click [Next]. 27. In [Name], enter a Filter Action name, and then click [Next]. 28. Select "Negotiate security", and then click [Next]. 29. Select one of options for computers allowed to communicate with, and then click [Next]. 30. Select "Custom" and click [Settings...]. 31.
Transmission Using IPsec 37. Select the filter action that you have just created, and then click [Next]. 38. Select one of options for an authentication method, and then click [Next]. 39. Click [Finish], and then click [OK] twice. The new IP security policy (IPsec settings) is specified. 40. Select the security policy that you have just created, right click on it, and then click [Assign]. IPsec settings on the computer are enabled.
7. Appendix Notes About the Toner • Proper operation cannot be guaranteed if any third-party toner is used. • Depending on printing conditions, there are cases where the printer cannot print the number of sheets indicated in the specifications. • Replace the print cartridge if the printed image suddenly becomes pale or blurred. • When operating the machine for the first time, use the print cartridge supplied with this machine.
Moving and Transporting the Machine Moving and Transporting the Machine This section provides cautions that you must follow when moving the machine both short and long distances. Repack the machine in its original packing materials when moving it over a long distance. • Be sure to disconnect all cables from the machine before transporting it. • The machine is a precision piece of machinery. Be sure to handle it carefully when moving it. • Make sure to move the machine horizontally.
7. Appendix Consumables Print Cartridge Print cartridge Black Average printable number of pages per cartridge *1 2,000 or 3,500 pages *1 The printable number of pages is based on pages that are compliant with ISO/IEC 19752 with the image density set as the factory default. ISO/IEC 19752 is an international standard for measurement of printable pages, set by the International Organization for Standardization. • Unless a print cartridge is replaced before toner runs out, printing will become impossible.
Specifications of the Machine Specifications of the Machine This section lists the machine's specifications. General Function Specifications Configuration Desktop Print process Laser electrostatic transfer Maximum paper size for printing 216 mm × 356 mm (8.5 × 14 inches) Warm-up time 26 seconds or less (23 °C, 71.
7. Appendix • Bypass tray 50 sheets Memory 128 MB Power requirements • 220-240 V, 4 A, 50/60 Hz • 120 V, 7 A, 60 Hz Power consumption • Maximum power consumption : 890 W : 800 W • Energy Saver mode 1 50 W or less • Energy Saver mode 2 3.8 W or less Machine dimensions (Width × Depth × Height) 370 × 392 × 262 mm (14.6 × 15.4 × 10.3 inches) Weight (machine body with consumables) Approximately 12.7 kg (28.0 lb.
Specifications of the Machine • USB 2.
7. Appendix Copyright Information about Installed Applications expat Copyright (c) 1998, 1999, 2000 Thai Open Source Software Centre, Ltd. and Clark Cooper. Copyright (c) 2001, 2002 Expat maintainers.
Copyright Information about Installed Applications 3. Redistributions must contain a verbatim copy of this document. The OpenLDAP Foundation may revise this license from time to time. Each revision is distinguished by a version number. You may use this Software under terms of this license revision or under the terms of any subsequent revision of the license.
7. Appendix 2. Redistributions in binary form must reproduce the above copyright notice, this list of conditions and the following disclaimer in the documentation and/or other materials provided with the distribution. 3. All advertising materials mentioning features or use of this software must display the following acknowledgment: "This product includes software developed by the OpenSSL Project for use in the OpenSSL Toolkit. (http://www.openssl.org/)" 4.
Copyright Information about Installed Applications If this package is used in a product, Eric Young should be given attribution as the author of the parts of the library used. This can be in the form of a textual message at program startup or in documentation (online or textual) provided with the package. Redistribution and use in source and binary forms, with or without modification, are permitted provided that the following conditions are met: 1.
7. Appendix Trademarks Adobe, Acrobat, and Reader are either registered trademarks or trademarks of Adobe Systems Incorporated in the United States and/or other countries. TrueType, and Safari are trademarks of Apple Inc., registered in the U.S. and other countries. Firefox® is a registered trademark of the Mozilla Foundation. Java is a registered trademark of Oracle and/or its affiliates. LINUX® is the registered trademark of Linus Torvalds in the U.S. and other countries.
Trademarks Microsoft® Windows® 8 Microsoft® Windows® 8 Pro Microsoft® Windows® 8 Enterprise • The product names of Windows Server 2003 are as follows: Microsoft® Windows Server® 2003 Standard Edition Microsoft® Windows Server® 2003 Enterprise Edition Microsoft® Windows Server® 2003 Web Edition Microsoft® Windows Server® 2003 Datacenter Edition • The product names of Windows Server 2003 R2 are as follows: Microsoft® Windows Server® 2003 R2 Standard Edition Microsoft® Windows Server® 2003 R2 Enterprise Editi
7.
INDEX A N Authentication........................................................ 94 Non-recommended paper................................... 27 Notes.................................................................... 100 B Basic operation......................................................39 C Cleaning.......................................................... 69, 70 Configuration page............................................... 64 Consumables.......................................................
U Upgrade................................................................. 21 W Web Image Monitor............................................. 47 Where to put the printer........................................ 16 Wireless LAN settings.....................................
MEMO 115
MEMO 116 GB GB EN US EN AU M154-8600
© 2013
EN GB EN US EN AU M154-8600