
Installation guide

SendScan Settings
71
3
H
HH
H
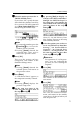
Select the option you want for “2.
TWAIN Standby Time”.
If you select “On”, specify the time
after which this machine stands by
for a network TWAIN command
(or a [Enter Custom Send File] com-
mand) using the number keys.
• Use the {
{{
{1
11
1}
}}
} and {
{{
{0
00
0}
}}
} keys to
highlight the setting you want.
Note
❒ To correct the number, press the
{
{{
{Clear/Stop}
}}
} key to clear the
number you have entered.
❒ Pressing [Cancel] discards the
adjusted time value, and re-
turns to the previous screen.
I
II
I
Press [ OK ]
This saves the setting you have
configured, and returns to the
SendScan Settings menu.
Note
❒ Pressing [Cancel] discards the
selected option, and returns to
the previous screen.
J
JJ
J
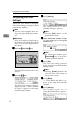
Press [↓
↓↓
↓Next].
“3. Auto Reset Timer” appears as
the setup item currently selected.
Note
❒ Pressing [↑
↑↑
↑Prev.] displays the
previous setup item.
K
KK
K
Set the auto reset timer in the
same way that you have done in
the steps
G
GG
G
through
I
II
I
.
L
LL
L
By pressing [Next] to display “4.
Compression (Black and White)”
through “12. ADF Thin Paper” as
the setup item, select options for
each of them in the same way that
you have done in the steps
C
CC
C
through
E
EE
E
.
After all, “14. Job Delivery Data
Max. Setting” appears as the setup
item currently selected.
M
MM
M
Select the options you wish to re-
fer in “13. Job Delivery Data Max.
Setting”, “14. Scanned Sheet
Counter”, “15. Scanned Page
Counter”, “16. Registration”, in
the same way that you have done
in the steps
G
GG
G
through
I
II
I
.
Reference
For operation of “16. Registra-
tion”, see p.193 “Adjusting the
position to start reading the
originals”.
N
NN
N
Press [Exit].
This returns to the Scanner Fea-
tures menu.
O
OO
O
Press [Exit].
This exits the Scanner Features
menu, and returns to the standby
screen that is displayed when you
turn the power on.