
Installation guide


Configuring the Scanner Settings
84
3
P
PP
P
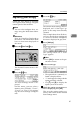
Press [OK].
This saves the setting you have se-
lected, and returns to the Default
Scan Settings menu.
Note
❒ Pressing [Cancel] discards the
selected setting, and returns to
the Default Scan Settings menu.
Q
QQ
Q
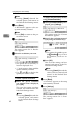
By pressing [↓
↓↓
↓Next] to display “5.
Erase Colour” through “11. Origi-
nal Settings” as the setup item, se-
lect options for each of them in
the same way that you have done
in steps
D
DD
D
through
G
GG
G
.
R
RR
R
After all the settings are the way
you want, press [Exit].
This registers the Scan Settings you
have configured to the “Default”
memory area, and returns to the
Scan Settings menu.
S
SS
S
While the Scan Settings menu is
displayed, press the {
{{
{2}
}}
}, {
{{
{3}
}}
} or
{
{{
{4}
}}
} key to display a correspond-
ing User Scan Settings menu.
For example, press the {
{{
{2}
}}
} key to
display the User 1 Scan Settings
menu.
T
TT
T
Repeat steps
D
DD
D
through
R
RR
R
for each
of “User 1”, “User 2”, and “User
3” memory areas.
U
UU
U
When you are finished, press [Ex-
it].
This returns to the Scanner Fea-
tures menu.
V
VV
V
Press [Exit].
This exits the Scanner Features
menu, and returns to the standby
screen that is displayed when you
turn the power on.
Important
❒ Never turn off the power of this
machine before the standby
screen is displayed. Doing so
can discard all the settings you
have configured, and return this
machine to its factory default
status.
Note
❒ Instead of pressing [Exit], you
can press a number key to enter
another setting menu.