GP90150A OPERATOR’S MANUAL WHEELBARROW AIR COMPRESSOR To reduce the risk of injury, the user must read and understand the Operator’s Manual before using this product. IN629100AV 12/08 Printed in U.S.A.
Table of Contents Section Page Section Table of Contents . . . . . . . . . . . . . . . .2 Page Maintenance . . . . . . . . . . . . . . . . . . .13 Maintenance Schedule . . . . . . . . . .13 Tank . . . . . . . . . . . . . . . . . . . . . . . . .14 Filter Removal, Inspection, and Replacement . . . . . . . . . . . . . . . . . .14 Drive Belt . . . . . . . . . . . . . . . . . . . . .15 Storage . . . . . . . . . . . . . . . . . . . . . .15 Safety Instructions . . . . . . . . . . . . . . .
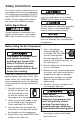
Safety Instructions This manual contains information that is very important to know and understand. This information is provided for SAFETY and to PREVENT EQUIPMENT PROBLEMS. To help recognize this information, observe the following symbols. Warning indicates a potentially hazardous situation which, if not avoided, COULD result in death or serious injury. Safety Signal Words Caution indicates a potentially hazardous situation which, if not avoided, MAY result in minor or moderate injury.
Safety Instructions (continued) Compressor parts may be hot even if the unit is stopped. Motors, electrical equipment and controls can cause electrical arcs that will ignite a flammable gas or vapor. Never operate or repair in or near a flammable gas or vapor. Never store flammable liquids or gases in the vicinity of the compressor. 10. Keep fingers away from a running compressor; fast moving and hot parts will cause injury and/or burns. 11.
15. Tanks rust from moisture build-up, which weakens the tank. Make sure to drain tank daily and inspect periodically for unsafe conditions such as rust formation and corrosion. 17. STOP the engine whenever leaving the work area, before cleaning, making repairs or inspections. When cleaning, repairing or inspecting, make certain all moving parts have stopped. Disconnect the spark plug wire and keep the wire away from the plug to prevent accidental starting. 16.
Safety Instructions (continued) Warning Labels Find and read all warning labels found on the air compressor shown below DK724100AV 10003 6
Glossary of Terms ASME Safety Valve A safety valve that automatically releases the air if the air receiver (tank) pressure exceeds the preset maximum. Air Tank Capacity The volume of air stored in the tank and available for immediate use. A large tank allows the intermittent use of an air tool with an air requirement higher than the compressor’s rated delivery. PSI (Pounds per Square Inch) Measurement of the pressure exerted by the force of the air.
Getting to Know Your Air Compressor 1 Beltguard 2 Air Filter 3 Dipstick/Oil Sight Glass 4 5 6 7 Unloader Air Storage Tank 9 8 Handles Tank Drain Valve Regulator Knob 10 Regulated Outlet Gauge Tank Pressure Gauge 11 12 ASME Safety Valve Air Outlet Fittings ridgid.
1. Belt Guard. The belt guard encloses the pulleys and drive belt. It protects the user from moving parts and directs cooling air to the compressor pump 8. Regulated Outlet Gauge. This gauge shows at-a-glance, air pressure at outlet. Air pressure is measured in pounds per square inch (PSI). Most tools have maximum pressure ratings. Never exceed the maximum pressure rating of the tool you are using. Be sure this gauge reads ZERO before changing air tools or disconnecting hose from outlet. 2. Air Filter.
Operating Your Air Compressor Before starting the compressor, thoroughly read all component instruction manuals, especially the engine manual. Drain liquid from tank daily. All lubricated compressor pumps discharge some condensed water and oil with the compressed air. Install appropriate water/oil removal equipment and controls as necessary for the intended application. Do not attach air tools to open end of the hose until start-up is completed and unit checks OK.
Lubrication This compressor is shipped with oil. Dipstick Use single viscosity, ISO 100 (SAE 30), non-detergent compressor oil; or Mobil 1® 5W30 or 10W30 synthetic oil may also be used. See illustration for proper oil fill. Add Oil Max Low Refer to engine manual for proper oil level and type. Fill Line Full Add Oil Start-Up To ensure proper operation, unit must be on a level surface. 1. Fill engine with oil and gasoline per instructions furnished with engine. 2.
Operating Your Air Compressor (continued) To Start Gasoline Engine 4. Move the choke lever to the CHOKE position, turn the fuel lever ON, and turn the engine stop switch to the ON position. 5. Pull start grip lightly until resistance is felt, and then pull briskly. 6. As the engine warms up, gradually move the choke lever to the open position. See gas engine manual for more details. 7. Run the compressor unloaded for approximately 30 minutes to break in the pump. 8.
Maintenance Release all pressure from the system before attempting to install, service, relocate or perform any maintenance. Do not attempt to tamper with the ASME safety valve! In order to maintain efficient operation of the compressor system, check the air filter weekly (per maintenance schedule), oil level and gasoline level before each use. The ASME safety valve should also be checked weekly. Pull ring on safety valve and allow the ring to snap back to normal position.
Maintenance (continued) Tank Never attempt to repair or modify a tank! Welding, drilling or any other modification will weaken the tank resulting in damage from rupture or explosion. Always replace worn, cracked or damaged tanks. Tank Drain (2) Drain liquid from tanks daily. The tanks should be carefully inspected at a minimum of once a year. Look for cracks forming near the welds. If a crack is detected, remove pressure from tank immediately and replace.
Drive Belt Belt stretch is a result of normal use. When properly adjusted, the belt deflects about 1/2” with five pounds of pressure applied midway between the engine pulley and pump. 1/2” Deflection To adjust drive belt tension: 1. Remove belt guard and loosen engine brace. 2. Loosen the four fasteners holding the engine to the baseplate. 3. Shift the engine in the proper direction. The belt must be properly aligned when adjustment is made. 4.
Troubleshooting For your own safety do not try and run the air compressor while troubleshooting. TROUBLE Low discharge pressure PROBABLE CAUSE 1. Air leaks 2. Leaking valves 3. Restricted air intake 4. Slipping belts 5. Blown gaskets 6. Low compression 16 REMEDY 1. Listen for escaping air. Apply soap solution to all fittings and connections. Bubbles will appear at points of leakage. Tighten or replace leaking fittings or connections 2.
TROUBLE Overheating PROBABLE CAUSE 1. Poor ventilation 2. Dirty cooling surfaces Excessive belt wear 1. Pulley out of alignment 2. Belt too loose or too tight 3. Belt slipping 4. Pulley wobbles Unit stalls 1. Low engine idle 2. Improper lubrication 3. Low oil level 4. Defective unloader valve Excessive noise (knocking) 1. Loose engine or compressor pulley 2. Lack of oil in crankcase 3. Worn connecting rod 4. Worn piston pin bushing 17 REMEDY 1.
Troubleshooting TROUBLE Excessive noise (knocking) Continued PROBABLE CAUSE 5. Worn bearings 6. Piston hitting the valve plate 7. Noisy check valve Oil in the discharge air 1. Worn piston rings 2. Compressor air intake restricted 3. Restricted breather 4. Excessive oil in compressor 5. Wrong oil viscosity 6. Connecting rod out of alignment 18 REMEDY 5. Replace worn bearings and change oil 6.
Repair Parts 43 39 38 42 1 41 37 29 30 2 28 26 19 40 27 44 36 31 46 32 45 3 4 25 33 5 7 34 35 24 23 6 19 20 7 21 22 8 9 18 17 11 16 15 14 13 12 10 11 20
Repair Parts For Repair Parts, Call 1-800-4-RIDGID Please provide following information: -Model number -Serial number (if any) -Part description and number as shown in parts list Ref.
Repair Parts 21 13 11 12 11 20 19 10 18 1 8 9 16 2 15 17 5 14 22 6 7 4 3 22
Repair Parts For Repair Parts, Call 1-800-4-RIDGID Please provide following information: -Model number -Serial number (if any) -Part description and number as shown in parts list Ref.
RIDGID“ AIR COMPRESSOR LIMITED THREE YEAR WARRANTY This product is manufactured by Campbell Hausfeld. The trademark is licensed from Ridgid, Inc. All warranty communications should be directed to RIDGID air compressor technical service at (toll free) 1-800-4-RIDGID. WHAT IS COVERED UNDER THE LIMITED THREE YEAR WARRANTY This warranty covers all defects in workmanship or materials in this RIDGID air compressor for the three-year period from the date of purchase.