
Use and Care Manual


14 — English
ASSEMBLY
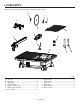
Fig. 9
INSTALLING THE RIP GUIDE
See Figure 9.
Place the front of the rip guide on the front rail of the saw
table.
Lower the back of the rip guide to the saw table.
Use the rip guide scale, located on front of the table, to
set the rip guide to the desired width of cut.
Push the locking lever down to secure to the saw table.
When securely locked, the locking lever should point
downward.
INSTALLING THE MITER GUIDE
See Figure 9.
Align the grooves under the miter guide with the grooves
in the top of the rip guide.
Push the miter guide onto the rip guide to the desired
operating position.
NOTE: Slide the guide off the rip guide to remove.
INSTALLING THE OVERFLOW DRAIN
See Figure 10.
Firmly push the overflow drain into the hole in the bottom
of the water fill reservoir.
FILLING/CHANGING THE WATER RESERVOIR
See Figure 11.
Fill the water reservoir with clean tap water to the fill line.
NOTE: The overflow drain prevents overfilling.
To change reservoir water:
Unplug the saw.
Remove the overflow drain and empty waste water into a
bucket. Do not allow the water to splash onto the ground
or around the machine.
Rinse the machine thoroughly.
Discard the waste water in accordance with local regula-
tions.
Replace with clean water.
Fig. 10
RIP
GUIDE
MITER
GUIDE
LOCKING
LEVER
OVERFLOW
DRAIN
FILL LINE
WATER
RESERVOIR
Fig. 11