
Use and Care Manual


7 - English
INSTALLING/REMOVING BATTERY PACK
See Figure 2, page 9.
Place the switch in the OFF position.
Insert the battery pack into the product as shown.
Make sure the latches on each side of the battery pack
snap into place and the battery pack is secured in the
product before beginning operation.
Depress the latches to remove the battery pack.
For complete charging instructions, see the operator’s manu-
als for your battery pack and charger.
INSTALLING/REMOVING BITS
See Figures 3 - 5, pages 9 and 10.
Remove the battery pack.
Release the depth lock lever and pull the wrench/depth
guide out of the tool.
Place the wrench/depth guide onto the collet nut as
shown.
Depress spindle lock.
NOTICE:
To prevent damage to the spindle or spindle lock,
always allow motor to come to a complete stop
before engaging spindle lock.
Loosen collet nut by turning counterclockwise with the
wrench/depth guide.
WARNING:
If you are changing a bit immediately after use, be
careful not to touch the bit or collet with your hands
or fingers. You could get burned because of the
heat buildup from cutting. Always use the wrench/
depth guide to remove or install bits.
To insert bit: Insert shank end of bit into collet.
To remove bit: Remove bit once collet nut is loose.
Tighten collet nut securely by turning clockwise with the
wrench/depth guide.
WARNING:
If the collet nut is not securely tightened, the bit can
detach during use causing serious personal injury.
Release spindle lock.
OPERATION
WARNING:
Do not use bits with undersized shanks.
Undersized shanks will not tighten properly and
could be thrown from the tool causing serious
personal injury.
Remove the wrench/depth guide and slide it back into
the tool.
Engage the depth lock lever to secure the wrench/depth
guide in place.
NOTE: The tool ships with a preinstalled collet that is
machined to precision tolerances to fit bits with 1/8 in.
diameter shanks. To use bits with 1/4 in. shank, remove the
collet nut and 1/8 in. collet then insert the 1/4 in. collet into
the output shaft. Replace the collet nut before inserting the
bit. Replace the collet nut before inserting the bit.
NOTICE:
We suggest that you practice with your drywall
cut-out tool before installing a bit and making cuts.
OPERATING THE DRYWALL CUT-OUT TOOL
See Figures 6 - 7, page 10.
Place the switch in the OFF position and install the bat-
tery pack.
Hold drywall cut-out tool firmly.
Slide the switch to the ON position and allow bit to come
up to full speed.
Tilt drywall cut-out tool at a 45
o
angle.
Plunge bit into material using the wrench/depth guide as
a pivot.
Raise drywall cut-out tool slowly to a 90
o
angle.
Begin cutting.
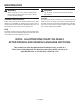
DANGER
:
Do not cut electrical outlet openings with live
electrical wires. Do not cut walls that could have
live electrical wiring behind them. Shut off breakers
or remove fuses to disconnect the circuit. Always
hold the tool by its motor housing.
ADJUSTING DEPTH OF CUT
See Figure 8, page 10.
Remove battery pack.
Release the depth lock lever.
Move wrench/depth guide to desired position.
Engage the depth lock lever to secure the wrench/depth
guide in place.