
Instructions


RIGOL Chapter 2 Front Panel Operation
User’s Guide for DSA800 Series
2-38
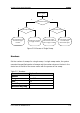
Result:
The results of Pass/Fail test contain the pass number and the pass ratio.
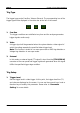
1. Switch
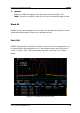
Turn on or off the Pass/Fail test function and the default is “Off”. When the
function is enabled, the system changes to split-screen display. At this point,
T2 and T3 are used for marking the upper and lower limits separately.
2. Settings
Limit: select the desired limit line (upper or lower) for editing. Then,
press Edit to set the limit conditions.
Test: enable or disable the test function. Each limit line has its own
switch. You can test according to both together, either one or neither.
Note: Trace/P/F Pass/Fail Switch is only used to enable or
disable the setting menu of Pass/Fail test, not the test itself.
Edit: edit the properties of the limit lines.
Note: The edited limit line data can be stored in the internal or external
memory of the analyzer and can be recalled when needed. After the
editing is finished, press Storage to store the data according to the
method introduced in “Storage”.
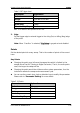
Table 2-22 Pass/Fail menu
Function Explanation
Limit Quickly select the limit line to be edited.
Point Set the number of the point to be edited. The range is from
1 to 200.
X-axis Edit the X-axis value (frequency or time) of the current
point. If the X-axis unit is frequency and the Rel Freq is
enabled, edit the frequency difference between the
frequency of the current point and the center frequency.
Amplitude Edit the amplitude of the current point. If the Rel Ampt is
enabled, edit the amplitude difference between the
amplitude of the current point and the reference level.
Connected Connect this point with the previous one or not.
Del Point Delete the point you are editing.