
User guide


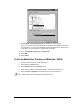

The Enable Color Sub-Strobes option can be enabled to individually change the
each color strobe. This may require multiple printings on CDs to tune color hue.
Rimage recommends most users to just use the Master Print Strobe setting.
Note: Double print does not affect the color printing process, so it is disabled when a color
ribbon is selected.
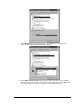
10. Select RLE Compression and select Yes. This speeds up the data transfer to the
printer and does not affect the print quality.
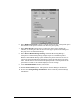
11. Select the Detect Media Change Setting and select No if using any of the
Rimage transporters. Select Yes if printing multiple copies to a standalone
printer.
With the Detect Media Change option enabled, the printer waits for the user to
remove the printed CD-R and a new CD to be placed on the print pad before
attempting to print the next label on the same label. The CD must be removed
from the print pad and a new CD placed on the pad within 5 seconds, or Windows
may display an error message.
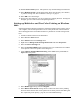
12. Disable Perfect Print option. This option is only used for Rimage’s AutoPrinter.
13. Select Halftone Setup to make changes that affect color intensity, color balance,
or pattern settings. See “Win NT Halftone Settings” on page 41.
14. Select OK to save the changes.
15. If using any other software, you can go right to the printing function. If using CD
Designer, go to the next section to the printing function.
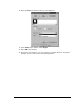
Enabling Color in CD Designer with Windows NT
1. If using CD Designer, open the label in CD designer.
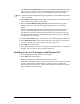
2. Select Print from the File menu.
3. Make sure the Rimage Perfect Image Printer PF is selected.
CD Designer is designed to print only to the CD Printer. If a test print is required
on paper, select another available printer. If another printer is selected the
software goes into a demo mode. Demo mode will provide an example of the label
but it substitutes letters in the text.
26