
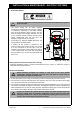
Installation manual


Rinnai Australia - 42 - Solar Close Coupled Operating / Installation Manual Issue 7 - 16/9/10
PRE SOLAR HEATING CHECKS
Before commencing solar heating of the water in the system ensure the following actions have been
completed:
Solar Collectors
1. Are the solar collectors installed with the correct slope and orientation to the sun?
2. Is the installation finished neatly with the roof made good, all tiles and flashings in place?
3. Are the bolts tight on the roof framework?
4. Are all solar collector straps fitted and correctly anchored to the roof structure?
5. If leak testing completed and successful, have any covers been removed from the solar collectors?
Electric Heating Element
1. Has the thermostat set point been set to at least 60°C and no greater than 70°C?
Temperature Limiting Devices
1. Commission any temperature limiting devices in accordance with the instructions supplied by the
manufacturer.
2. Confirm the hot water delivery temperature at a tempered water outlet. Tempered water outlets
should be those supplying areas primarily used for the purposes of personal hygiene such as
bathrooms. The hot water delivery temperature should not exceed 50°C or 45°C as detailed in the
section "Hot water delivery temperature" of these instructions.
SOLAR HEATING
1. Remove any cardboard or tarp covers that may have been placed over the solar collectors to
prevent them from heating water during installation and commissioning.
Auxiliary Energy Supply
1. Connect the electrical element to the power supply (off peak if available).
2. When the system is fully of water turn on electrical supply to element.
FINISHING THE INSTALLATION
• After testing is completed explain to the householder the functions and operation of solar water
heater components. Also explain to the householder the importance of carrying out
Maintenance as per separate ‘Warranty Terms and Conditions’ document.
• Leave this Manual with the householder.
• Remind the householder to complete the 'Warranty Certificate' provided in the separate
‘Warranty Terms and Conditions’ document.
DRAINING INSTRUCTIONS
1. The power supply to the element must be switched off.
2. Close the cold water mains supply stock cock.
3. Open a hot tap to relieve pressure.
4. Disconnect ‘cold water inlet’ connection to the T/A valve.
5. Remove the brass plug on the bottom right hand side of the collector bank.
6. The system will now drain all water.
INSTALLATION & MAINTENANCE - ELECTRIC SYSTEMS