
Installation Guide


Installation & Servicing Instructions Rinnai Q-Series
64
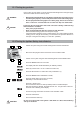
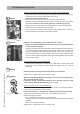
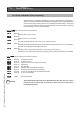
13.5 Installing the casing
- Install the airbox and close all snap locks. See fi gure 34;
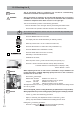
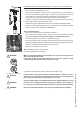
- Install the metal casing on the boiler;
- Lock the casing by using the screw behind the door. See fi gure 35.
14 Maintenance
Maintenance or changes to the boiler may only be carried out by a licensed
professional.
To protect yourself from harm, before performing maintenance:
- Turn off the electrical power supply by switching off the boiler at the mains power
switch or by turning off the electricity at the circuit breaker.
- Turn off the gas at the manual gas valve, usually located below the boiler.
- Turn off the incoming water supply. This can be done at the isolation valve usually
located below the boiler or by turning off the water supply to the building.
14.1 Periodic examination of venting systems and boiler
The inspection of the boiler and venting system should be done every 2 years or
4000 hours and full maintenance every 4 years or 8000 hours of operation, whichever
occurs fi rst. When doing this the circumstances of the boiler’s location must be taken
into account. From this one can determine whether to deviate from this advice.
Please contact Rinnai for further guidance on the frequency and service
requirements. Contact details can be found on the back page of this manual.
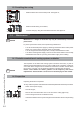
14.2 Inspection
Preparing the boiler for inspection
To carry out the inspection and maintenance activities please follow the next procedure:
- Switch off the power supply;
- Shut off the gas;
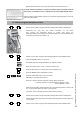
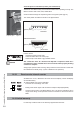
- Remove the screw behind the door on the front of the casing (fi gure 36);
- Lift the casing and remove it towards the front;
- Valve off the boiler from the system using the boiler isolation valves in the plumbing
kit.
NOTICE
i
NOTICE
i
Removing casing fi gure 36
Installing casing fi gure 35
2
3
1
2
3
1
Installing air box fi gure 34
CLOSE
1
2