
Instruction manual


89
Store Operation
Marker
When the store mode is set to Auto or Timer Auto, and the L
p
store interval
is speci ed, a marker can be added to the data.
1. Select [Store] from the menu list screen and set the store mode to
Auto or Timer Auto.
Also set the required measurement parameters such as L
p
store in-
terval.
2. Press the START/STOP key to set the unit to the measurement con-
dition.
3. The
(marker 1) and (marker 2) keys now function as markers.
Pressing a key will insert the corresponding marker into the screen.
4. Wait until the preset measurement time has ended, or stop the mea-
surement with the START/STOP key.
5. Select the [Recall] on the menu list screen and press the MENU/EN-
TER key.
6. Select data le and press the MENU/ENTER key. The le processing
screen appears.
7. Select [Con rm the data] and press the MENU/ENTER key. The
recall data is displayed.
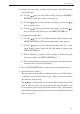
8. Press the DISPLAY key to switch the display. A time-level screen
appears showing the marker information.
Marker 1 (red)
Marker 2 (blue)
Time-Level screen