ASSEMBLY INSTRUCTIONS RiverRidge® KIDS TABLE W/3 BINS & 2 CHAIRS ITEM # 01-004 ADULT ASSEMBLY REQUIRED This product requires assembly by an adult because of the small parts. Care should be taken in unpacking and assembling this item to keep the small parts away from children. WARNING Young children can be seriously injured or killed, if furniture tips over. Don’t use this item for a TV stand.
Send requests for missing or damaged parts replacements by email to : customer.service@ssi-rr.com or call toll free 1-(844)-223-5201 or order parts on line at www.riverridgehome.com THE CHAIRS HAVE A WEIGHT CAPACITY OF 110 POUNDS AND ARE FOR CHILDREN'S USE ONLY. DO NOT ALLOW CHILDREN TO STAND ON THE CHAIRS. THE TABLE STORAGE BINS/SHELVES HAVE A LOAD CAPACITY OF 15 POUNDS EACH. TABLE TOP LOAD CAPACITY IS 50 POUNDS.
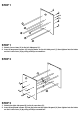
PARTS LIST
PARTS LIST TOOLS NEEDED FOR ASSEMBLY: FLAT & PHILIPS SCREWDRIVER (NOT INCLUDED) THE USE OF POWER SCREWDRIVER IS NOT RECOMMENDED
STEP 1 STEP 1 1. Attach 6 cross bars (2) to the left side panel (1). 2. Insert 6 long wood screws (A) into the holes on the left side panel (1) then tighten into the holes on the 6 cross bars (2) by using a Philips screwdriver. STEP 2 2 3 STEP 2 1. Attach the right side panel (3) to the 6 cross bars (2). 2. Insert 6 long wood screws (A) into the holes on the right side panel (3) then tighten into the holes on the 6 cross bars (2) by using a Philips screwdriver.
STEP 3 5 4 5 STEP 3 1. Place the top board (4) up-side-down. 2. Attach the 2 support bars (5) to the top board (4). 3. Insert 4 short wood screws (B) into the holes on the 2 support bars (5) then tighten into the holes on the top board (4) by using a Philips screwdriver. STEP 4 3 4 STEP 4 1. Screw in 4 cam bolts (C) into the pre-threaded holes on the top board (4). 2.
STEP 5 3 5 5 STEP 5 1. Insert 4 short wood screws (B) into the holes on the support bars (5) then tighten into the holes on the both side panel (1), (3) by using a Philips screwdriver. STEP 6 STEP 6 1. Put the big storage bin (12) into the storage unit.
STEP 7 STEP 7 1. Put the 2 small storage bins (13) into the storage unit. STEP 8 7 6 STEP 8 - Chairs 1. Insert 2 wood dowels (G) into the holes on the right side leg (6). 2. Attach the 2 chair center cross bars (7) to the right side leg (6) by inserting 2 wood dowels (G) into the holes on the 2 chair center cross bars (7). 3.
STEP 9 8 6 STEP 9 1. 2. 3. 4. Insert 1 wood dowel (G) into the hole on the right side leg (6). Attach the chair back board (8) to the right side leg (6) by inserting 1 wood dowel (G) into the hole on the chair back board (8). Insert 1 barrel nut (F) into the hole on the chair back board (8), making sure the hole of the 1 barrel nut (F) is facing towards the edge of the chair back board (8).
STEP 11 7 7 STEP 11 1. Insert 4 wood dowels (G) into the holes on the cross bars (7),(9), and chair back board (8). 2. Attach the left side leg (10) to the 2 chair center cross bars (7), chair back board (8) and chair lower cross bar (9) by inserting 4 wood dowels (G) into the holes on the 2 chair center cross bars (7), chair back board (8) and chair lower cross bar (9). 3.
ENJOY YOUR NEW RiverRidge® TABLE / CHAIR NOW ! Attention Adults: The table / chair should be checked periodically for damage or loose screws/parts. Take appropriate action necessary to correct the hazard such as tightening of screws and taking any damaged parts away from the children. Thank you for purchasing this RiverRidge® Kids Products item. We hope you enjoy it, and consider purchasing other RiverRidge® items. Send requests for missing or damaged parts replacements by email to : customer.