RG-16 User’s Manual RJM Music Technology, Inc.
RG-16 User’s Manual Version 1.2 January 5, 2009 RJM Music Technology, Inc. 2525 Pioneer Ave. Suite 2 Vista, CA 92081 +1-760-597-9450 email: support@rjmmusic.com web: www.rjmmusic.
Copyright © 2008 RJM Music Technology, Inc. All Rights Reserved RG-16, Amp Gizmo, MasterMind and the RJM logo are trademarks of RJM Music Technology, Inc.
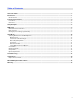
Table of Contents Table of Contents.............................................................................................................................................................. v Introduction ......................................................................................................................................................................1 RG-16 Features ........................................................................................................................
Introduction Congratulations on purchasing the RG-16 audio loop and function switcher. The RG-16 has been designed to give you total control of your amplifier, effects devices, effects pedals or other electronic equipment from a single MIDI footswitch. The RG-16 provides eight audio loops, eight function switches and a professional quality audio buffer, all in a compact, single rack space design.
2 Front Panel
3 From Front Input Buffer In Buffer Out Return 1 Send 1 Rear Panel Return 2 Send 2 Return 3 Send 3 Return 4 Send 4 Output Tuner Out Send 5/NC In 5 Return 5 Out 5/NO Send 6/NC In 6 Return 6 Out 6/NO Send 7/NC In 7 Return 7 Out 7/NO Send 8/NC In 8 Return 8 Out 8/NO Amp 1 Amp 2 MIDI Thru RJM Music Technology, Inc. MIDI Out www.rjmmusic.
Controls and Connectors Front Panel 1. Write Button – Hold this button for three seconds to save the current settings to memory. The LEDs will flash to confirm. 2. Function Switch Buttons – These buttons turn function switches 1 through 8 on and off. The LED above each button is lit when the corresponding function switch is on. The Function Switches are used to control channel switching and other features of an amplifier connected to the RG-16 via the Amp 1 and/or Amp 2 jacks. 3.
About Audio Loops 5 through 8 Audio loops 5 through 8 are fully independent and not connected to each other in any way. Each loop has its own discrete input and output. When a loop is off, the Send and Receive jacks for that loop are bypassed, and audio signal passes unchanged from loop input to loop output. When a loop is on, the loop input is connected to the Send jack, and the loop output is connected to the Return jack. 14. Input (5 through 8) – Signal input to the corresponding audio loop. 15.
Setup Examples Guitar connects to input on front panel Buffer In Send 1 From Front Send 2 Send 3 Send 4 To Tuner To Amplifier Input In 5 Tuner Out Out 5/NO In 6 Out 6/NO In 7 Out 7/NO In 8 Out 8/NO Amp 1 Amp 2 MIDI Out MIDI Thru MIDI In Power 9VAC only! Buffer Out Input Return 1 Return 2 Return 3 Return 4 Output Send 5/NC Return 5 Send 6/NC Return 6 Send 7/NC Return 7 Send 8/NC Return 8 RJM Music Technology, Inc. www.rjmmusic.
Buffer In From Front Send 1 Send 2 Send 3 Send 4 In 5 Tuner Out Out 5/NO In 6 Out 6/NO In 7 Out 7/NO In 8 Out 8/NO Amp 1 Amp 2 MIDI Out MIDI Thru MIDI In Power 9VAC only! Buffer Out Input Return 1 Return 2 Return 3 Return 4 Output Send 5/NC Return 5 Send 6/NC Return 6 Send 7/NC Return 7 Send 8/NC Return 8 RJM Music Technology, Inc. www.rjmmusic.
MIDI Usage The RG-16 can receive MIDI messages from any MIDI footswitch or other MIDI controller. By storing different settings, or “patches” for different MIDI program numbers, you can automatically recall a stored patch by sending the correct MIDI program number from your footswitch. You can assign which audio loops and function switches are on for each and every patch. To save a setting to a MIDI program number: • • • Select a MIDI program number with your MIDI footswitch or controller.
Bank Selection The RG-16 can store programs in MIDI banks 0 and 1, for a total of 256 programs. Continuous Controller #0 (Bank MSB) is used to select the current MIDI bank. Bank numbers above bank 1 are ignored. By default, bank selection is disabled. You can enable bank selection using Setup Mode (see Setup Mode section). Backing Up Your Settings: Sysex Dump A Sysex (System Exclusive) data dump will send the current RG-16 system configuration out through the MIDI Out port.
Setup Mode To configure the RG-16, you must first enter Setup Mode. Holding down selected buttons while powering the unit on will bring up selected setup modes, as detailed in this section. Selecting MIDI Channel and MIDI Options Hold the Audio Loop 1 button while powering the RG-16 on. Keep holding the button until the LEDs flash. The Audio Loop buttons will then allow you to select the MIDI channel the RG-16 responds to as well as set other MIDI related options.
The Function Switch 3 and 4 buttons control the Continuous Controller range for all Function Switches: Function Switch CC Range 80…87 88…95 (default) 64…71 56…63 GCX Number 1 2 3 4 Function Switch 3 LED OFF ON OFF ON Function Switch 4 LED OFF OFF ON ON GCX Compatibility Mode Function Switch 5 turns on GCX compatibility mode for the Audio Loops. This makes the Audio Loops respond to MIDI commands like the GCX switcher, manufactured by Voodoo Lab.
To enter Momentary Mode, hold down the Audio Loop 3 button while powering up the RG-16. Keep holding the button until the LEDs flash. Use the front panel buttons to light the LED of any function that needs to be momentary. Make certain that no other LED is lit. Once you’ve selected the buttons for the momentary functions, press the Write button. The RG-16 is now in normal operational mode and the momentary functions should operate correctly.
Troubleshooting Problem: The LEDs don’t flash when you hold down the Write Button. Solution: The RG-16 did not receive a MIDI Program Change message. First, verify that you have a valid MIDI connection. The MIDI output of your MIDI controller should be connected to the MIDI input of the RG-16 by a MIDI cable that’s known to be working correctly. The next most likely cause is that the RG-16 is set to a different MIDI channel than your MIDI controller.
Specifications Dimensions Weight Power Phantom Power Memory Standard 1U EIA rack enclosure 19 (W) x 1.75 (H) x 7.25 (D) inches 48.3 (W) x 4.5 (H) x 18.5 (D) cm 4 lbs, 4 oz 1.8 kg 9VAC @ 450mA, 12VDC also acceptable 5.5mm OD, 2.5mm ID x 9.
RG-16 MIDI Implementation Chart MIDI Implementation Chart v 2.0 (Page 1 of 3) Manufacturer: RJM Music Technology, Inc. Model: RG-16 Version: 1 Date: January 5, 2009 Transmit/Export Recognize/Import 1.
MIDI Implementation Chart v 2.0 (Page 2 of 3) Manufacturer: RJM Music Technology, Inc.
MIDI Implementation Chart v 2.0 (Page 3 of 3) Manufacturer: RJM Music Technology, Inc.
Warranty RJM Music Technology, Inc. warrants this product against any defects in material or workmanship for a period of one year from the original date of purchase. Should you experience any difficulty with this RJM Music product, please contact us as described below.