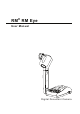
RM ® RM Eye User Manual Digital Document Camera
P/N 300AACEN Made in Taiwan
FCC NOTICE (Class B) This device has been tested and found to comply with the limits for a Class B digital device, pursuant to Part 15 of the FCC Rules. These limits are designed to provide reasonable protection against harmful interference in a commercial, industrial or business environment. This equipment can generate, use and radiate radio frequency energy and, if not installed and used in accordance with the instruction, may cause harmful interference to radio communications.
Battery Safety Information - Store the batteries in a cool dry place. Do not dispose of used batteries in normal waste. Dispose of batteries at special collection points or return to point of sale if applies. Remove the batteries during long periods of non-use. Always remove exhausted batteries from the remote control. Battery leakage and corrosion can damage this remote control, dispose of batteries safely. Do not mix old and new batteries.
Table of Contents Introduction ........................................................................................ 1 Package Contents .............................................................................. 1 Optional Accessories......................................................................... 2 RM Eye Parts ...................................................................................... 2 Technical Specifications....................................................................
Introduction Packa ge Contents Thank you for purchasing Eye ® RM RM U ser your RM Eye ™. This Manu al visualiser displays any documents, negatives, Di gi tal Docum ent Came ra transparencies and 3D objects onto a TV, LCD or User Manual DLP projector making presentations simple. RM Eye is an ideal RCA Cable presentation tool for the academic community.
Optional Accessories Microscope Adapter (28mm) Microscope Adapter (34mm) DVI/VGA Adapter Light Box * Required to view slide, transparencies and film or to display negative film as positive image. RM Eye Par ts The illustrations below identify the parts of RM Eye.
Te c h n i c a l S p e c i f i c a t i o n s Image Pick-up Device Effective Pixels Frame Rate White Balance (RGB Output only) Exposure (RGB output only) Image mode Effect Analog RGB output S-Video, C-Video Output 1/3” progress scan CCD 790K 1024 (H) x 768 (V) 20 fps Auto/Manual Auto/ Manual/ Flicker / Night View Text/ Graphics/ Microscope Color/ B/W / Negative/ Mirror/ Rotate XGA 75 Hz; SVGA 75 Hz NTSC/ PAL Optics Lens Shooting Area Zooming Focusing Power Source Consumption F1.8-2.
Har dwar e Installation and Setup Connection Ports The ports on the back and side panel of the RM Eye are for connecting the unit to a computer, graphics display monitor or LCD/ DLP projector, TV and other devices. Illustrated below are the ports that are located at the back and side panel of the RM Eye with their corresponding labels. 6 DC V 2 S23 TV/R SW DC12 V SD PC IN CF DVI/V GA OU T Port Description 1. Security Slot Connect a Kensington compatible security lock to this slot. 2.
Setting the DIP Switch The chart below tells you how to set the DIP switch. Turn the power off before changing the DIP switch setting. DIP Switch UP DOWN 1 (TV SYSTEM) NTSC PAL 2 (VIDEO OUTPUT) RGB TV 3-4 (ENGINEERING PORT) Default X Connecting a VGA, Mac Display Monitor or LCD/DLP Projector To display a presentation using a DVI/VGA or any graphics display monitor, set the DIP switch no. 2 to the UP position.
Connecting an IBM Compatible PC or Macintosh Computer You can connect the RM Eye to an IBM compatible PC, Macintosh, or notebook (laptop) computer. After physically connecting the unit to your PC, you can display an image on your computer by pressing the PC button on the unit’s control panel or remote control.
Using RM Eye as USB PC Cam For detailed PC Cam driver installation procedures, see the instruction provided in the CD and click User Manual. USB Port Laptop TV/R DC S232 6V SW DC12 SD V PC IN CF DVI/V G A OU T Computer USB Cable (supplied) Installing the LED Lamp To ensure adequate lighting, focus the light towards the object to balance the distribution or range of luminance for better image projection. TURN ON Snap to hold. LL / FU S C Stretch the arm and insert the LED lamp.
Installing the Optional Light Box Connecting an optional light box enables you to view x-rays, transparencies and negative slides. Light Box (optional) Light Box (optional) DC DC12 V 6V TV/ RS232 SW PC SD IN DVI/V GA OU T CF PLUG IT HERE TURN ON Connecting to a Microscope Connecting the RM Eye to a Microscope enables you to examine microscopic objects on a big screen without straining your eyes.
Making the Adjustments This section describes how your can adjust the RM Eye to meet your needs. Camera head The camera head can be rotated 125 degrees from left to right. As you rotate the camera head, the camera adjusts the focus automatically. 15 degrees 90 degrees Mechanical Arm The mechanical arm is designed to move from almost any angle. Follow the illustrated safety procedure to adjust. 195 degrees Extendable up to 122mm (4.
LED Panel The chart below indicates the different status of RM Eye. Color Green Red Description The unit is powered on. The unit is in standby mode. Infrared Sensor When using the remote control, aim it at the Infrared Sensor, which is located on the front panel of the RM Eye. U si n g t h e I n f r ar e d Rem o t e C o n t r o l Use the RM Eye Remote Control to enhance your presentation, switch between three presentation modes and access additional features.
(2) (3) (4) (1) (20) (5) (6) (19) REVERSE (18) (7) (17) (8) (9) ENTER (11) (16) (15) (14) (12) (13) (10) Name Button Function (1) POWER Turn the unit on/off. (2) CAMERA MODE Switch to Camera mode and display the image from the RM Eye’s built-in CCD camera. (3) PC MODE Switch to PC mode and display the video signal from the RGB input port. (4) PLAYBACK MODE Switch to Playback mode and toggle to display 16-thumbnail images or the selected image from the memory source.
Name Button PG UP (8 & 19) Function PG DN PAGE UP/DOWN Display the previous and next set of 16-thumbnail images. (9) NIGHT VIEW Turn on/off Night View. Use Night View when you are presenting in a low-light condition. The captured image however, appears in slow motion. (10) FREEZE Toggle to pause or resume the camera. (11) AUTO FOCUS Adjust the focus automatically. (12) FOCUS U/V Adjust the focus manually. (13) ZOOM +/ - - Zoom in and zoom out the picture digitally in Playback mode.
Name Button Function Remove the selected picture permanently in Playback mode. (21) DELETE To u c h B u t t o n C o n t r o l P a n e l The touch button control panel located on the top side of RM Eye provides quick access to commonly used functions. (2) (1) (3) (4) (10 ) (5) (9) (8) (6) (7) Name Button 1 CAMERA MODE 2 PC MODE 3 PLAYBACK MODE 4 FOCUS Function Switch to Camera mode and display the image from the RM Eye’s built-in digital video camera.
Name Button 5 Function Automatically adjust the focus. AUTO FOCUS 6 CAPTURE 7&9 MENU/ ◄▲►▼ 8 ZOOM +/ - - In Camera mode, press to photograph an image. If there is an available memory card in the slot, the captured image is stored in the memory card automatically and saved in 1024 x 768 resolution. - Press MENU to call the OSD menu and then use the ▲, ►, ▼ and ◄ to make a selection and adjustment. (Refer to the section; Menu Functions, for more details.
Timer Function The RM Eye enables you to control the pace of your presentation by displaying the remaining time on the countdown screen. This merely serves as a reminder. When the time is up, the timer blinks at the top right corner of the screen and the presentation screen will not be affected in any way. To Set the Timer: 1. Press MENU to view on screen function selections. 2. Press ▲or▼ buttons to select TIMER. 3. Press ►or◄ buttons to set a time value. You can set the time value up to 120 minutes. 4.
O S D N a v i g a t i o n Tr e e RGB VIDEO OUTPUT OSD BRIGHTNESS -50 0 50 CONTRAST MENU BRIGHTNESS CONTRAST ZOOM TIMER MODE EFFECT DEFAULT ADVANCED -50 0 50 ZOOM OPTICAL DIGITAL TIMER : MIN.
TV OUTPUT OSD DISPLAY TIMER : MIN. 0 0 120 WHITE BALANCE AUTO MANUAL MENU TIMER WHITE BALANCE EXPOSURE CARD DEFAULT RED MANUAL RED BLUE MEASURE -0 -0 100 FLICKER 50 HZ 60 HZ CARD TYPE FORMAT TYPE SD CARD CF CARD DEFAULT NO YES FORMAT NO YES 511 66 511 BLUE MANUAL EXPOSURE AUTO MANUAL FLICKER NIGHT VIEW 91 100 -0 Menu Functions The RM Eye provides MENU functions enabling you to fine-tune your screen display, set the timer, select OSD language and more.
OSD Menu Description MODE MODE : TEXT GRAPHICS MICROSCOPE Use ▲or▼ buttons to select between text, graphics and microscope image enhancement mode. In text mode, the RM Eye corrects the intensity of the adjacent pixel making it more uniform producing sharper and clearer images. While in graphics mode, the RM Eye adjusts the gradient of the adjacent pixel that appears to have a smooth image. Setting it to microscope mode automatically fixes the optical zoom and displays the microscope image more clearly.
OSD Menu FLICKER Description FLICKER : 50 Hz 60 Hz Use ▲or▼ buttons to select between 50Hz or 60Hz. Some display devices cannot handle high refresh rates. The image will flicker a couple of times as the output is switched to another refresh rate. WHITE BALANCE WHITE BALANCE : AUTO MANUAL Use ▲or▼ buttons to select between Auto and Manual. RM Eye enables you to automatically or manually adjust the camera to suit the lighting condition or colour temperature.
Tr o u b l e s h o o t i n g This section provides useful tips describing how to solve common problems while using the RM Eye. There is no picture on the presentation screen. 1. 2. 3. 4. Check all the connectors again as shown in this manual. Check your display output device remote control’s on/off switch. Verify the setting of the display output device. If you are to present using a notebook or computer, you may have to switch the source to VGA.