
User Manual


Table Of Contents
- 41 CHAPTER VIII: Troubleshooting
- CH II
- CH III
- CH IV
- CHV
- CHVI
- CHVII
- CHVIII
4
CH III
Connecting your R1 3D Printer
Physically connect your printer
• Locate a solid flat surface to place your printer- somewhere close to your computer
• You also need to be close to a power outlet
• Plug the USB cable that comes with your kit into the right side of the printer and
connect the other end to an available port on your computer.
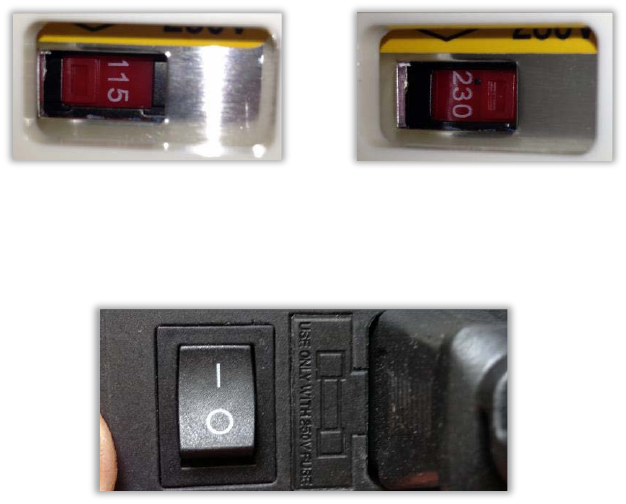
*IMPORTANT!! Make sure you set the voltage on the power supply on the back
side of your printer to the correct position before use! Use a flat head
screwdriver or a pen to move the slider. Use 115 (3.1a) if you are in the U.S. If
you are out of the U.S. or need a higher voltage setting for another reason, move
the slider to the 230v (3.1b) position.
(3.1a) (3.1b)
• Flip the switch on the back right side of the printer to the on position (3.2)
(3.2)