
User Manual


Table Of Contents
- 41 CHAPTER VIII: Troubleshooting
- CH II
- CH III
- CH IV
- CHV
- CHVI
- CHVII
- CHVIII
5
Connecting to the ROBO 3D Software
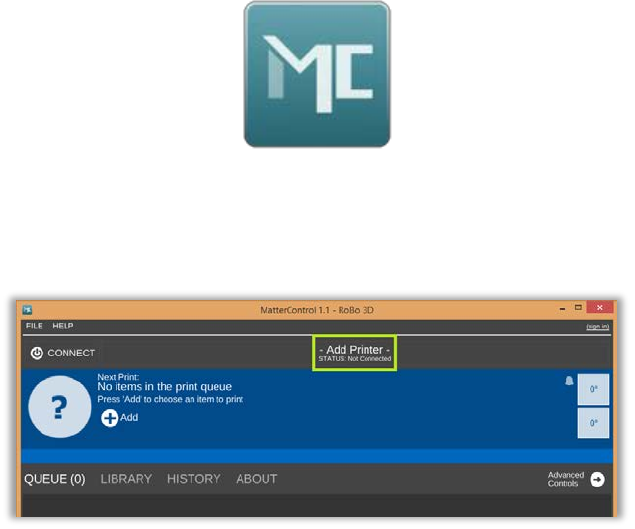
• Click the MatterControl icon that saved on your desktop.
• Make sure you are connected via USB and your printer is powered on.
• After the software opens, click the “Add Printer” button at the top of the screen. (3.3)
(3.3)
• A new window will pop up and you will be able to set up a 3D printer. From here you
can assign your ROBO 3D a nickname. This helps you keep track of multiple units. (3.4a)
• Next find the “Select Make” drop down list and choose ROBO 3D.
• Now select “R1” from the model list. (3.4b)
• To save this printer, click the “Save & Continue” button as seen below. (3.4c)