Robomow app
TABLE OF CONTENTS 1 General .............................................................................................................................................................................................. 2 2 Compatibility ..................................................................................................................................................................................... 2 3 4 5 6 2.1 Device Compatibility..................................................
1 GENERAL The Robomow App is a mobile application available for Android and iOS that enables user friendly and intuitive operation of your Robomow, through a variety of menu options and features. The unique advantages of Robomow App include: The Robomow App is completely free and works with all Robomow models produced since 2014. You do not need to purchase an expensive accessory for your Robomow in order to operate it with the Robomow App.
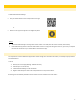
3 DOWNLOADING AND INSTALLATION 3.1 FIRST TIME INSTALLATION To download the Robomow App: Use your mobile device to scan the QR code on the right or Search for the app in the App Store or Google Play Store. Notes: 3.2 To find the Robomow App in the App Store search results on an iPad, filter the search results by ‘iPhone Only’.
4 4.1 REGISTRATION REGISTRATION FLOW The following steps describe how to register the Robomow app. 1. 2. Start the Robomow app. You are prompted to select a country and language. Select the country where the Robomow is located. 3. The next step is to create a new user. Click the New User area. 4. You are now prompted to scan the serial number of your Robomow. You can find the Robomow serial number on the silver product sticker. On the C-models, it’s on the back of the mower.
While scanning the serial number, it is important to keep the smartphone / tablet close to the barcode, so that the code is clearly read. The serial number can also be entered manually. To do so, press Enter Manually and type in the entire serial number, including the leading letters. 5. You now need to enter an email address and a password. The password is case-sensitive and must be at least 6 characters long. It should not start with ‘%’ or ‘#’ or ‘&’ characters.
6. Next, click the yellow Terms & Conditions link. This displays the usage conditions and safety warnings. Scroll down to the end of the text, and click the yellow Accept button if you agree to the terms and conditions. A small checkmark appears: I agree to the Robomow’s Terms & Conditions. If all fields are completed, press Next. A “Registration Complete” notification appears on your screen, and this completes the registration process.
4.2 REGISTRATION TROUBLESHOOTING The following table describes the various registration-failure sub-messages that may appear, and the corrective action to take in each case. # Sub-message Corrective Action 1 This serial number is already registered. The person currently registered with the mower needs to delete his account (App Settings > Delete Account). Alternatively, register with exactly the same credentials as the person currently registered. 2 No Internet connection.
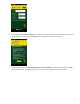
5 CONNECTION WITH A MOWER The Robomow App communicates with your mower via the BLE (Bluetooth Low Energy) communication protocol. Upon successful registration and upon every launch of the app, the app automatically scans for available BLE devices and tries to connect automatically to the registered mower: Figure 1 - Successful Registration Figure 2 - Scanning for mowers Important! Make sure the mower is switched on and awake. Make sure you’re within a few meters of the mower.
5.1 CONNECTION TROUBLESH OOTING If you get a connection failure message when trying to connect to your mower, please refer to the following table to troubleshoot the problem: # 1 Possible Cause / Sub-message Corrective Action Android only: Trying to connect to a mower while it’s in operation. When mower’s software version is older than 2016, then Android versions of the Robomow App can establish a connection only when a mower docks in the base station or is idle.
If you see MoMT or MoNA in scan results, contact Robomow Hotline for assistance. When you see the proper MoXXXX in scan results, close LightBlue/nRF UART app, open Robomow App and try to connect again. If still unable to connect, contact Robomow Hotline for assistance. 5.2 CONNECTION RANGE OF THE ROBOMOW APP The range of wireless connection between the Robomow App and your mower varies between 10 to 25 meters under normal conditions, depending on the mower’s orientation (side, front, or back).
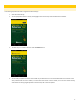
iOS Instructions: Android Instructions: 11
12
6 6.1 ROBOMOW APP OPERATION MAIN OPERATIONAL SCREEN The following figure illustrates all the features/components available in the Robomow App main operational screen. Access to main menu Battery capacity of the mower Status of Bluetooth® SMART connection with the mower: Connected/Disconnected Note: when disconnected, only access to main menu is available. Any other status or control on the screen is not available or not updated.
6.2 CHANGING MOWER’S SETTINGS WITH ROBOMOW APP To view and change mower or lawn settings using the Robomow App: 1. Click the “Menu” button on the Robomow app’s home screen. The main menu is displayed, as shown below. 2. Click Lawn & Mower Options. A new window appears with all of the lawn options that can be set for the Robomow. Here you can view and change Lawn Options (additional zones, inactive periods, etc.) and Mower Options (Rain Sensor, child locks, etc.
(*) Program On/Off External Base (RC models only) The available Mower options include: (*) 6.2.1 Child Lock Rain Sensor Sound On/Off Edge On/Off Mobile Communication System In the 2015 software version CHANGING “LAWN OPTIO NS” VIA ROBOMOW APP To change lawn options, navigate to Main Menu Lawn & Mower Options. 6.2.1.1 INACTIVE TIME Using this option you can set the Robomow inactive periods, during which mowing is inactive.
Important: In the 2014 mower’s software version, once you enable the “Hours 2” slot via the app on the C-model mower, the entire “Inactive Times” menu become unavailable via the mower. To regain control of the “Inactive Times” menu via the mower, disable “Hours 2” in the app. In the 2015 mower’s software version, there is no such limitation. You can always change “Inactive Times” via the mower, but only for “Hours 1”. The “Hours 2” option is only available via the app.
6.2.1.2.1 INTENSITY (“MOWING HOURS %” IN 2015 MODELS) Robomow by default allocates a certain number mowing hours per a given area size. Using the Intensity setting, you can make adjustments to the default setting and increase/decrease the number of operating hours per area size (in %). ‘Zero’ indicates Robomow’s default number of required mowing hours for the given area. You can adjust the intensity for each zone separately. 6.2.1.2.
6.2.1.3 ZONES Using this option you can set the area of the main zone, set additional zones (sub-zones), or set separate zones. To change the size of the main zone, click the Main Zone box. To define an additional zone, click Add in the Zones window.
6.2.1.3.1 SUB-ZONE To set a sub-zone: 1. Click the Sub-Zone area. If the mower is in the base station, it gives a signal that it is departing from the base. Shortly afterwards, it departs from the base and starts driving along the wire without activating the mowing motor(s). While Robomow is driving to the sub-zone entrance, the app window looks like this: 2. Follow the mower while it is driving along the edge. 3.
6.2.1.3.2 SEPARATED ZONE To set a separated zone: 1. Click Separated Zone (see the figure below). 2. Click the area size setting to set the area of the separated zone. 3. Click Save to save the settings. 6.2.1.4 ISLANDS In rare cases, you may notice the mower unnecessarily circling around a Perimeter Island, while searching for the Base Station. The Islands option helps overcome this situation. To avoid such cases in a zone, turn the Islands feature On in that zone.
Important! When the Islands feature is set to On, the mower executes a special method of searching for the Base Station. As a result it may take the mower a longer time to arrive at the Base Station. 6.2.1.5 NEAR WIRE FOLLOW Using this option you can define how closely Robomow follows the perimeter wire on its way to the base station. You can set this option for each zone separately. You can set the following: Max.
1. Before using this option, make sure the external charging station was installed correctly. Refer to the Operating Manual for the installation instructions. 2. Select the zone in which the external charging station is located – the Main Zone, or if relevant, a Separated Zone. 3. Enable or disable the External Base option by setting the controller to "ON" or "OFF". 4. Specify the distance of the base station from the edge using the Distance slider.
3. Select the Mower tab to change mower settings such as child lock, rain sensor, , etc.
6.2.2.1 CHILD LOCK SETTINGS (PARENTAL CONTROL) The Child Lock feature locks the mower’s buttons to prevent unintended operation, especially by children. Note: this feature only locks buttons on the mower itself. The operational buttons in the app are not locked. When the Child Lock is set to 'On', to operate the mower you must first press one of the mower’s operating mode buttons and then press OK to confirm. 6.2.2.2 SOUND This option turns operational sound signals of the mower on or off.
7 REMOTE CONTROL FUNCTION The Remote Control function is a unique Robomow App functionality, which enables you to remotely drive your Robomow and perform manual mowing. It is completely free of charge for all Robomow models. The Remote Control function can be accessed by pressing Remote in the Main Operation Screen, as shown in the figure below: 7.1 MANUAL MOWING WITH THE REMOTE CONTROL FUNCTION To perform manual mowing in remote control mode: 1. 2. 3. 4.
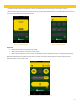
8 APP SETTINGS 8.1 CHANGING THE ROBOMOW APP LANGUAGE You can change the language of the Robomow app in either of the following ways: In the Welcome screen, just before the initial registration. In the Main Menu App Settings. Figure 5 - Changing the language in the Welcome screen 8.
9 GSM MODULE The main purpose and value of the GSM accessory is the ability to send alerts by push notification to the mower’s owner. The GSM Module itself provides an Internet data connection, but the push notifications mechanism requires registering a mobile device as a push notifications recipient. This is where the Robomow App comes in. The GSM Module can send two types of alerts (push notifications) to your mobile device: 9.
10 REMOTE ACCESS The “Remote Access” utility enables remote access to your mower by an authorized Robomow service provider, using your mobile device as an intermediator. This means that from one side, your mobile device is connected to your mower via the regular BLE connection. And from the other side, it is connected to the service station via a 3G or WiFi connection. In this way there is a direct link between the service station and your mower.
Important notes: Only an authorized service station that knows the exact serial number of your mower can connect remotely to your mower. It can only connect to your mower when your mobile device is connected to the mower by itself, and running the Remote Access utility. You can abort a remote connection to your mower at any moment by pressing the Disconnect button. You can speak with the service operator on the same phone that is running a remote connection with your mower.