Ford Super Duty Rear Bumper Installation Instruction RB-F-100-SD Installation Instruction RSEI 115
Parts List QTY 1 4 4 8 2 DESCRIPTION Rear Bumper ½” Bolts Nylock Nuts Washers License Plate Clips *If any parts listed are missing or damaged please call Rock-Slide Engineering @ 435-752-4580 prior to installation Installation Instruction RSEI 115
Bumper Installation 1. Remove stock bumper. Unplug wiring harness from truck to bumper. 2. Flip mounting brackets from outside of frame to inside. Reattach with factory bolts, but don’t completely tighten to allow some adjustability for later in the install Mounting Bracket, moved from outside of frame to inside of frame 3.
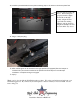
. Remove all wiring from rear of factory bumper 5. Install factory sensors in new bumper. The sensors read in a specific direction, so they need to be installed in the same location in the bumper they were removed from. They also need to be rotated in the hole to face the same direction. After the bumper is reinstalled, test the sensors to make sure they read correctly by putting the truck in reverse and backing up to an object. If needed they can be rotated in the hole. 6.
7. Install factory license plate lights in new bumper 8. Plug stock wiring harness into sensors and license plate lights. Bumper is now ready to install 9. Place bumper on vehicle. Bolt bumper to mounting brackets, using provided ½” bolts, washers and nylock nuts. Adjust so the tailgate opens and closes without hitting the bumper and so the light pockets or step are not touching the truck.
10. Install the provided white license plate mounting clips in the holes on the license plate face License plate mounting clip holes. When bumper is properly installed, lights should show through evenly, tailgate should open without touching bumper, and gap between tailgate and bumper should be even all the way across 11. Plug in 7 way tow plug 12. After market lights can be installed in the light pockets (if equipped) after the bumper is installed.