Ford Raptor/F-150 Slider Installation SL-F150-4DR, SL-F150-4DRA SL-F150-2DR-EX, SL-F150-2DR-EXA Installation Instruction RSEI 137
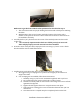
PARTS LIST 1 DESCRIPTION Drivers Side Slider Assembly 1 Passenger Side Slider Assembly 2 Top Brackets 2 Back brackets 24 7/16” Washers 24 Aluminum Nutserts 14 5/16” SS Button Head Bolts 14 5/16” Stainless Steel Washers *If any parts listed are missing or damaged please call Rock-Slide Engineering @ 435-752-4580 prior to installation SLIDER INSTALLATION 1. Remove the stock rocker panel guards 2.
Make sure to get the front of the bracket positioned as described in step 3. a. This works best with two people holding the bracket and a third person marking the holes b. With bracket in the correct location, mark the location of the holes with a marker on the panel of the truck. These will be the locations for the nutserts to be installed in the body. 5. Carefully drill a 7/32’’ pilot hole into the center of the marked points into the truck’s rocker side a.
vii. If the nutsert ever breaks loose and spins, repeat the process and crimp it tighter to prevent spinning Nutserts properly installed 8. Attach the top bracket to the truck a. Hang bracket on truck and bolt through bracket into the nutserts. Leave bolts loose until all bolts are installed. Go back and tighten bolts until the bracket is firm against side of truck 9. Set slider onto installed top bracket 10.
16. Tighten all the bolts on the back bracket 17. Attach the slider to the top bracket using the stainless steel bolts. Don’t forget to use the anti-sieze on each stainless steel bolt 18. Tighten the bolts from the back bracket to the slider body 19. These holes are elongated to allow for any adjustments that need to me made. 20. When the slider is mounted make sure that you have not twisted or manipulated the shape of the slider with you tightening sequence. THIS WILL CAUSE THE STEP TO NOT WORK PROPERLY.