8
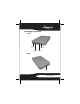
4 Secure the drive to the printed circuit board with four
screws.
5 Return the printed circuit board to the enclosure, then
secure it with the four screws you previously removed.
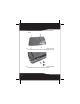
6 Replace the top of the enclosure, then slide the switch
lock from the unlocked to the locked position.