0-1087_RF-HD3035_MAN_ENG_V1.fm Page 1 Friday, October 29, 2010 1:25 PM USB 3.0 3.
10-1087_RF-HD3035_MAN_ENG_V1.fm Page 2 Friday, October 29, 2010 1:25 PM USB 3.0 3.5" SATA Hard Disk Drive Enclosure Contents Introduction ............................................................................................................3 Safety information ................................................................................................3 Important safety instructions .................................................................3 Features.........................................
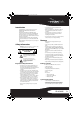
10-1087_RF-HD3035_MAN_ENG_V1.fm Page 3 Friday, October 29, 2010 1:25 PM Introduction Congratulations on the purchase of your new Rocketfish RF-HD3035 external hard drive enclosure kit. The USB 3.0 Rocketfish 3.5" SATA hard drive enclosure lets you install a high-speed SATA hard drive and connect it to a computer via a USB 3.0 port. The enclosure has a built-in USB 2.0 hub and a memory card reader. SuperSpeed USB 3.0 transfers data at 5 gigabits per second. That's up to 10 times faster than USB 2.0.
10-1087_RF-HD3035_MAN_ENG_V1.fm Page 4 Friday, October 29, 2010 1:25 PM • Supports Microsoft Windows XP, Windows Vista, and Windows 7 operating systems. • Supports MAC OS X version 10.4 or higher operating system (USB 2.0 only). For highest performance and reliability, install the latest updates and service pack (SP). For Windows, go to the Start menu and select Windows Update. Back Power button Physical description USB 3.
10-1087_RF-HD3035_MAN_ENG_V1.fm Page 5 Friday, October 29, 2010 1:25 PM • Make sure that you first touch an unpainted, grounded metal object to discharge any static electricity stored on your clothing or body before touching any electronic components. • Handle the printed circuit board (PCB) edges only. Avoid touching the onboard electronic components. 4 Replace the top cover (make sure to place it in the correct direction), then secure it with the four screws that you previously removed.
10-1087_RF-HD3035_MAN_ENG_V1.fm Page 6 Friday, October 29, 2010 1:25 PM 2 Plug the USB 3.0 B type connector into the USB port on the enclosure, then plug the USB 3.0 A type connector into an available USB 3.0 port on your computer. Creating a new partition in Windows XP/Vista/7 To create a new partition in Windows XP/Vista/7: 1 Right click My Computer, then click Manage. 2 Select Disk Management under Storage on the USB 3.0 A-type connector USB 3.
10-1087_RF-HD3035_MAN_ENG_V1.fm Page 7 Friday, October 29, 2010 1:25 PM 3 Double-click Drive Setup. 4 In the list of drives, select the drive you want to Using your memory card reader The enclosure provides two USB 3.0 multimedia memory card slots: initialize, then click Initialize. Formatting the hard drive on your Mac To format your hard drive with Mac OS Extended format: This method of formatting hard drives allows for more efficient use of hard drive storage space. 1 Click Custom Setup.
10-1087_RF-HD3035_MAN_ENG_V1.fm Page 8 Friday, October 29, 2010 1:25 PM Installing the software The installation CD includes backup software to enable you to back up your files. 4 Click Next. The Roxio End-User License Agreement screen opens. Note: This Roxio Back On Track software runs only on Windows 7, Windows Vista, and Windows XP computers using USB. Important: Before installing the backup software, make sure that your Windows operating system has been updated to the latest service pack.
10-1087_RF-HD3035_MAN_ENG_V1.fm Page 9 Friday, October 29, 2010 1:25 PM 9 It may take several minutes to install the software. The first time you run the software, the Product Registration screen opens. 2 Complete the product registration information 10 When installation is complete, the Setup Wizard Completed screen opens. as prompted (first time only). The main screen opens. 3 To back up or restore files, follow the on-screen guide. For help, press F1 or click Help.
-1087_RF-HD3035_MAN_ENG_V1.fm Page 10 Friday, October 29, 2010 1:25 PM Selecting files to back up You can back up all of the files in a selected path or limit your project to certain file categories. The following categories can be selected from the project window: Email, Financial, Music, Photos, Productivity, and Video and Recorded TV. You can also create one custom category.
10-1087_RF-HD3035_MAN_ENG_V1.fm Page 11 Friday, October 29, 2010 1:25 PM Creating a custom category Most computer files are defined by the two-, three-, or four-letter extension placed at the end of their names. Plain text files, for example, can be identified by their .txt file extension. When you record a Backup Files project, the program is simply searching your computer for files with extensions that correspond to the categories you selected.
10-1087_RF-HD3035_MAN_ENG_V1.fm Page 12 Friday, October 29, 2010 1:25 PM To open and run a saved Backup Files project: 1 Click File. If the project is listed on the File menu, select it. If the project is not listed, click Open and use the dialog box to navigate to the project file. By default, project files are saved in your Windows Vista and Windows 7 Documents folder or Windows XP My Documents folder. The settings for that project are displayed in the project window.
10-1087_RF-HD3035_MAN_ENG_V1.fm Page 13 Friday, October 29, 2010 1:25 PM Backup tips • All of the discs used in a Back Up Files project must be the same general format. • In a multi-disc Back Up Files project, files are assigned based on the size of the first disc you use. If your first disc has a capacity of 650 MB, for example, no more than 650 MB will be burned on any subsequent disc, even if it has a larger capacity.
10-1087_RF-HD3035_MAN_ENG_V1.fm Page 14 Friday, October 29, 2010 1:25 PM Restoring files The Restore Files project restores individual files and folders that you have protected using the Backup Files project. With Restore Files, you select a backup, search for the files or folder you would like to restore, and then click the action button. The files will be restored to the location you choose. 8 Click the action your files.
10-1087_RF-HD3035_MAN_ENG_V1.fm Page 15 Friday, October 29, 2010 1:25 PM 5 After the software is uninstalled, restart your computer if prompted. Troubleshooting I do not see the enclosure/additional drive in my system There is a USB icon in the system tray, but I can't find the hard disk in MY COMPUTER.
10-1087_RF-HD3035_MAN_ENG_V1.fm Page 16 Friday, October 29, 2010 1:25 PM • Increase the separation between the equipment and receiver. • Connect the equipment into an outlet on a circuit different from that to which the receiver is connected. • Consult the dealer or an experienced technician for help. FCC warning Changes or modifications not expressly approved by the party responsible for compliance with the FCC Rules could void the user’s authority to operate this equipment.
10-1087_RF-HD3035_MAN_ENG_V1.fm Page 17 Friday, October 29, 2010 1:25 PM One-year limited warranty Rocketfish Products (“Rocketfish”) warrants to you, the original purchaser of this new RF-HD3035 (“Product”), that the Product shall be free of defects in the original manufacture of the material or workmanship for one (1) year from the purchase of the Product (“Warranty Period”). This Product must be purchased from an authorized dealer of Rocketfish brand products and packaged with this warranty statement.
10-1087_RF-HD3035_MAN_ENG_V1.fm Page 20 Friday, October 29, 2010 1:25 PM www.rocketfishproducts.com (800) 620-2790 Distributed by Best Buy Purchasing, LLC 7601 Penn Avenue South, Richfield, MN 55423-3645 USA © 2010 BBY Solutions, Inc. All rights reserved. ROCKETFISH is a trademark of BBY Solutions, Inc. All other products and brand names are trademarks of their respective owners.