DeviceNet Interface Catalog Number 1761-NET-DNI User Manual
Important User Information Solid state equipment has operational characteristics differing from those of electromechanical equipment. Safety Guidelines for the Application, Installation and Maintenance of Solid State Controls (publication SGI-1.1 available from your local Rockwell Automation sales office or online at http://literature.rockwellautomation.com) describes some important differences between solid state equipment and hard-wired electromechanical devices.
Summary of Changes The information below summarizes the changes to this manual since the last revision. Revision bars in the margin identify updated information. The following changes are included in this version of the document. Change 3 Page Added note that programming over a DeviceNet network is available only with RSLogix 5/500-based controllers. 21 Added note that remote access to a DeviceNet network is available only with RSLogix 5/500-based controllers.
Summary of Changes Publication 1761-UM005B-EN-P - October 2006
Table of Contents Preface About This Publication . . . . . . . . Who Should Use This Publication Conventions . . . . . . . . . . . . . . . . Additional Resources. . . . . . . . . . . . . . . . . . . . . . . . . . . . . . . . . . . . . . . . . . . . . . . . . . . . . . . . . . . . . . . . . . . . . . . . . . . . . . . . . . . . . . . . . . . . . . 7 7 7 8 Chapter 1 Overview Introduction . . . . . . . . . . . . . . . . . . . . . . . . . . . . . . . . . . . . . 9 Operating Modes . . . .
Table of Contents 6 Chapter 7 Application Examples MicroLogix as I/O on the DeviceNet Network . . . . . . . . . . . 69 Example DNI Configuration Parameters . . . . . . . . . . . . . . . . 70 Example Ladder Logic . . . . . . . . . . . . . . . . . . . . . . . . . . . . . 71 Chapter 8 Explicit Messaging (DNI Series B Using DF1 Protocol for Explicit Messages Over a DeviceNet Network . . . . . . . . . . . . . . . . . . . . . . . . . . . . . . . . . . . . . . . 78 Only) Routing Profile Configuration. . . . .
Preface About This Publication This user manual introduces the DeviceNet Interface (DNI) and explains the procedures you need to install, configure, and commission the interface. Who Should Use This Publication Use this manual if you are responsible for designing, installing, programming, or troubleshooting control systems that use Allen-Bradley controllers on a DeviceNet network. You should have a basic understanding of Allen-Bradley programmable controllers and DeviceNet technology.
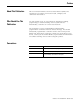
Preface Additional Resources Resource Description MicroMentor, publication 1761-RM001 Information on understanding and applying micro controllers.
Chapter 1 Overview Introduction The DeviceNet interface is a standalone, DIN-rail or panel mounted, intelligent DeviceNet-to-DF1 protocol-conversion device that lets existing DF1 devices communicate on a DeviceNet network. The DF1 device exchanges I/O data with a Master device and originates and receives DF1 encapsulated DeviceNet messages across a DeviceNet network. The DNI provides a single DeviceNet connection point and a single RS-232 connection.
Overview Publication 1761-UM005B-EN-P - October 2006
Chapter 2 Quick Start This chapter can help you to get started using the 1761-NET-DNI DeviceNet Interface (DNI). We base the procedures here on the assumption that you have an understanding of MicroLogix products. You should understand electronic process control and be able to interpret the ladder logic instructions required to generate the electronic signals that control your application.
Quick Start IMPORTANT If your network consists entirely of DNIs (no master is present), you must disable Autobaud on at least one DNI. It is recommended that all DNIs be manually set to a specific baud rate. This is to prevent multiple DNIs from hunting for a baud rate at power-up. 5. To exchange data with other controllers over a DeviceNet network, configure a message instruction inside each controller’s program. See Programming Over the DeviceNet Network on page 21 for more information. 6.
Quick Start Configuring Master/Slave I/O IMPORTANT 13 You must have the DNI’s EDS (electronic data sheet) file and bitmap file (or icon) loaded into your configuration software. See DNI Software Files on page 53 and Setting Up Network Configuration Software on page 55 for more information. Follow these steps to configure a DNI connected to a MicroLogix 1000 controller as a slave device to a DeviceNet master. 1. Unpack and mount the DNI. 2. Connect the DNI to the DeviceNet Network.
Quick Start To configure a MicroLogix 1000 controller as a slave device to a DeviceNet master, set the parameters as shown in the following table.
Quick Start 15 7. Click Modified Parameter, then OK. 8. Save to the configuration to the DNI. In this configuration, the DNI provides two words (32 bits) of data. The data is scanned (read), starting at address N7:90 of the attached MicroLogix 1000 controller, at 100 msec intervals. Data received (DeviceNet master output) is written to the MicroLogix 1000 controller whenever new (changed) data is detected by the DNI. Two words of data will be written to Integer file 7, starting at word 95.
Quick Start Publication 1761-UM005B-EN-P - October 2006
Chapter 3 Operation Modes of Use The DeviceNet Interface has three primary features. • DeviceNet I/O • Explicit Messaging • Programming over DeviceNet network DeviceNet I/O IMPORTANT All input and output comments are referenced from the perspective of the DeviceNet Master. The DNI is capable of being owned by a master on DeviceNet.
Operation Input Image The input image is a configurable array of 16-bit data words. The image is configurable from 1…16 data words for DNI Series A (1…32 data words for DNI Series B). The actual data that resides in the input image is delivered to the DeviceNet master by one of three mechanisms. • Polled: Where the DeviceNet Master sends a poll request with output data and the DNI responds with its current input data.
Operation Messaging Services 19 The capabilities of each individual device determine what level of messaging is supported. The types of messaging supported are: • I/O Assembly Messaging (DNI responds) • PCCC encapsulated DeviceNet Messaging (peer-to-peer) • Explicit Assembly Messaging (DNI initiates, DNI Series B Only) See Explicit Messaging (DNI Series B Only) on page 77 for more information. I/O Assembly Messaging Two conditions must be met to access the I/O assemblies.
Operation Programmable Controller Communications Commands (PCCC) DeviceNet Messaging/ DF1 (peer-to-peer) Allen-Bradley controllers with RS-232 ports communicate via PCCC messaging. The DNI encapsulates the PCCC messages to allow PCCC messaging to operate over DeviceNet. This is an open, non-proprietary protocol that can be implemented by anyone who needs to exchange information with an Allen-Bradley controller.
Operation Programming Over the DeviceNet Network IMPORTANT 21 Programming over a DeviceNet network via the DNI is available only with RSLogix 5/500-based controllers such as PLC-5, SLC, and MicroLogix. Local Access to a DeviceNet Network PCCC/DF1 messaging allows programming devices to connect to a DeviceNet network, and upload/download/monitor and even edit programs if the controller attached to the destination DNI supports that functionality.
Operation Remote Access to DeviceNet (Modems) IMPORTANT Remote access to a DeviceNet network via the DNI is available only with RSLogix 5/500-based controllers such as PLC-5, SLC, and MicroLogix. If users need to dial into a DeviceNet network and have access to controllers connected to DNIs, they can plug a DNI into a modem. Now users can dial into the modem and have access to all DNI/controllers from a remote site.
Chapter 4 Installation and Wiring European Communities (EC) Directive Compliance This product has the CE mark and is approved for installation within the European Union and EEA regions. It has been designed and tested to meet the following additional directives.
Installation and Wiring Safety Considerations This equipment is suitable for use in Class I, Division 2, Groups A, B, C, D, or non-hazardous locations only. ATTENTION Explosion Hazard Substitution of components may impair suitability for Class I, Division 2. Do not replace components unless power has been switched off and the area is known to be non-hazardous. Do not disconnect connectors unless power has been switched off and the area is known to be non-hazardous.
Installation and Wiring 25 Side View DIN Rail Latch Follow these steps to remove the DNI from the DIN rail. 1. Place a screwdriver in the DIN rail latch at the bottom of the unit. 2. Holding the unit, pry downward on the latch until the unit is released from the DIN rail. Side View DIN Rail Panel Mounting Follow these steps to mount the DNI on a panel. 1. Remove the mounting template from Appendix A of this document. 2. Secure the template to the mounting surface. 3. Drill holes through the template.
Installation and Wiring Network Port Wiring DeviceNet Network To properly design your DeviceNet network, see DeviceNet Media Design Installation Guide, publication DNET-UM072. This document provides design guidelines concerning wiring practices, connectors, grounding and power budgeting. This publication is available from your Allen-Bradley distributor, or from the Internet at www.literature.rockwell.com.
Chapter 5 DNI Configuration Parameters and Programming Notes Information About DNI Series B The following changes have been made which affect the EDS file. • The Standby/Operational parameter has been removed from the EDS file. The operating mode is now controlled by the I/O Scan Enable parameter. • Three new parameters have been added to the EDS file.
DNI Configuration Parameters and Programming Notes EDS Parameters for the DNI The following list shows the available parameters for configuring the DNI. Parameter definitions and usage information are provided in the sections following the table. IMPORTANT When modifying most DNI parameters, you must first disable polling (Set the Data Enable parameter to disable for DNI Series A. Set the I/O Scan Enable parameter to disable for DNI Series B). You can enable polling after setting your configuration.
DNI Configuration Parameters and Programming Notes 29 EDS Parameters for the DNI Messaging 2 15 Message Timeout 0…2500 ms 0 ms 46 Messaging Not Applicable 16 DF1 Substitute Address 0…64 64 = Disabled 47 DF1 15 17 DF1 Autobaud Disabled (0) or Enabled (1) Enabled (1) 47 DF1 16 18 DF1 Baud Rate 0…5: 0: 38,400 1: 19,200 2: 9600 3: 4800 4: 2400 5: 1200 Series A: 2 = 9600 Series B: 1 = 19,200 48 DeviceNet 1 19 DeviceNet Autobaud Disabled (0) or Enabled (1) Enabled (1) 48 Device
DNI Configuration Parameters and Programming Notes The first byte (byte 0) of the first word contains the status byte and is not available to the user. Input Size Sample Data Array Word Input Image Series A Series B 0 0 Data (8 bits) Status 1 1 Data Most Significant Byte (MSB) Data Least Significant Byte (LSB) 2 2 Data MSB Data LSB 3 3 Data MSB Data LSB ↓ ↓ ↓ ↓ 14 30 Data MSB Data LSB 15 31 Data MSB Data LSB TIP Byte 1 (MSB) of word 0 is available for user data.
DNI Configuration Parameters and Programming Notes 31 Organization of Input Data The following diagram describes how the Split Point parameter affects the data in the DF1 Device. The split point represents the last word of the Master data. Words above the split point are Explicit data.
DNI Configuration Parameters and Programming Notes The DNI’s input image will consist of: DNI’s Input Image Word Instance ID 0 Master’s Slave Data and Status 1 Master’s Slave Data 2 ↓ 3 Master’s Slave Data 0x64 Split Point 4 Explicit Input Data 0x70 5 ↓ 0x71 6 ↓ 0x72 7 ↓ 0x73 8 ↓ 0x74 9 ↓ 0x75 10 ↓ 0x76 11 ↓ 0x77 12 ↓ 0x78 13 ↓ 0x79 14 ↓ 0x7A 15 ↓ 0x7B 16 ↓ 0x7C 17 ↓ 0x7D 18 ↓Explicit Input Data 0x7E You can use 0x66 to access the entire configure
DNI Configuration Parameters and Programming Notes 33 Input Type Parameter Parameter Number Description Type Series A Series B Range Default Value I/O Bit or Integer File Integer File 5 3 Input Type This parameter is used to identify the type of data to be read within the controller. The DNI supports data exchange with either bit or integer files.
DNI Configuration Parameters and Programming Notes Input Word Offset Parameter Type Parameter Number Series A Series B I/O 7 5 Description Range Default Value Input Word Offset 0…254 0 This parameter identifies the starting word within the input file identified by the parameter Input Data File. The value entered is the first word of data that is read from the controller attached to the DNI.
DNI Configuration Parameters and Programming Notes IMPORTANT 35 If you use RSNetWorx or DeviceNet Manager to configure/commission the DNI, it is up to you to select the correct values for: • Input Size • Input Split Point (DNI Series B only) • Input Type • Input Data File • Input Word Offset Only the DNI Configuration Software Utility performs checks on the information entered.
DNI Configuration Parameters and Programming Notes The first byte (byte 0) of the first word contains the status byte and is not available to the user. A sample of the data array is shown below.
DNI Configuration Parameters and Programming Notes 37 Organization of Output Data The following diagram describes how the Split Point parameter affects the data in the DF1 Device. The split point represents the last word of the Master data. Words above the split point are Explicit data.
DNI Configuration Parameters and Programming Notes The DNI’s output image will consist of: DNI’s Output Image Word 0 1 2 3 Split Point 4 5 6 9 8 9 10 11 12 13 14 15 16 17 18 Master’s Slave Data and Status Master’s Slave Data ↓ Master’s Slave Data Explicit Output Data ↓ ↓ ↓ ↓ ↓ ↓ ↓ ↓ ↓ ↓ ↓ ↓ ↓ Explicit Output Data Instance ID 0x65 0x90 0x91 0x92 0x93 0x94 0x95 0x96 0x97 0x98 0x99 0x9A 0x9B 0x9C 0x9D 0x9E You can use 0x67 to access the entire configured explicit assembly.
DNI Configuration Parameters and Programming Notes 39 Output Data File Parameter Parameter Number Type Series A Series B Description Range Default Value I/O Output Data File 3…254 7 10 9 This parameter is used to identify the target data file where data will be written within the controller. The sizes of compatible data files within Allen-Bradley controllers vary based on the DFI device selected.
DNI Configuration Parameters and Programming Notes The sizes of compatible data files within Allen-Bradley controllers vary based on the DFI device selected. Controller Data Files Controller Output Data Files File Sizes MicroLogix 1000 Bit 32 Words Integer 105 Words Bit 255 Words Integer 255 Words Bit 999 Words Integer 999 Words SLC/Other MicroLogix PLC TIP IMPORTANT IMPORTANT The DNI can only access files 0…254. You must have sufficient room in the file that you select.
DNI Configuration Parameters and Programming Notes 41 Device Type Device Type Parameter Definition Parameter Parameter Number Type Series A Series B Description Range Default Value I/O DF1 Device 0…3: 0: Other 1: PLC 2: SLC/ Other MicroLogix 3: MicroLogix 1000 3 = MicroLogix 1000 14 11 Select the device connected to the DNI’s RS-232 port.
DNI Configuration Parameters and Programming Notes performance. When this parameter is disabled, PCCC messaging still operates. IMPORTANT IMPORTANT Enable this parameter to use explicit messaging to assemblies. When modifying most DNI parameters, you must first disable polling (Set the Data Enable parameter to disable for DNI Series A. Set the I/O Scan Enable parameter to disable for DNI Series B). You can enable polling after setting your configuration.
DNI Configuration Parameters and Programming Notes 43 DF1 Heartbeat DF1 Heartbeat Parameter Definition Parameter Parameter Number Description Type Series A Series B Range Default Value I/O Series A: 2…10 Series B: 1…10 2 12 13 DF1 Heartbeat The DF1 data heartbeat is used to detect a valid communications path between the controller and the DNI and also to detect if the connected controller is scanning its ladder logic.
DNI Configuration Parameters and Programming Notes DF1 Heartbeat Rotation Example The value entered for the heartbeat determines how often the DNI will rotate the heartbeat bit. The table below illustrates the heartbeat rotation with the default setting of two (heartbeat checked on every other read). DF1 (RS-232) Port DNI’s Read Sequence A D E F B C A B C DNI’s Write Sequence A. DNI gets (reads) data from controller B. DNI checks heartbeat and toggles bit C.
DNI Configuration Parameters and Programming Notes 45 Data Scan Delay Data Scan Delay Parameter Definition Parameter Parameter Number Description Type Series A Series B Range Default Value I/O 20…3000 ms 50 ms 13 14 Data Scan Delay (Polling Delay) When Data Enable (parameter 3) is enabled (DNI Series A) or I/O Scan Enable (parameter 12) is enabled (DNI Series B), the value entered for Data Scan Delay defines the amount of time that the DNI will delay between communications.
DNI Configuration Parameters and Programming Notes Message Timeout Message Timeout Parameter Definition Parameter Type Parameter Number Series A Series B Messaging 2 15 Description Range Default Value Message Timeout 0…2500 ms 0 MS The Message Timeout is the amount of time that a DeviceNet explicit connection is held open after message completion. The Message Timeout allows the DNI to hold open a connection with another device over the DeviceNet network.
DNI Configuration Parameters and Programming Notes 47 DF1 Substitute Address DF1 Substitute Address Parameter Definition Parameter Type Parameter Number Series A Series B Messaging n/a 16 IMPORTANT Description Range DF1 Substitute 0…64 Address Default Value 64 = Disabled The DF1 Substitute Address parameter cannot be used with DNI Series A.
DNI Configuration Parameters and Programming Notes DF1 Baud Rate DF1 Baud Rate Parameter Definition Parameter Type Parameter Number Series A Series B DF1 16 18 Description Range Default Value DF1 Baud Rate 0…5: 0: 38,400 1: 19,200 2: 9600 3: 4800 4: 2400 5: 1200 Series A: 2 = 9600 Series B: 1 = 19,200 This parameter defines the baud rate for the RS-232 port when DF1 Autobaud is disabled.
DNI Configuration Parameters and Programming Notes 49 DNI Mode DNI Mode Parameter Definition Parameter Type Parameter Number Device 17 IMPORTANT Description Range Default Value Series A Series B n/a DNI Mode Standby (0) or Operational (1) Operational (1) The DNI Mode parameter only applies to DNI Series A. For DNI Series B, the operating mode is controlled by the I/O Scan Enable parameter. This parameter defines the mode of the DNI.
DNI Configuration Parameters and Programming Notes Input Messaging Considerations • You cannot write to a specific word in the DNI’s input area. • The destination offset value in the controller’s message instruction is ignored. Data always starts at word 0. • The message length must equal the size specified by the Input Size parameter. For DNI Series B only, both the Master’s Slave data and the Explicit Assembly are considered to be input. For more information, see: – Input Split Point on page 30.
DNI Configuration Parameters and Programming Notes 51 Output Buffer Overdrive (Bit 6, written by the DNI) This bit is set (1) when Master Outputs arrive at a rate faster than the DNI can forward the data to the DF1 device. When the Buffer Overdrive bit is set, the output image is being overwritten before it can be sent to the DF1 device. To resolve this, limit the data production rate in the scanner until this bit stays clear (0).
DNI Configuration Parameters and Programming Notes Example With the starting output word at N7:95 (Output Word Offset), and the starting input word at N7:90 (Input Word Offset), you need to program this rung in the controller’s program to move the heartbeat bit. N7:95 N7:90 7 7 Your program should also monitor N7:95/7 for activity. If activity is lost, it represents a problem with the connection to the DNI, or the DNI has some type of error or problem.
Chapter 6 Setup, Programming, and Troubleshooting DNI Software Files To configure the DNI as an I/O slave device on a DeviceNet network, you may need to obtain two software files. These two files provide your network configuration software with the information it needs to interface with the DNI. DNI Series A Information RSNetWorx and DeviceNet Manager (version 3.0 and higher) include the files necessary for DNI Series A.
Setup, Programming, and Troubleshooting TIP DNI Series A stopped shipping in June of 1999. DNI Series B started shipping in July of 1999. File Descriptions File DNI Electronic Data Sheet DNI Icon for Configuration Software DNI Configuration Software Utility Description This is a text file that is compatible with A-B network configuration software. This file, along with the 1761DNI.BMP (or 1761DNI.
Setup, Programming, and Troubleshooting Setting Up Network Configuration Software 55 To configure the DNI, you must set up your network configuration software and follow the configuration procedures. The initial set up is only performed once. After the files have been saved by your network configuration software, they are stored on the computer. Setting Up DNI Configuration Software Utility No initial set up is required to use the DNI Configuration Software Utility.
Setup, Programming, and Troubleshooting – Communications Adapter Publication 1761-UM005B-EN-P - October 2006
Setup, Programming, and Troubleshooting 57 Setting Up DeviceNet Manager With DeviceNet Manager open, install 1761DNI2.EDS for DNI Series A (1761DNI3.EDS for DNI Series B) and 1761DNI.BMP for DNI Series A (1761DNIB.BMP for DNI Series B) using the EDS install utility (in the Utilities menu of DeviceNet Manager). Follow these steps to load both DNI files into DeviceNet Manager. 1. Start DeviceNet manager. 2. With DeviceNet manager open, select the Utilities Menu. 3. Select Install EDS Files. 4.
Setup, Programming, and Troubleshooting Commissioning the DNI Your configuration software handles all interface issues for connection to a DNI over a DeviceNet network. You use exactly the same procedures to connect to a DNI as you do any other DeviceNet product. The DNI draws power from the DeviceNet connector.
Setup, Programming, and Troubleshooting IMPORTANT IMPORTANT Programming Over the DeviceNet Network 59 Configuring the baud rate is needed only when DeviceNet Autobaud is disabled. The default (out-of-box) setting for DeviceNet Autobaud is “enabled”. The new baud rate takes effect on power cycle or when DNI is reset. Use caution when changing the baud rate on an active network.
Setup, Programming, and Troubleshooting Computer on DeviceNet Network You must have RSLinx version 2.O or newer to upload, download, or edit controller programs directly over DeviceNet (using a 1770-KFD, 1784-PCD, 1784-PCID or equal). 1. Open RSLinx, and select Configure Drivers. 2. Select DeviceNet Driver from the list. 3. Click Add New. 4. Open your configuration software and make sure it recognizes and is configured to use RSLinx DeviceNet driver. 5.
Setup, Programming, and Troubleshooting 61 Using RSNetWorx to Modify Parameters Once a DNI is placed on the network, double-click to open the EDS file. All adjustable parameters that configure the DNI for operation are set up through this configuration utility. The illustration below shows the RSNetWorx Device Configuration screen with each DNI configurable parameter. Perform this procedure to configure any of the parameters. 1. Highlight the parameter. 2.
Setup, Programming, and Troubleshooting Using DeviceNet Manager to Modify Parameters Once a DNI is placed on the network, double-click to open the EDS file. All adjustable parameters that configure the DNI for operation are set up through this configuration utility. The illustration below shows the DeviceNet Manager Device Configuration screen with each DNI configurable parameter. To configure any of the parameters, perform this procedure. 1. Highlight the parameter. 2.
Setup, Programming, and Troubleshooting Troubleshooting 63 The DeviceNet Interface has three LED indicators. LED Indicators LED Module Status LED Network Status LED RS-232 LED Color bicolor - red/green bicolor - red/green green Module Status LED (MOD LED) The module status LED provides information specific to the DNI. Module Status LED LED Condition Off DNI State Not Powered Green(1) DNI Series A: Device Operational Problem/Indication The device may not be powered or firmware unable to run.
Setup, Programming, and Troubleshooting Network Status LED (NET LED) The network status LED provides information specific to the DeviceNet network. Network Status LED LED Condition Off DNI State Not Powered/Not On-Line Flashing Green(1) Green(1) Flashing Red Red Flashing Red-Green (1) Problem/Indication DNI is not on-line. • DNI has not completed the Dup_MAC_ID test yet. • DNI may not be powered.
Setup, Programming, and Troubleshooting DNI Series A DeviceNet Class Codes 65 Identity Object Class Code: 0x01 Service Name Get Attribute Single Set Attribute Single Reset Service Code 0x0E 0x10 0x05 Instance = 0x01 Name Vendor ID Device Type Product Code Revision Major Revision Minor Revision Status Serial Number Product Name DNI Mode (parameter 17) Attribute 0x01 0x02 0x03 0x04 0x05 0x06 0x07 0x64 Data UINT UINT UINT STRUCT of: USINT USINT WORD UDINT SHORT_STRING BOOL Access Get Get Get Get Get G
Setup, Programming, and Troubleshooting DNI Series B DeviceNet Class Codes Identity Object Class Code: 0x01 Service Name Get Attribute Single Set Attribute Single Reset Service Code 0x0E 0x10 0x05 Instance = 0x01 Name Vendor ID Device Type Product Code Revision Major Revision Minor Revision Status Serial Number Product Name Publication 1761-UM005B-EN-P - October 2006 Attribute 0x01 0x02 0x03 0x04 0x05 0x06 0x07 Data UINT UINT UINT STRUCT of: USINT USINT WORD UDINT SHORT_STRING Access Get Get Ge
Setup, Programming, and Troubleshooting 67 Input Assembly Data (Explicit, Split Point, and Slave) Class Code: 0x04 Name Inputs Slave Assembly Access Get/Set Instance Type Input Data Attribute Value 100 (64h) 3 Get/Set Input 102 (66h) 3 Get/Set Get/Set Get/Set Get/Set Get/Set Get/Set Get/Set Get/Set Get/Set Get/Set Get/Set Get/Set Get/Set Get/Set Get/Set Get/Set Get/Set Get/Set Get/Set Get/Set Get/Set Get/Set Get/Set Get/Set Get/Set Get/Set Get/Set Get/Set Get/Set Get/Set Get/Set Input Input Inpu
Setup, Programming, and Troubleshooting Output Assembly Data (Explicit, Split Point, and Slave) Class Code: 0x04 Name Outputs Slave Assembly Access Get/Set Instance Type Output Data Attribute Value 101 (65h) 3 Get/Set Output 103 (67h) 3 Get/Set Get/Set Get/Set Get/Set Get/Set Get/Set Get/Set Get/Set Get/Set Get/Set Get/Set Get/Set Get/Set Get/Set Get/Set Get/Set Get/Set Get/Set Get/Set Get/Set Get/Set Get/Set Get/Set Get/Set Get/Set Get/Set Get/Set Get/Set Get/Set Get/Set Get/Set Output Outpu
Chapter 7 Application Examples All examples are for illustration and information purposes only. Because of the many variables and requirements associated with any particular installation, Rockwell Automation cannot assume responsibility or liability for the actual use based on the examples and diagrams. MicroLogix as I/O on the DeviceNet Network MicroLogix controllers are incapable of being true slave I/O products.
Application Examples Example DNI Configuration Parameters All example ladder logic programs in this section use the following DNI configuration.
Application Examples Parameter Number Series A Series B 16 18 Description Range Default Value For this Example, ENTER DF1 Baud Rate 0…5: Series A: 2 = 9600 0 = 38,400 0: 38,400 Series B: 1 = 19,200 71 1: 19,200 2: 9600 3: 4800 4: 2400 1 17 5: 1200 19 DeviceNet Autobaud Disabled (0) or Enabled (1) Enabled (1) Not DNI Mode Standby (0) or Operational (1) Applicable Operational (1) Example Ladder Logic Enabled (1) Operational (1) The ladder program example is used to monitor the integrity of t
Application Examples DNI - MicroLogix Heartbeat Logic TIP Publication 1761-UM005B-EN-P - October 2006 Rung 9 in this example resets (0) all outputs to off if communications are lost. If you prefer your application to have the controller maintain the outputs in their last state, remove this rung. Or, if you want additional logic to control your outputs, remove this rung and program the outputs as your application requirements warrant.
Application Examples 73 DNI I-O.RSS Ladder 2 - Main Program This rung sets status file bit S2:0/8. When this bit is set, it allows a program written for a 32-point MicroLogix 1000 controller to run without an I/O mismatch error on a 10, 16, or 25-point controller. Extend I/O Configuration S:0 0000 8 This rung detects an off-to-on transition of bit N7:95/7. Bit N7:95/7 is the communication’s Heartbeat that is received from the DNI.
Application Examples DNI - COS (change of state) I/O Messaging The ladder logic shown below is an example of how to send input data to the DNI (COS input messaging). This procedure is recommended because the latency issue associated with polling devices is minimized. Polling is a mechanism that is used to acquire data from a device. The DNI reading data from a controller at a set interval is an example of a polled relationship.
Application Examples 75 DNI I-O.RSS Ladder 6 - COS ML DNI This rung checks to see if the input data has changed from the previous ladder scan. If the input data has changed, bit B3:31 is set. MicroLogix 1000 Inputs Input Data has Changed Flag 0000 NEQ Not Equal Source A Source B NEQ Not Equal Source A Source B B3:31 I:0.0 341< N7:89 341< 11 I:0.
Application Examples Publication 1761-UM005B-EN-P - October 2006
Chapter 8 Explicit Messaging (DNI Series B Only) Explicit messaging is the mechanism that is used to move data over the DeviceNet network. Every device on the DeviceNet network either initiates or responds to some type of explicit message to either read (get) or write (set) data. In the network shown below, node 5 is a master (scanner) that owns slave I/O data on the DeviceNet network.
Explicit Messaging (DNI Series B Only) The Series B DNI also has the ability to exchange data with other DeviceNet devices using explicit messaging, provided those devices are capable of interacting. The following list provides some of the requirements. • If a device is Unconnected Message Manager (UCMM) capable, it should be 100 percent compliant with or without a master being present on the network.
Explicit Messaging (DNI Series B Only) 79 The DNI can store up to 10 profiles. These profiles can be changed at any time, and they are not backed up with a battery. If the power to the DeviceNet network is lost, the profiles are cleared and must be reloaded. This can be done with a subroutine. TIP Routing Profile Configuration A message instruction returning an error code of 0xD0H is an indication that profiles need to be re-configured. The 10 profiles are stored within the DNI in profile registers.
Explicit Messaging (DNI Series B Only) Explicit Messaging Examples Once the profiles are correctly loaded into the DNI, getting data from a DeviceNet device is as simple as reading data from another controller. The procedure is illustrated by the following examples. Reading (Get) Data Example Node 5 Node 10 Node 20 Node 15 Node 25 Node 30 For the DeviceNet network shown above, we want to read data from the proximity sensor at node 15.
Explicit Messaging (DNI Series B Only) 81 DNI Profile Register 240: • • • • • DeviceNet Node:15 Class: 14 (0x0E) Instance: 1 Attribute: 1 Size: 1 byte To read data from the proximity sensor, a read message is initiated from the controller to node address 240. The DNI receives the node 240 read request and then generates the appropriate DeviceNet explicit message to get (read) data from the proximity sensor at node 15. TIP The profiles size parameter must match the DeviceNet device.
Explicit Messaging (DNI Series B Only) Writing (Set) Data Example In this example we want to write data to the light tower at node 20. The light tower has specific parameters that are accessible via the DeviceNet network. In this example, profile register 241 within the DNI (node 10) has been configured to set data in the light tower.
Explicit Messaging (DNI Series B Only) 83 The message instruction setup screen is shown below. • The actual data portion of the controller’s write message (N7:1) must match the size parameter in the respective profile register.
Explicit Messaging (DNI Series B Only) Publication 1761-UM005B-EN-P - October 2006
Appendix A Specifications Physical Specifications Description 24V dc Power Source Required Current Draw Specification 11…25V dc 200 mA at 24V dc 350 mA at 11V dc (400 mA maximum inrush for 30 ms at 24V dc) 500V dc 0° C…+60° C (+32° F…+140° F) -40° C…+85° C (-40° F…+175° F) UL 1604 C-UL C22.2 No. 213 Class I Division 2 Groups A,B,C,D CE compliant for all applicable directives ODVA Conformance Version 2.0 Internal Isolation Ambient Operating Temp.
Specifications Dimensions 52.07 mm (2.05 in.) 118 mm (4.64 in.) 107 mm (4.20 in.) 27.7 mm Allow 15 mm (0.6 in.) (1.09 in.) clearance for DIN rail latch movement during installation and removal. Publication 1761-UM005B-EN-P - October 2006 64.8 mm (2.55 in.
Specifications 87 Mounting Template 52.07 mm (2.05 in) 118 mm (4.64 in) 107 mm (4.20 in) 27.7 mm (1.09 in) Allow 15 mm (0.6 in.) clearance for DIN rail latch movement during installation and removal.
Specifications Publication 1761-UM005B-EN-P - October 2006
Glossary Interface Basics The 1761-NET-DNI (DNI) is a smart interface that provides DF1 full-duplex capable devices a connection to the DeviceNet network. To understand how the DNI operates, you need to become familiar with certain terms. This figure illustrates the relationship between the DF1 Device, the DNI function, and the DeviceNet network.
Glossary DeviceNet Master A product capable of owning input/output (I/O) on a DeviceNet network. DeviceNet Slave A product whose data (or portion of) can be owned by DeviceNet master. DF1 Full Duplex DF1 is a standard (open) point-to-point communication protocol. Virtually all Allen-Bradley controllers (PLC-3, PLC-5R, SLC, MicroLogix) that support an RS-232 communication port support DF1. Explicit Messaging A DeviceNet message that gets/sets device configuration information.
Glossary 91 data words (DNI Series B is configurable from 1…32). Output data received from the DeviceNet master is forwarded (written) to the RS-232 device. Peer-To-peer A type of communication where both devices are equal. These devices communicate to each other without a third device to manage the transaction. Profile Register The location within the DNI where routing profile configurations are stored.
Glossary Publication 1761-UM005B-EN-P - October 2006
Index Numerics 1761-NET-DNI agency certification 85 commissioning 58 compliance to EC directives 23 configuration parameters 27 configuration software 53 interface diagram 89 new features 27 port identification 26 specifications 85 DeviceNet valid data 51 DF1 autobaud 47 DF1 baud rate 48 DF1 heartbeat 43 DF1 substitute address 27, 47 dimensions 86 mounting template 87 DIN rail mounting 24 DNI Configuration Utility 54, 55 DNI mode 49 DNI-COS I/O Messaging 74 DNI-MicroLogix heartbeat logic 71 A application
Index network port wiring 26 safety considerations 24 setting up network configuration software 53 L LED module status 63 network status 64 RS-232 port 64 M master/slave I/O configuration 13 message timeout 46 modes of use 17 DeviceNet I/O 17 explicit messaging 17 programming over DeviceNet network 17 mounting DIN rail mounting 24 enclosure 23 mounting template 87 panel mounting 25 input data file 33 input size 29 input split point 30 input type 33 input word offset 34 message timeout 46 output siz
Index 95 T terms 89 troubleshooting LED indicators 62 U UL 85 W wiring 26 cables 24 Publication 1761-UM005B-EN-P - October 2006
Index Publication 1761-UM005B-EN-P - October 2006
Index 97 Publication 1761-UM005B-EN-P - October 2006
Index Publication 1761-UM005B-EN-P - October 2006
Rockwell Automation Support Rockwell Automation provides technical information on the Web to assist you in using its products. At http://support.rockwellautomation.com, you can find technical manuals, a knowledge base of FAQs, technical and application notes, sample code and links to software service packs, and a MySupport feature that you can customize to make the best use of these tools.