User Manual Compact High-speed Counter Module Catalog Number 1769-HSC
Important User Information Solid-state equipment has operational characteristics differing from those of electromechanical equipment. Safety Guidelines for the Application, Installation and Maintenance of Solid State Controls (publication SGI-1.1 available from your local Rockwell Automation sales office or online at http://www.rockwellautomation.com/literature/) describes some important differences between solid-state equipment and hard-wired electromechanical devices.
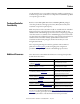
Summary of Changes This manual contains new and updated information. Changes throughout this revision are marked by change bars, as shown to the right of this paragraph. New and Updated Information This table contains the changes made to this revision. Topic Pages Changes were made to differentiate between the available high speed counters modules.
Summary of Changes Notes: 4 Rockwell Automation Publication 1769-UM006E-EN-P - July 2013
Table of Contents Preface Packaged Controller Functionality . . . . . . . . . . . . . . . . . . . . . . . . . . . . . . . . . 9 Additional Resources . . . . . . . . . . . . . . . . . . . . . . . . . . . . . . . . . . . . . . . . . . . . . . 9 Chapter 1 Module Overview Counters . . . . . . . . . . . . . . . . . . . . . . . . . . . . . . . . . . . . . . . . . . . . . . . . . . . . . . . . Inputs . . . . . . . . . . . . . . . . . . . . . . . . . . . . . . . . . . . . . . . . . . . . . . . . . . . . . . . .
Table of Contents Output Control . . . . . . . . . . . . . . . . . . . . . . . . . . . . . . . . . . . . . . . . . . . . . . . . . . Masks. . . . . . . . . . . . . . . . . . . . . . . . . . . . . . . . . . . . . . . . . . . . . . . . . . . . . . . . Ranges . . . . . . . . . . . . . . . . . . . . . . . . . . . . . . . . . . . . . . . . . . . . . . . . . . . . . . . Overcurrent . . . . . . . . . . . . . . . . . . . . . . . . . . . . . . . . . . . . . . . . . . . . . . . . . . Safe State Control . . . . . . .
Table of Contents Cyclic Rate Update Time (CtrnCyclicRateUpdateTime) . . . . . . . . 81 Configuration Flags . . . . . . . . . . . . . . . . . . . . . . . . . . . . . . . . . . . . . . . . . . 82 Range High Limit (Range0To11[n].HighLimit) and Range Low Limit (Range0To11[n].LowLimit) . . . . . . . . . . . . . . . . . . . . . . . . . . . . 84 Range Output Control (Range0To11[n].OutputControl). . . . . . . 85 Range Configuration Flags . . . . . . . . . . . . . . . . . . . . . . . . . . . . . . . . . . . .
Table of Contents Module Error Definition . . . . . . . . . . . . . . . . . . . . . . . . . . . . . . . . . . . . . . . . . 114 Module Error Field . . . . . . . . . . . . . . . . . . . . . . . . . . . . . . . . . . . . . . . . . . 114 Extended Error Information Field. . . . . . . . . . . . . . . . . . . . . . . . . . . . . 114 Error Codes . . . . . . . . . . . . . . . . . . . . . . . . . . . . . . . . . . . . . . . . . . . . . . . . . . . . . 116 Appendix A Specifications Throughput and Timing . . . . .
Preface Use this manual if you are responsible for designing, installing, programming, or troubleshooting control systems that use Compact I/O and/or MicroLogix 1500 or CompactLogix controllers. Packaged Controller Functionality Both the 1769-L24ER-QBFC1B and 1769-L27ERM-QBFC1B packaged controllers provide the same high-speed counter (HSC) functionality as the 1769-HSC except for the input frequency.
Preface Notes: 10 Rockwell Automation Publication 1769-UM006E-EN-P - July 2013
Chapter 1 Module Overview The 1769-HSC module is an intelligent counter module with its own microprocessor and I/O that is capable of reacting to high-speed input signals. The module can interface with up to two channels of quadrature or four channels of pulse/count inputs. The signals received at the inputs are filtered, decoded, and counted. They are also processed to generate rate and time-between-pulses (pulse interval) data.
Chapter 1 Module Overview Counters The module is capable of counting pulses in either direction (forward, reverse, up, down). A maximum of four pulse counters (or two quadrature counters) are available. Each 32-bit counter can count to ±2 billion as a ring or linear counter. In addition to providing a count value, the module provides a rate value up to ±1 MHz, dependent upon the type of input (the L23 packaged controller’s HSC module functionality does not provide rate values).
Module Overview Hardware Features Chapter 1 The module’s hardware features are illustrated in Figure 1. Refer to Chapter 3 on page 45 for detailed information on installation and wiring. For information about the packaged controllers’ hardware features, see the CompactLogix Packaged Controllers Quick Start and User Manual, publication IASIMP-QS010.
Chapter 1 Module Overview Status Indicators The front panel of the 1769-HSC module has a total of 12 status indicators. For information about the packaged controllers’ status indicators, see the CompactLogix Packaged Controllers Quick Start and User Manual, publication IASIMP-QS010.
Chapter 2 Module Operation This chapter details the operation of the 1769-HSC module. We strongly suggest that you review this information before configuring your module.
Chapter 2 Module Operation Module Operation Block Diagrams To provide an overview of the module operation, the block diagrams indicate relationships between module functions and configuration parameters. Inputs The following diagram illustrates how the inputs function. Input Filtering Discrete Input State Decoded NumberOfCounters Operational Mode Pulse Direction DirInvert DirInhibit Count Min/Max and Linear/Ring Overflow (ResetOvf)(1) Underflow (ResetUdf)(1) Store CtrnConfig.
Module Operation Chapter 2 Outputs The following diagram illustrates how the outputs function.
Chapter 2 Module Operation Number of Counters The module has six input points: A0, B0, Z0, A1, B1, and Z1. Through these inputs, the module can function with 1, 2, 3, or 4 counters depending upon the number of counters and the operational mode configuration of the input points. Summary of Available Counter Configurations The table summarizes the input configurations available for all counters, based on the number of counters. No.
Module Operation Chapter 2 The counter options and operating modes are summarized in Figure 2.
Chapter 2 Module Operation Input Filtering In many industrial environments, high frequency noise can be inadvertently coupled to the sensor wires. The module can help reject some noise by means of built-in filters. Inputs are filtered by means of user-selectable, low-pass filters(1) set up during module configuration. The available nominal pulse width filters are shown in the table. Input Filter A0, A1, B0, B1, Z0, Z1 5 ms, 500 s, 10 s, no filter (7.1 ms, 715 s, 18.
Module Operation Operational Mode Selection Chapter 2 A count channel’s operational mode configuration selection determines how the A and B inputs cause a counter channel to increment or decrement.
Chapter 2 Module Operation Pulse/External Direction Mode Selection In this mode, the B input controls the direction of the counter, as shown in Figure 3. If the B input is low (0), the counter increments on the rising edges of input A. If the input B is high (1), the counter decrements on the rising edges of input A. Two Output Control bits let you modify the operation of the B input from your control program or during configuration.
Module Operation Chapter 2 Table 2 - Pulse External Direction Counting Direction Inhibit Bit Direction Invert Bit Input A (count) Input B (direction) Change in Count Value 0 0 0 or open 1 1 -1 0, 1, Don’t care 0 0 or open -1 1 1 0, 1, Don’t care 0 0 or open 1 1 1 0, 1, Don’t care 0 0 or open -1 1 -1 0, 1, Don’t care 0 0 1 1 1 0 1 See Direction Inhibit and Direction Invert Output Control Bits on page 21 for more information.
Chapter 2 Module Operation Up and Down Pulses Mode Selection In this mode, the counter channel increments on the rising edge of pulses applied to input A and decrements on the rising edge of pulses applied to input B. When set, the Direction Inhibit bit causes both A and B to increment. When set, the Direction Invert bit causes B to increment and A to decrement. When the Direction Invert and Direction Inhibit bits are both set, both A and B decrement.
Module Operation Chapter 2 Table 5 - Up and Down Counting Direction Inhibit Bit Direction Invert Bit Input A (count) Input B (direction) Change in Count Value 0 0 0, 1, 1 0, 1, -1 0 0, 1, -1 0, 1, 1 0 0, 1, 1 0, 1, 1 0 0, 1, -1 0, 1, -1 0 0 1 1 0 1 1 X1 Quadrature Encoder Mode Selection In this mode, when a quadrature encoder is attached to inputs A and B, the count direction is determined by the phase relation
Chapter 2 Module Operation Figure 5 - Quadrature Encoder Modes (direction inhibit = 0, direction invert = 0) A B Quadrature Encoder Z Forward Rotation Input A Input B Input Z Reverse Rotation A B X1 Count X2 Count X4 Count X2 Quadrature Encoder Mode Selection The X2 Quadrature Encoder mode operates much like the X1 Quadrature Encoder except that the resolution is doubled as shown in Figure 5 on page 26.
Module Operation Chapter 2 Figure 6 - Operation Using Various Direction Inhibit and Direction Invert Settings A Quadrature Encoder Input A B Input B Z Forward Rotation Input Z Reverse Rotation A B DirectionInhibit = 0; DirectionInvert = 0 X1 Count Pulse X2 Count Pulse X4 Count Pulse DirectionInhibit = 0; DirectionInvert = 1 X1 Count Pulse X2 Count Pulse X4 Count Pulse DirectionInhibit = 1; DirectionInvert = 0 X1 Count Pulse X2 Count Pulse X4 Count Pulse DirectionInhibit = 1; DirectionInvert = 1
Chapter 2 Module Operation Input Frequency Counter Types Maximum input frequency is determined by the input configuration as shown in the table.
Module Operation Chapter 2 Ring Counter Figure 8 demonstrates ring counter operation. In ring counter operation, the current count (Ctr[n].CurrentCount) value changes between user-programmable minimum count (CtrnMinCount) and maximum count (CtrnMaxCount) values. If, when counting up, the counter reaches the CtrnMaxCount value, it rolls over to the CtrnMinCount value upon receiving the next count and sets the overflow bit.
Chapter 2 Module Operation Counter Enable/Disable The counter can be enabled or disabled using the CtrnEn control bit. Be aware that disabling the counter does not inhibit any current count loading functions (for example, preset or direct write) or any Z function. Z Input Functions There are three Z input functions: store, gate, and Z preset. Store The Z-input can be used to capture the current count value even when the counter is counting at full 1 MHz speed.
Module Operation Chapter 2 Preset/Reset Preset sets the counter to a zero or non-zero value you define. Reset the counter by setting this value (CtrnPreset) to zero. Counter Reset Refer to page 73 in Chapter 4 for details on performing a default counter reset for the CMX 5370 L2 packaged controller and the 1769-HSC/B module only. The L23E packaged controller and the 1769-HSC/A module do not have this functionality.
Chapter 2 Module Operation Rate/Timer Functionality To ensure maximum accuracy, the module offers two different methods to calculate the rate. • Per Pulse = 1/Pulse Interval • Cyclic = Number of Pulses/User-defined Time Interval You select the method used, depending upon the pulse speed as defined below. These are continuously available regardless of input operational mode. IMPORTANT The Rate/Timer Functionality information does not apply to the L23E packaged controller.
Module Operation Chapter 2 The generalized rate calculation is Rate = count/ time. IMPORTANT The rate calculation is based on net counts. If a counter goes up 500 counts and down 300 counts, the net count is 200. Therefore, changes in direction and speed affect the Ctr[n].CurrentRate value. The cyclic method is better suited to high pulse rates.
Chapter 2 Module Operation Scalar You can configure the CtrnScalar value to scale or convert the raw rate value to application-specific information, such as RPM (Revolutions Per Minute). Setting CtrnScalar to 1 leaves the rate value in cycles per second (Hertz). The actual rate equation is the following. Current Rate = TIP 1000 x count CyclicRateUpdateTime x Scalar To configure the Ctr[n].CurrentRate value to show an RPM value, set CtrnScalar to (counts per revolution)/60.
Module Operation Chapter 2 Rate Method Selection By knowing when to use each method, an optimal rate determination can be made. TIP Fractional rates are not reported by the module, but can be calculated from Ctr[n].PulseInterval in your control program. Use the following information to choose the appropriate calculation method. In general, consider the effect of having the count off by ±1 in each method at frequencies of interest to see if the resulting inaccuracy is acceptable.
Chapter 2 Module Operation Output Control All 16 outputs can be controlled by any of the four counters or by the user’s control program, via the output mask function. Output states are determined by count, rate (not supported in packaged controller), ranges, mask configuration data, overcurrent status, and safe state settings and conditions. The 16 outputs are made up of four real (physical) outputs and 12 virtual outputs. The status of the real and virtual outputs is available to the user program.
Module Operation Chapter 2 Ranges For the 1769-HSC module and the embedded HSC in the CMX 5370 L2 packaged controllers, up to 16 dynamically configurable ranges are available. Ranges activate outputs based on the current count value or the current rate value. Each range is programmed with a type, counter number, two limit values, an invert bit, and an output mask. For the embedded HSC in the L23E packaged controller, up to four dynamically configurable ranges are available.
Chapter 2 Module Operation Count Range In a non-inverted count range, the outputs are active if the count value is within the user-defined range. In an inverted count range, the outputs are active if the count value is outside the user-defined range. Valid limits for the range are -2…2 billion regardless of programmed minimum and maximum values. Figure 9 shows all ranges referring to one counter. The module is capable of individually assigning each range to any counter.
Module Operation Chapter 2 Rate Range IMPORTANT The Rate Range information does not apply to the packaged controller. In a non-inverted rate range, the outputs are active if the rate measurement is within the user-defined range. In an inverted rate range, the outputs are active if the rate measurement is outside the user-defined range. The input rate can be up to 1 MHz in either direction. Figure 10 shows all ranges referring to one counter.
Chapter 2 Module Operation Overcurrent If the module detects a real output point overcurrent condition, it reports it to the input file and turns off that output. You can also program the module to latch each of the four real outputs off, emulating a physical fuse, or to automatically reset. The 12 virtual outputs do not have this function.
Module Operation Chapter 2 Program State Run (PSR) Program State Run lets you specify that the output should continue to be controlled by the module as if it were in the Run state. That is, events on the module or changes in the output image will affect the physical outputs without regard to the Program_HLS or UDSS state indicated. When this bit is set, the corresponding OutnProgramMode and OutnProgramValue bits are ignored.
Chapter 2 Module Operation Fault State Run (FSR) Similar to Program State Run, Fault State Run lets you specify, on a bit basis, that the output should continue to be controlled by the module as if it were Run state. That is, events on the module or changes in the output image will affect the physical outputs without regard to the Fault_HLS or UDSS state indicated. When this bit is set, the corresponding Fault mode and fault value bits are ignored.
Module Operation Chapter 2 Program to Fault Enable (PFE) The ProgToFaultEn bit lets you select which data value (Program Value or Fault Value) to apply to the output when the Output State Logic state Prog_HLS changes to indicate Fault_HLS. If PFE is 0, the module leaves the Program value applied. If PFE is set to 1, the Fault value is applied.
Chapter 2 Module Operation Table 11 illustrates the step-by-step logical operations that are performed to determine the final output state. For example, Range 1 values do not affect the output because Range 1 is disabled, and the Output Off Mask causes some of the outputs to change to zero because it takes priority over the range masks. The output parameters shown have been discussed in the previous sections.
Chapter 3 Installation and Wiring This chapter explains how to install and wire the 1769-HSC module. Topic Page Power Requirements 47 General Considerations 47 System Assembly 49 Mount the Module 50 Replace the Module within a System 53 Field Wiring Connections 54 IMPORTANT For information about installing and wiring the packaged controllers, refer to the CompactLogix Packaged Controller Installation Instructions, publication 1769-IN082.
Chapter 3 Installation and Wiring North American Hazardous Location Approval The following information applies when operating this equipment in hazardous locations. Informations sur l’utilisation de cet équipement en environnements dangereux. Products marked "CL I, DIV 2, GP A, B, C, D" are suitable for use in Class I Division 2 Groups A, B, C, D, Hazardous Locations and nonhazardous locations only.
Installation and Wiring Power Requirements Chapter 3 The modules receive power through the Compact bus interface from the 5V DC/24V DC system power supply. The maximum current drawn by the modules is shown in the table. Module Current Draw 5V DC 24V DC 425 mA 0 mA WARNING: When you insert or remove the module while backplane power is on, an electrical arc can occur. This could cause an explosion in hazardous location installations.
Chapter 3 Installation and Wiring Protect the Circuit Board from Contamination The printed circuit boards of the modules must be protected from dirt, oil, moisture, and other airborne contaminants. To protect these boards, we recommend installing the system in an enclosure suitable for the environment. Keep the interior of the enclosure should clean and the enclosure door closed whenever possible. Power Supply Distance You can install as many modules as your power supply can support.
Installation and Wiring System Assembly Chapter 3 The module can be attached to an adjacent controller, power supply, or I/O module. For mounting instructions, see Panel Mounting on page 50, or DIN Rail Mounting on page 52. To work with a system that is already mounted, see Replace the Module within a System on page 53. Refer to the illustration when assembling the Compact I/O system. A D E C B G B F 45275 1. Disconnect the power. 2.
Chapter 3 Installation and Wiring Mount the Module Use these procedures to mount your module. ATTENTION: During panel or DIN-rail mounting of all devices, be sure that all debris (metal chips, wire strands) is kept from falling into the module. Debris that falls into the module could cause damage at powerup. Minimum Spacing Maintain spacing from enclosure walls, wireways, adjacent equipment, and so forth. Allow 50 mm (2 in.) of space on all sides for adequate ventilation, as shown.
Installation and Wiring Chapter 3 Figure 11 - Compact I/O Module with CompactLogix Controller and Power Supply 50 mm 35 mm (1.97 in.) (1.38 in.) 40 mm 35 mm (1.58 in.) (1.38 in.) 28.5 mm (1.12 in.) DIN Rail Center Line 132 mm (5.19 in.) 147.4 mm (5.81 in.) (2.32 in.) 70 mm 35 mm (2.76 in.) (1.38 in.) 35 mm 35 mm 35 mm (1.38 in.) (1.38 in.) (1.38 in.) 118 mm (4.65 in.) 59 mm (2.32 in.) 59 mm 122.6 mm (4.83 in.) Mounting Hole Dimension 14.7 mm (0.58 in.) Important: Hole spacing tolerance: ±0.
Chapter 3 Installation and Wiring Panel Mounting Procedure By Using Modules as a Template This procedure lets you use the assembled modules as a template for drilling holes in the panel. Due to module mounting hole tolerance, it is important to follow these procedures: 1. On a clean work surface, assemble no more than three modules. 2. Using the assembled modules as a template, carefully mark the center of all module-mounting holes on the panel. 3.
Installation and Wiring Replace the Module within a System Chapter 3 The module can be replaced while the system is mounted to a panel or DIN rail. 1. Remove power, referring to the Warning on page 47. 2. Remove terminal block or disconnect input and/or output wiring from the module. 3. Remove the upper and lower mounting screws from the module (or open the DIN latches using a screwdriver). 4.
Chapter 3 Installation and Wiring Field Wiring Connections Consider these system wiring guidelines when wiring your system. General Guidelines • Make sure the system is properly grounded. • Input and output channels are isolated from the 1769 Compact bus. Input channels are isolated from one another; output channels are not. • Shielded cable is required for high-speed input signals A, B, and Z. Use individually shielded, twisted-pair cable for lengths up to 300 m (1000 ft).
Installation and Wiring Chapter 3 Considerations for Reducing Noise In high-noise environments, the 1769-HSC module inputs can accept ‘false’ pulses, particularly when using low frequency input signals with slowly sloping pulse edges. To minimize the effects of high frequency noise on low frequency signals, perform the following: • Identify and remove noise sources. • Route input cabling away from noise sources. • Use your programming software to select low-pass filters on input signals.
Chapter 3 Installation and Wiring Follow these steps. 1. Loosen the terminal screws to be wired. 2. Route the wire under the terminal pressure plate. You can use the bare wire or a spade lug. The terminals accept a 6.35 mm (0.25 in.) spade lug. TIP The terminal screws are non-captive. Therefore, it is possible to use a ring lug (6.35 mm (0.25 in.) maximum outside diameter with 3.53 mm (0.139 in.) minimum inside diameter) with the module. 3.
Installation and Wiring Chapter 3 Wire the Modules After the module is properly installed, wire the modules by using this procedure. To provide proper operation and high immunity to electrical noise, always use shielded wire. ATTENTION: To prevent shock hazard, care should be taken when wiring the module to signal sources. Before wiring any module, disconnect power from the system power supply and from any other source to the module. Do not wire more than two conductors on any single terminal.
Chapter 3 Installation and Wiring Terminal Door Label A removable, write-on label is provided with the module. Remove the label from the door, mark the identification of each terminal with permanent ink, and slide the label back into the door. Your markings (ID tag) will be visible when the module door is closed. Terminal Block Wiring The input and output terminals are shown below. Both inputs and outputs are isolated from the 1769 Compact bus.
Installation and Wiring Chapter 3 Wire Diagrams The following pages show wiring examples for a differential encoder, single-ended encoder, and discrete device. Inputs The module utilizes differential inputs. Therefore, two input terminals are required for each input point. For example, the A0+ and A0- terminals are required for input point A0. Each input point is isolated from other input points, the 1769 Compact bus, and the entire output terminal group.
Chapter 3 Installation and Wiring Figure 15 - Single-ended Encoder Wiring Cable(1) VS +VDC GND COM R Power Supply (2) A1(+) A A1(–) B1(+) B Allen-Bradley 845H Series Single-ended Encoder B1(–) Z1(+) Z Z1(–) Shield Shield/Housing Connect only if housing is electronically isolated from the motor and ground. Earth Module Inputs (1) Refer to your encoder manual for proper cable type.
Installation and Wiring Chapter 3 Figure 16 - Discrete Device Wiring +VDC COM Proximity Sensor Power Supply VS A1(+) OUT A1(–) COM VS Solid-state Switch OUT B1(+) COM B1(–) VS OUT R (1) Z1(+) COM Z1(–) Photo-electric Sensor with Open Collector Sinking Output Module Inputs (1) External resistors are required if they are not internal to the sensor. The pull-up resistor (R) value depends on the power supply value.
Chapter 3 Installation and Wiring Outputs The four output terminals must be powered by a user-supplied external source. User-power range is from 5…30V DC. See the Output Specifications in Appendix A on page 124. There is no isolation between the outputs, but the outputs are isolated from the inputs and the 1769 Compact bus. Electronic Protection The electronic protection of the 1769-HSC module has been designed to provide protection for current overload and short-circuit conditions.
Installation and Wiring Chapter 3 Transistor Output Transient Pulses The maximum duration of the transient pulse occurs when minimum load is connected to the output. However, for most applications, the energy of the transient pulse is not sufficient to energize the load. ATTENTION: A transient pulse occurs in transistor outputs when the external DC supply voltage is applied to the output common terminals (for example, via the master control relay).
Chapter 3 Installation and Wiring Output Wiring Basic wiring(1) of output devices(2) to the module is shown in Figure 18. ATTENTION: Follow these guidelines: • Miswiring of the module to an AC power source or applying reverse polarity will damage the module. • Be careful when stripping wires. Wire fragments that fall into a module could cause damage at powerup. Once wiring is complete, make sure the module is free of all metal fragments.
Chapter 4 Module Configuration, Output, and Input Data After installing the 1769-HSC module, you must configure it for operation by using the programming software compatible with the controller, such as RSLogix 500 or RSLogix 5000 software. TIP Normal counter configuration is done using programming software. In that case, it is not necessary to know the meaning of the bit location. However, some systems let the control program change configuration.
Chapter 4 Module Configuration, Output, and Input Data Configuration Array The configuration array, which consists of 118 words (46 words for the packaged controller), lets you specify how the module’s counters will function.
Module Configuration, Output, and Input Data Chapter 4 Table 12 - Configuration Array - 1769-HSC Module and CMX 5370 L2 Packaged Controller Embedded HSC (Continued) Bit Word 15 14 13 12 11 10 09 08 02 01 00 Function 07 06 05 04 03 Out 3 FSR Out 2 FSR Out 1 FSR Out0 FSR Out3 Out 2 FM FM Out1 Out0 Output Fault Mode and FM FM Output Fault State Run Out3 Out 2 FV FV Out1 Out0 Output Fault Value FV FV 4 Not used 5 Not used 6 Ctr0MaxCount Counter 0 Maximum Count Ctr0MinCount Co
Chapter 4 Module Configuration, Output, and Input Data Table 12 - Configuration Array - 1769-HSC Module and CMX 5370 L2 Packaged Controller Embedded HSC (Continued) Bit Word 15 14 13 12 11 10 Linear Not used 09 08 07 06 05 04 03 02 01 00 Function 35 Not used Counter 2 Configuration Flags 36 Ctr3MaxCount Counter 3 Maximum Count Ctr3MinCount Counter 3 Minimum Count Ctr3Preset Counter 3 Preset 42 Ctr3Hysteresis Counter 3 Hysteresis 43 Ctr3Scalar Counter 3 Scalar 44 Ctr3Cy
Module Configuration, Output, and Input Data Chapter 4 Table 12 - Configuration Array - 1769-HSC Module and CMX 5370 L2 Packaged Controller Embedded HSC (Continued) Bit Word 66 15 14 13 12 11 10 09 08 07 06 05 04 03 02 01 00 Range0To11[3].LowLimit Function Range 3 Low Limit 67 68 Out 15 Out 14 Out 13 Out 12 Out 11 Out 10 Out 09 Out 8 Out 7 Out 6 Inv Not used Out 5 Out 4 Out 3 69 Not used 70 Range0To11[4].HighLimit Range 4 High Limit Range0To11[4].
Chapter 4 Module Configuration, Output, and Input Data Table 12 - Configuration Array - 1769-HSC Module and CMX 5370 L2 Packaged Controller Embedded HSC (Continued) Bit Word 96 15 14 13 12 11 10 09 08 07 06 05 04 03 02 01 00 Range0To11[8].LowLimit Function Range 8 Low Limit 97 98 Out 15 Out 14 Out 13 Out 12 Out 11 Out 10 Out 09 Out 8 Out 7 Out 6 Inv Not used Out 5 Out 4 Out 3 99 Not used 100 Range0To11[9].HighLimit Range 9 High Limit Range0To11[9].
Module Configuration, Output, and Input Data Chapter 4 Table 13 - Configuration Array - L23E Packaged Controller Embedded HSC (Continued) Bit Word 15 14 13 12 11 10 09 08 03 02 01 00 Function 07 06 05 04 Out 3 FSR Out 2 FSR Out1 FSR Out0 Out3 Out2 FSR FSO FSO Out1 Out0 Fault State for Output FSO FSO and Fault State Run for Output Out3 Out2 FVO FVO Out1 Out0 Fault Value for Output FVO FVO 4 Not used 5 Not used 6 Ctr0MaxCount Counter 0 Maximum Count Ctr0MinCount Counter 0 Mi
Chapter 4 Module Configuration, Output, and Input Data Table 13 - Configuration Array - L23E Packaged Controller Embedded HSC (Continued) Bit Word 36 15 14 13 12 11 10 09 08 07 06 05 04 03 02 01 00 Function Ctr3MaxCount Counter 3 Maximum Count Ctr3MinCount Counter 3 Minimum Count Ctr3Preset Counter 3 Preset 42 Not used Not used 43 Not used Not used 44 Not used Not used 45 Not used 37 38 39 40 41 Linear Not used Counter 3 Configuration Flags General Configuration Bits
Module Configuration, Output, and Input Data Chapter 4 Counter Reset (CtrReset) Bits 12…15 in the configuration array correspond to the counter reset selection bits for counters 0…3, respectively. The Counter Reset Enable in the Add-On profile lets you select which counter to be enabled or disabled. An enabled checkbox indicates a zero (0) in the respective counter reset selection bits in RSLogix 5000 software.
Chapter 4 Module Configuration, Output, and Input Data Figure 20 - Configuration for Individual Counter Reset Disable Counter 0 in this example equates to individual counter reset selection bit 12. As shown in Figure 20, the Counter Reset Enable box has been unchecked to indicate the individual counter reset functionality is disabled for the selected counter of the 1769-HSC/B module. The corresponding controller tag in RSLogix 5000 software shows a one (1) for disabled.
Module Configuration, Output, and Input Data Chapter 4 PFE - Program to Fault Enable (ProgToFaultEn) This bit indicates what should happen when the bus controller indicates a change from one condition (Program mode) to another (Fault mode). If this bit is set (1), the safe state operation of all four real outputs changes to that identified by the Fault State and Fault Value words. If this bit is reset (0), the module continues with the operation identified by the Program State and Program Value words.
Chapter 4 Module Configuration, Output, and Input Data IMPORTANT Do not set these bits while certain counters or ranges are enabled. Attempting to do so will result in a BadModConfigUpdate error. See page 120 for a list of prohibited settings.
Module Configuration, Output, and Input Data Chapter 4 Output Program Value (Out0ProgramValue through Out3ProgramValue) Configuration Array Word 3 15 14 Output Program Value Not used 13 12 11 10 09 08 07 06 05 04 03 02 01 00 Out3 PV Out2 PV Out1 PV Out0 PV These bits are the values that will be applied to each of the real outputs when User-defined Safe State (UDSS) is set as described and the module is in Program state.
Chapter 4 Module Configuration, Output, and Input Data Output Fault Value (Out0FaultValue through Out3FaultValue) Configuration Array Word 5 15 5 Not used Output Fault Value 14 13 12 11 10 09 08 07 06 05 04 03 02 01 00 Out3 FV Out2 FV Out1 FV Out0 FV These bits are the values that will be applied to each of the real outputs when User-defined Safe State is set as described and the module is in Fault state. TIP Outputs are also affected by PFT above.
Module Configuration, Output, and Input Data Chapter 4 Counter Minimum Count (CtrnMinCount) Configuration Array Words 15 14 13 8 Counter 0 Minimum Count Ctr0MinCount Counter 1 Minimum Count Ctr1MinCount Counter 2 Minimum Count Ctr2MinCount Counter 3 Minimum Count Ctr3MinCount 12 11 10 09 08 07 06 05 04 03 02 01 00 9 18 19 28 29 38 39 This is the minimum count value allowed for counter (n). The count value cannot fall below this value.
Chapter 4 Module Configuration, Output, and Input Data Counter Hysteresis (CtrnHysteresis) IMPORTANT Configuration Array Words 15 14 12 Counter 0 Hysteresis Ctr0Hysteresis 22 Counter 1 Hysteresis Ctr1Hysteresis 32 Counter 2 Hysteresis Ctr2Hysteresis 42 Counter 3 Hysteresis Ctr3Hysteresis 13 12 11 The Counter Hysteresis information does not apply to the L23E packaged controller because rate measurement is not supported.
Module Configuration, Output, and Input Data IMPORTANT Chapter 4 Do not change this value while the counter is enabled. Attempting to do so will result in a BadModConfigUpdate error. See page 120 for a list of prohibited settings. Cyclic Rate Update Time (CtrnCyclicRateUpdateTime) IMPORTANT 14 13 The Counter Scalar information does not apply to the L23E packaged controller because rate measurement is not supported.
Chapter 4 Module Configuration, Output, and Input Data Configuration Flags Configuration Array Words 15 15 Counter 0 Configuration Flags 14 13 12 11 10 09 08 07 06 05 04 03 02 01 00 Not used Linear Not Storage mode used Not used Operational mode 25 Counter 1 Configuration Flags Not used Linear Not Storage mode used Not used Operational mode 35 Counter 2 Configuration Flags Not used Linear Not used 45 Counter 3 Configuration Flags Not used Linear Not used Operational Mo
Module Configuration, Output, and Input Data Chapter 4 Storage Mode (CtrnConfig.StorageMode_0 through CtrnConfig.StorageMode_2) These three bits apply to Counters 0 and 1 only. They define how the module interprets the Z input, as shown below. Each bit works independently. If bit 0 and bit 2 are set simultaneously, a Z event causes the Current Count Value to be stored and then preset. Set bit For function CtrnConfig.StorageMode_0 Stores the Current Count Value on the rising edge of Z to Ctr[n].
Chapter 4 Module Configuration, Output, and Input Data Range High Limit (Range0To11[n].HighLimit) and Range Low Limit (Range0To11[n].LowLimit) IMPORTANT The Range High Limit and Range Low Limit words do not apply to the L23E packaged controller. 14 11 Configuration Array Words 15 46 and 47 Range 0 High Limit Range0To11[0].HighLimit 48 and 49 Range 0 Low Limit Range0To11[0].LowLimit 52 and 53 Range 1 High Limit Range0To11[1].HighLimit 54 and 55 Range 1 Low Limit Range0To11[1].
Module Configuration, Output, and Input Data Chapter 4 These values, which represent a count value or rate value, depending upon the programed Type, are used for range comparison. When the rate value is equal to Range0To11[n].HighLimit or Range0To11[n].LowLimit, Rangen changes state, becoming either active or inactive, depending upon the setting of the Range0To11[n].Invert bit.
Chapter 4 Module Configuration, Output, and Input Data These 16-bit words indicate which outputs should be enabled when a range is active. When range n is enabled, this word is combined with the other range output masks as described in Output Off Mask (OutputOffMask.0 through OutputOffMask.15) on page 91 and on page 89.
Module Configuration, Output, and Input Data IMPORTANT Chapter 4 If this value is greater than NumberOfCounters, a configuration error occurs. Type (Range0To11[n].Type) This bit indicates which type of value to use for the range comparison in range n. This value and Range0To11[n].ToThisCounter determine the current value that is used in range comparison as the rate or count value. Range0To11[n].Type Range Type 0 Count Value 1 Rate Value Inv (Range0To11[n].
Chapter 4 Module Configuration, Output, and Input Data Output Array The output array, which consists of 34 words, lets you access the module’s realtime output data to control the module. The default value is all zeros. IMPORTANT The output array contains dynamic configuration data. The settings in the output array must be compatible with the settings in the configuration array.
Module Configuration, Output, and Input Data Chapter 4 Table 14 - Output Array - 1769-HSC Module and CMX 5370 L2 Packaged Controller Embedded HSC (Continued) Word Bit 15 Function 14 13 12 11 10 09 08 07 06 05 04 03 02 01 00 20 Range12To15[1].OutputControl Range Output Control 21 Not used 22 Range12To15[2].HiLimOrDirWr Range High Limit or Direct Write Value Range12To15[2].LowLimit Range Low Limit 26 Range12To15[2].
Chapter 4 Module Configuration, Output, and Input Data Table 15 - Output Array - L23E Packaged Controller Enbedded HSC (Continued) Word Bit Function 15 14 13 12 11 10 09 08 07 06 05 04 03 02 01 00 14 Out 15 Out 14 Out 13 Out 12 Out 11 Out 10 Out 9 Out 8 Out 7 Out 6 Out 5 Out 4 Out 3 Out 2 Out 1 Out 0 15 Not used RInv Not used 16 RangeHighLimit_DWV_1 Range High Limit or Direct Write Value 1 RangeLowLimit_1 Range Low Limit 1 LDW Not used RCntrNum 17 18 Range
Module Configuration, Output, and Input Data Chapter 4 Output on Mask (OutputOnMask.0 through OutputOnMask.15) Output Array Word 0 15 14 13 12 11 10 09 08 07 06 05 04 03 02 01 00 Output On Mask Out 15 Out 14 Out 13 Out 12 Out 11 Out 10 Out 9 Out 8 Out 7 Out 6 Out 5 Out 4 Out 3 Out 2 Out 1 Out 0 This word lets you turn on any output, real or virtual, when the corresponding bit is set.
Chapter 4 Module Configuration, Output, and Input Data RBF - Reset Blown Fuse (ResetBlownFuse) Output Array Word 4 15 14 Reset Blown Fuse Not used 13 12 11 10 09 08 07 06 05 RBF Not used 04 03 02 01 00 When the OvercurrentLatchOff bit is set and an overcurrent condition has occurred, the real output remains off until this bit is cycled from 0 to 1(rising edge).
Module Configuration, Output, and Input Data Chapter 4 RCU - Reset Counter Underflow (CtrnResetCounterUnderflow) A 0 to 1 transition of this bit causes the corresponding Ctr[n]Underflow bit to be reset. D Inv - Direction Invert (CtrnDirectionInvert) This bit, when set, inverts the direction of the counter (n) as follows: • If the CtrnDirectionInhibit bit is set when this bit is 0, the resulting direction is up, increasing counts.
Chapter 4 Module Configuration, Output, and Input Data Range High Limit or Direct Write Value (Range12To15[n].HiLimOrDirWr) IMPORTANT 14 For the L23E packaged controllers embedded HSC, the ranges referred to in this section are numbered 0…3 instead of 12…15. The ranges in this section apply to only the 1769-HSC module and the CMX 5370 L2 packaged controllers embedded HSC. Output Array Words 15 13 12 11 10 10 and 11 Range 12 High Limit Direct Write Value Range12To15[0].
Module Configuration, Output, and Input Data Chapter 4 When Load Direct Write = 1 When Range12To15[n].LoadDirectWrite = 1, then Range12To15[n].HiLimOrDirWr is used to change the Ctr[n].CurrentCount to Range12To15[n].HiLimOrDirWr. When the Range12To15[n].LoadDirectWrite bit transitions from 0 to 1, then Range12To15[n].HiLimOrDirWr is loaded into Ctr[n].CurrentCount (where n is the counter indicated in Range12To15[n].ToThisCounter). When CtrnSoftPreset and a Range12To15[n].
Chapter 4 Module Configuration, Output, and Input Data Range Output Control (Range12To15[n].OutputControl) IMPORTANT For the L23E packaged controllers embedded HSC, the ranges referred to in this section are numbered 0…3 instead of 12…15. The ranges in this section apply to only the 1769-HSC module and the CMX 5370 L2 packaged controllers embedded HSC. 14 11 Output Array Words 15 13 12 14 Range 12 Output Control Range12To15[0].OutputControl 20 Range 13 Output Control Range12To15[1].
Module Configuration, Output, and Input Data Chapter 4 ToThisCtr - Range Counter Number (Range12To15[n].ToThisCounter) This 2-bit value indicates which counter will be used in the range comparison or Range12To15[n].LoadDirectWrite. The counter is indicated in the table below. Bit 01 Bit 00 Counter 0 0 0 0 1 1 1 0 2 1 1 3 If Range12To15[n].
Chapter 4 Module Configuration, Output, and Input Data Inv - Range Invert (Range12To15[n].Invert) Indicates the active portion of Rangen. When Range12To15[n].Invert = 0, the outputs are activated when the range value is at or between the Range12To15[n].LowLimit and Range12To15[n].HiLimOrDirWr. When Range12To15[n].Invert = 1, the outputs are activated when the range is at or outside the range limits.
Module Configuration, Output, and Input Data Chapter 4 Table 16 - Input Array - 1769-HSC Module and CMX 5370 L2 Packaged Controller Embedded HSC (Continued) Word Bit 15 8 Function 14 13 12 11 10 09 08 07 06 05 04 03 02 01 00 Ctr[0].CurrentRate Counter 0 Current Rate Ctr[0].PulseInterval Counter 0 Pulse Interval 9 10 11 12 Not used C0PW RV Not used ID W REZ CUdf COvf 13 Not used Not used 14 Ctr[1].CurrentCount Counter 1 Current Count Ctr[1].
Chapter 4 Module Configuration, Output, and Input Data Table 17 - Input Array - L23E Packaged Controller Enbedded HSC Word Bit 15 Function 14 13 12 11 10 09 08 07 06 05 04 03 02 01 00 Z1 B1 A1 Z0 B0 A0 Input State Out 4 Out 3 Out 2 Out 1 Out 0 DataEcho 0 Not used 1 Out 15 2 BadRangeLimit 30 BadRangeCtrNum30 3 R3 Not used 4 PresentCount_0 PresentCount_0 StoredValue_0 StoredValue_0 Not used Not used Not used Not used Out 14 R2 Out 13 R1 Out 12 R0 Out
Module Configuration, Output, and Input Data Chapter 4 Table 17 - Input Array - L23E Packaged Controller Enbedded HSC (Continued) Word Bit 15 32 Function 14 13 12 11 10 09 08 07 06 05 04 03 02 01 00 Not used Not used 33 34 Not used C3PW RV IC ID W CUdf COvf Counter 3 Status Flags Input State (InputStateA0 through InputStateZ1) Input Array Word 0 15 14 Input State Not used 13 12 11 10 09 08 07 06 05 04 03 02 01 00 Z1 B1 A1 Z0 B0 A0 This word indicates t
Chapter 4 Module Configuration, Output, and Input Data Output Overcurrent (Out0Overcurrent to Out3OverCurrent) The output overcurrent bits are set (1) when the module is in an overcurrent condition. These bits also show whether the output is latched off, because the output remains in the off state and these bits remain on until the ResetBlownFuse bit is used. Module Configured (ModConfig) Word 2, bit 5 is set by the module after it has accepted all of the configuration data.
Module Configuration, Output, and Input Data Chapter 4 Invalid Counter Assigned to Range (InvalidCtrAssignToRange12 through InvalidCtrAssignToRange15) InvalidCtrAssignToRange12 is set when the indicated range in the output array refers to a non-existent counter. • It is set (1) when Range12To15[n].ToThisCounter > NumberOfCounters. • It is cleared (0) when Range12To15[n].ToThisCounter NumberOfCounters. When this error occurs, the entire output array is rejected until a valid configuration is detected.
Chapter 4 Module Configuration, Output, and Input Data Current Count (Ctr[n].CurrentCount) Input Array Words 15 14 13 4 Counter 0 Current Count Ctr[0].CurrentCount Counter 1 Current Count Ctr[1].CurrentCount Counter 2 Current Count Ctr[2].CurrentCount Counter 3 Current Count Ctr[3].CurrentCount 12 11 10 09 08 07 06 05 04 03 02 01 00 04 03 02 01 00 5 14 15 24 25 30 31 This is the 32-bit count value from the counter. Stored Count (Ctr[n].
Module Configuration, Output, and Input Data Chapter 4 Current Rate (Ctr[0].CurrentRate to Ctr[3].CurrentRate) IMPORTANT Input Array Words 15 8 Counter 0 Current Rate Ctr[0].CurrentRate 14 13 Counter 1 Current Rate Ctr[1].CurrentRate Counter 2 Current Rate Ctr[2].CurrentRate Counter 3 Current Rate Ctr[3].CurrentRate 12 11 For the L23E packaged controllers embedded HSC, the current rate words do not apply; they are always returned as 0 in the input array.
Chapter 4 Module Configuration, Output, and Input Data Status Flags 06 05(1) 04 03 02 01 00 Not used C0PW RV Not used IDW REZ CUdf COvf Counter 1 Status Flags Not used C1PW RV IC IDW REZ CUdf COvf 28 Counter 2 Status Flags Not used C2PW RV IC IDW CUdf COvf 34 Counter 3 Status Flags Not used C3PW RV IC IDW Not used CUdf COvf Input Array Words 15 12 Counter 0 Status Flags 22 14 13 12 11 10 09 08 07 (1) Bit 05 is not used for the packaged controller.
Module Configuration, Output, and Input Data Chapter 4 IDW - Invalid Direct Write (Ctr[0].InvalidDirectWrite to Ctr[3].InvalidDirectWrite) IMPORTANT For the L23E packaged controllers Embedded HSC, the ranges referred to in this section are numbered 0…3 instead of 12…15. The ranges in this section apply to only the 1769-HSC module and the CMX 5370 L2 packaged controllers Embedded HSC. This bit is set when the Range12To15[n].HiLimOrDirWr is invalid. (For example, if CtrnMaxCount < Range12To15[n].
Chapter 4 Module Configuration, Output, and Input Data CnPW - Counter Preset Warning (Ctr[0].PresetWarning to Ctr[3].PresetWarning) This bit is set when Ctr[n].CurrentCount has been forced by the module to the CtrnPreset value. This will happen when a configuration array is accepted, which sets the following: • CtrnMinCount > Ctr[n].CurrentCount or • CtrnMaxCount < Ctr[n].CurrentCount. This bit is reset by a 0 to 1 transition of the CtrnResetCtrPresetWarning bit in the output array.
Chapter 5 Diagnostics and Troubleshooting This chapter describes how to troubleshoot the module. Safety Considerations Topic Page Safety Considerations 109 Module Operation versus Counter Operation 111 Counter Defaults 111 Module Diagnostics 112 Non-critical versus Critical Module Errors 113 Module Error Definition 114 Error Codes 116 Safety considerations are an important element of proper troubleshooting procedures.
Chapter 5 Diagnostics and Troubleshooting Stand Clear of the Machine When troubleshooting any system problem, have all personnel remain clear of the machine. The problem could be intermittent, and sudden unexpected machine motion could occur. Have someone ready to operate an emergency stop switch in case it becomes necessary to shut off power to the machine.
Diagnostics and Troubleshooting Module Operation versus Counter Operation Chapter 5 The module performs operations at two levels: • Module level • Counter level Module-level operations include functions, such as powerup, configuration, and communication with a bus master, such as a MicroLogix 1500 controller. Counter-level operations include counter-related functions, such as data conversion and overflow or underflow detection. Internal diagnostics are performed at both levels of operation.
Chapter 5 Diagnostics and Troubleshooting IN OUT Module Diagnostics 0 2 FUSE 1 3 OK A0 B0 The 176-HSC module offers power-up, configuration, and post configuration diagnostics. Power-up Diagnostics At module powerup, a series of internal diagnostic tests are performed. These diagnostic tests must be successfully completed or the OK status indicator remains off and a module error results and is reported to the controller.
Diagnostics and Troubleshooting Chapter 5 Configuration Diagnostics When a configuration is sent, the module performs a diagnostic check to see that the configuration is valid. This results in either a valid ModConfig bit or module configuration error. See the Configuration Error Codes table on page 117 for configuration error codes. Post Configuration Diagnostics If the ModConfig bit in the input array is set, then the module has accepted the configuration.
Chapter 5 Diagnostics and Troubleshooting Module Error Definition Module errors are expressed in two fields as four-digit Hex format, with the most significant digit as ‘don’t care’ and irrelevant. The two fields are ‘Module Error’ and ‘Extended Error Information’. The structure of the module error data is shown in Table 19.
Diagnostics and Troubleshooting Chapter 5 Configuration Errors If you set the fields in the configuration file to invalid or unsupported values, the module ignores the invalid configuration, generates a non-critical error, and keeps operating with the previous configuration. The Configuration Error Codes table on page 117 lists the possible module-specific configuration error codes defined for the module. Correct the error by providing proper configuration data to the module.
Chapter 5 Diagnostics and Troubleshooting Error Codes The tables in this section explain the extended error codes for general common hardware errors, configuration errors, and runtime errors. Table 22 - General Common Hardware Error Codes Error Type Hex Equivalent(1) Module Error Code Extended Error Information Code Binary Binary Description Status of the OK Indicator(2) No Error X000 000 0 0000 0000 OK, normal operating condition.
Diagnostics and Troubleshooting TIP IMPORTANT Chapter 5 The OK status indicator flashes red for all error codes in the Configuration Error Codes table. Only error codes X400…X443 apply to the packaged controller.
Chapter 5 Diagnostics and Troubleshooting Table 23 - Configuration Error Codes (Continued) Hex Equivalent(1) Module Error Code Extended Error Information Code Error Description Binary Binary X462 010 0 0110 0010 BadScalar_2 The Ctr2Scalar value is invalid, that is, less than one when NumberofCounters = 10 or 11. X463 010 0 0110 0011 BadScalar_3 The Ctr3Scalar value is invalid, that is, less than one when NumberofCounters = 11.
Diagnostics and Troubleshooting Chapter 5 Table 23 - Configuration Error Codes (Continued) Hex Equivalent(1) Module Error Code Extended Error Information Code Error Description Binary Binary X493 010 0 1001 0011 BadCtrAssignToRange_3 This error occurs if you try to set Range0To11[3].ToThisCounter to an invalid value (that is, to a counter that is not available due to the number of counters selected).
Chapter 5 Diagnostics and Troubleshooting The BadModConfigUpdate error conditions are shown in the following table. They occur when you attempt to change a forbidden module configuration parameter while a counter or range is still enabled. To recover from this situation, do the following: • Correct the configuration problem. • Reconfigure the module. Refer to your controller’s documentation for available reconfiguration methods.
Diagnostics and Troubleshooting Chapter 5 Table 24 - ‘BadModConfigUpdate’ Error Prohibited Configuration Settings (Continued) Configuration Parameters Array Position Prohibited from changing when indicated bits (X) are set Word Bit Ctr0EN Ctr1MaxCount 16 and 17 -- X Ctr1MinCount 18 and 19 -- X Ctr1Preset 20 and 21 -- (1) Ctr1Hysteresis(2) 22 -- X Ctr1Scalar(2) 23 -- X Ctr1CyclicRateUpdateTime(2) 24 -- X Ctr1Config.OperationalMode 25 0 to 3 X Ctr1Config.
Chapter 5 Diagnostics and Troubleshooting Notes: 122 Rockwell Automation Publication 1769-UM006E-EN-P - July 2013
Appendix A Specifications IMPORTANT For specifications for the packaged controllers, refer to the CompactLogix Packaged Controller Installation Instructions, publication 1769-IN082. Table 25 - Technical Specifications - 1769-HSC Attribute 1769-HSC Dimensions (H x W x D), approx. 118 x 35 x 87 mm (4.65 x 1.38 x 3.43 in.) Height including mounting tabs is 138 mm (5.43 in.) Shipping weight (with carton), . 309 g (0.681 lb) Bus current draw, max 425 mA at 5V DC 0 mA at 24V DC Heat dissipation 6.
Appendix A Specifications Table 26 - Input Specifications - 1769-HSC Attribute 1769-HSC No. of inputs 2 quadrature (ABZ) differential inputs Input voltage range 2.6…30V DC(1) On-state voltage, max 30V DC(1) On-state voltage, min 2.6 V DC On-state current, min 6.8 mA Off-state voltage, max 1.0V DC Off-state current, max 1.5 mA Off-state leakage current, max 1.5 mA Input current, max 15 mA Input current, min 6.
Specifications Appendix A Table 28 - Environmental Specifications - 1769-HSC Attribute 1769-HSC Temperature, operating IEC 60068-2-1 (Test Ad, Operating Cold), IEC 60068-2-2 (Test Bd, Operating Dry Heat), IEC 60068-2-14 (Test Nb, Operating Thermal Shock) 0…60 °C (32…140 °F) Temperature, surrounding air, max For UL certified open equipment 40 °C (104 °F) -40…85 °C (-40…185 °F) Temperature, nonoperating IEC 60068-2-1 (Test Ab, Unpackahed Nonoperating Cold), IEC 60068-2-2 (TestBb, Unpackaged Nonoperati
Appendix A Specifications Table 29 - Certifications - 1769-HSC(1) Certification(2) 1769-HSC c-UL-us UL Listed Industrial Control Equipment, certified for US and Canada. See UL File E65584 c-UL-us UL Listed for Class I, Division 2 Group A,B,C,D Hazardous Locations, certified for U.S. and Canada.
Specifications Rate Accuracy Appendix A The following graph shows rate error at various frequencies. The following trends can assist you in reading the graph: • Of the lines that rise at low frequencies, the left-most is a 10-second update time (CtrnCyclicRateUpdateTime = 10000). • The right-most of these lines is a 1-millisecond update time (CtrnCyclicRateUpdateTime = 1). • The line that rises at high frequencies illustrates Ctr[n].PulseInterval.
Appendix A Specifications Temperature Derating Refer to the following figures for 1769-HSC temperature derating. Figure 22 - Maximum Input Voltage - 24V DC Operation Voltage Derating Based on Temperature Volts (DC) 26.4V DC at 55 °C (131 °F) (-32) (50) (68) (86) (104) (122) (140) (158) Ambient Temperature, °C (°F)) 45204 Temperature Derated Voltage(1) 0…40 °C (-32…104 °F) 30V DC 55 °C (131 °F) 26.
Specifications Appendix A Figure 24 - Maximum Output Current per Point - 5V DC Operation Current per Point (A) Current Derating Based on Temperature 0.5 A at 60 °C (140 °F) (-32) (68) (50) (86) (104) (122) (140) Ambient Temperature, °C (°F) (158) 45207 Temperature Derated Current 0…40 °C (-32…104 °F) 1A 60 °C (140 °F) 0.
Appendix A Specifications Figure 26 - Maximum Output Current per Point - 24V DC Operation Current per Point (A) Current Derating Based on Temperature 0.25 A at 60 °C (140 °F) (-32) (50) (68) (86) (104) (122) (140) Ambient Temperature, °C (°F) (158) 45208 Temperature Derated Current 0…40 °C (-32…104 °F) 1A 55 °C (131 °F) 0.5 A 60 °C (140 °F) 0.
Appendix B Program a 1769-HSC Module, CompactLogix Controller, and 845F Incremental Encoder with RSLogix 5000 Software The application example demonstrates how to wire an 845F optical incremental encoder to a 1769-HSC module and ultimately monitor the Current Count value in the CompactLogix controller. We also will control two onboard outputs with two ranges.
Appendix B Program a 1769-HSC Module, CompactLogix Controller, and 845F Incremental Encoder with RSLogix 5000 Software 845F Encoder Wiring to the 1769-HSC Module 845F Encoder Wire Color 1769-HSC Terminal Blue/black wire pair Blue A0+ Black A0- White B0+ Black B0- Green Z0+ Black Z0- Red 24V DC power supply Black 24V DC common White/black wire pair Green/black wire pair Red/black wire pair Scope These steps are used in this example. 1.
Program a 1769-HSC Module, CompactLogix Controller, and 845F Incremental Encoder with RSLogix 5000 Software Add a 1769-HSC Module to a CompactLogix System Appendix B The example in this section uses a 1769-L32E controller to add a 1769-HSC Module into the CompactLogix System by using RSLogix 5000 software. 1. Start the RSLogix 5000 programming software. The Quick Start window appears. 2. Click New Project. 3. Choose your controller and revision number. 4. Enter a unique controller name. 5. Click OK.
Appendix B Program a 1769-HSC Module, CompactLogix Controller, and 845F Incremental Encoder with RSLogix 5000 Software The RSLogix 5000 project window appears. 6. Right-click CompactBus Local and select New Module. The Select Module dialog box appears.
Program a 1769-HSC Module, CompactLogix Controller, and 845F Incremental Encoder with RSLogix 5000 Software Appendix B 7. Select the left-most I/O module in your 1769 CompactLogix chassis and click OK. The New Module dialog box appears. 8. In the Name box, type a name and click OK. The module is added to the I/O Configuration. 9. Repeat steps 6 through 8 until all of your local I/O modules are added in order from left to right. In this example, the 1769-IF4 and 1769-HSC /B modules must be configured.
Appendix B Program a 1769-HSC Module, CompactLogix Controller, and 845F Incremental Encoder with RSLogix 5000 Software Configure the 1769-HSC Module When the 1769-HSC module is added to the CompactLogix project, input, output, and configuration tags are automatically created in the Controller Tags area. 1. In the Controller Organizer, double-click the 1769-HSC module. The Module Properties dialog box appears. 2. Click the Input Configuration tab. 3. The Number of Counters defaults to 2.
Program a 1769-HSC Module, CompactLogix Controller, and 845F Incremental Encoder with RSLogix 5000 Software Appendix B 6. Use this information to complete the Counter Configuration tab. Option Value Maximum Count 1,200,000 Minimum Count 0 Preset 0 Hysteresis 0 Scalar 1 Update Time 1 Operation Mode Choose an operation mode from the pull-down menu, such as Pulse Internal Direction. Counter Reset Enable This box displays for 1769-HSC/B modules only.
Appendix B Program a 1769-HSC Module, CompactLogix Controller, and 845F Incremental Encoder with RSLogix 5000 Software 9. Use this information to complete the Output Configuration tab. Option Value Range 0 Range 1 Type Count Value Count Value Counter 0 0 High Limit 600,000 1,200,000 Low Limit 500,000 1,000,000 Output Control 2#0000_0000_0000_0001 2#0000_0000_0000_0010 Your Output Configuration tab should look like the example. 10. Click Apply.
Program a 1769-HSC Module, CompactLogix Controller, and 845F Incremental Encoder with RSLogix 5000 Software Appendix B 11. In the Controller Organizer, double-click Controller Tags. 12. At the bottom of the window, click Monitor Tags. The tags for I/O modules appear in the following format, where ‘s’ is the slot number of the module. Tag Description Local:s:I Input Image Local:s:O Output Image Local:s:C Configuration Data 13. Click ‘+’ to expand the output tags (Local:4:0). 14.
Appendix B Program a 1769-HSC Module, CompactLogix Controller, and 845F Incremental Encoder with RSLogix 5000 Software Monitor the Current Count and Verify Output Operation In this section, you use the 1769-HSC module’s input tags (Local:4:I) to view what is running. 1. Save the program and download it to your controller. 2. Put the controller into Run mode. 3. Spin the shaft on your 845F encoder. The Ctr0CurrentCount tag displays the current count data for Counter0 of the 1769-HSC module.
Appendix C Program a 1769-HSC Module, MicroLogix 1500 Controller, and 845F Incremental Encoder with RSLogix 500 Software This application example demonstrates how to wire an 845F optical incremental encoder to a 1769-HSC module and ultimately monitor the Current Count value in the MicroLogix 1500 controller. We also will control two onboard outputs with two ranges. IMPORTANT The individual counter reset functionality in the 1769-HSC/B module applies only to CompactLogix controllers.
Appendix C Program a 1769-HSC Module, MicroLogix 1500 Controller, and 845F Incremental Encoder with RSLogix 500 Software 845F Encoder Wiring to the 1769-HSC Module 845F Encoder Wire Color 1769-HSC Terminal Blue/Black Wire Pair Blue A0+ Black A0- White B0+ Black B0- Green Z0+ Black Z0- Red 24V DC Power Supply Black 24V DC Common White/Black Wire Pair Green/Black Wire Pair Red/Black Wire Pair Scope These steps are used in this example. 1.
Program a 1769-HSC Module, MicroLogix 1500 Controller, and 845F Incremental Encoder with RSLogix 500 Software Add a 1769-HSC Module to a MicroLogix 1500 System Appendix C The example in this section uses a MicroLogix 1500 controller to add a 1769-HSC module into the MicroLogix 1500 system by using RSLogix 500 software. 1. Start the RSLogix 500 software. 2. Click New. The Select Processor Type dialog box appears. 3. Select the correct controller type (Bul.
Appendix C Program a 1769-HSC Module, MicroLogix 1500 Controller, and 845F Incremental Encoder with RSLogix 500 Software 5. To add I/O modules to your project, click I/O Configuration. The I/O Configuration dialog box appears. This dialog box displays all 1769 I/O modules supported by your MicroLogix 1500 controller. 6. To add the 1769-HSC module to your MicroLogix 1500 system, double-click the module or drop and drag the module to the correct slot (in this example, slot 1).
Program a 1769-HSC Module, MicroLogix 1500 Controller, and 845F Incremental Encoder with RSLogix 500 Software Configure Your 1769-HSC Module Appendix C You configure the 1769-HSC module in an offline project and then download to the MicroLogix 1500 controller. 1. To open the 1769-HSC-module configuration file, click Adv Config. 2. To display the counter configuration information with the default values, click the Counters Tab. 3. Use this information to complete the configuration for the Counters tab.
Appendix C Program a 1769-HSC Module, MicroLogix 1500 Controller, and 845F Incremental Encoder with RSLogix 500 Software Your Counter tab should look like the example below. 2 4. Click the Ranges tab to display the counter range configuration window with default values. 5. Use this information to complete the configuration for the Ranges tab.
Program a 1769-HSC Module, MicroLogix 1500 Controller, and 845F Incremental Encoder with RSLogix 500 Software Appendix C 7. In the Project Menu, under Data Files, click Output. The 34 words of the output image open. Addresses for these 34 words are Output Word [0] through Output Word [33]. In this example, only the first six words are modified. Output Word [6] through Output Word [33] are for Counters 1–3 and Ranges 12–15, which we are not using in this example. 8.
Appendix C Program a 1769-HSC Module, MicroLogix 1500 Controller, and 845F Incremental Encoder with RSLogix 500 Software Monitor the Current Count and Verify Output Operation No program logic is needed for this example. Use these steps to monitor the count and verify the output operation. 1. Save the program and download it to your controller. 2. Put the controller into Run mode. 3. Spin the shaft on your 845F encoder.
Appendix D Programming Quick Reference This appendix section for the 1769-HSC Module contains at-a-glance lists of the following: • Configuration array • Output array • Input array The information in this appendix does not apply to the packaged controllers. IMPORTANT The default value for the configuration array is all zeros, except where noted.
Appendix D Programming Quick Reference Table 30 - Configuration Array for the 1769-HSC Module 15 14 13 12 11 10 9 8 7 6 5 4 3 2 1 0 Description 38 39 Ctr3MinCount(4) Ctr3MinCount 40 41 Ctr3Preset Ctr3Preset 42 Ctr3Hysteresis Ctr3Hysteresis 43 Ctr3Scalar(5) Ctr3Scalar 44 Ctr3CyclicRateUpdateTime(6) Ctr3CyclicRateUpdateTime Linear 45 Ctr3ConfigFlags 46 47 Range0to11[0].HighLimit Range0to11[0].HighLimit 48 49 Range0to11[0].LowLimit Range0to11[0].
Programming Quick Reference Appendix D Table 30 - Configuration Array for the 1769-HSC Module 15 14 13 12 11 10 9 8 105 7 6 5 Inv 4 3 2 Type 1 0 ToThisCtr Description Range0to11[9].ConfigFlags 106 107 Range0to11[10].HighLimit Range0to11[10].HighLimit 108 109 Range0to11[10].LowLimit Range0to11[10].LowLimit 110 Out15 Out14 Out13 Out12 Out11 Out10 Out09 Out08 Out07 Out06 Out05 Inv 111 Out04 Out03 Out02 Type Out01 Out00 ToThisCtr Range0to11[10].
Appendix D Programming Quick Reference The default value for the input array is all zeroes. Table 31 - Input Array for the 1769-HSC Module 15 14 13 12 11 10 9 8 7 6 0 1 Out15 2 3 Out14 Out13 Out12 InvalidRangeLimit12…15 R15 R14 R13 Out11 Out10 Out09 Out08 InvalidCtrAssignToRange12…15 R12 R11 R10 R09 R08 5 4 3 2 1 0 Z1 B1 A1 Z0 B0 A0 Out04 Out03 Out02 Out01 Out07 Out06 Out05 GenErr InvOut MCfg R07 R06 R05 Out00 Readback.0 -- Readback.
Programming Quick Reference Appendix D The default value for the output array is all zeroes. Table 32 - Output Array for the 1769-HSC Module 15 14 13 12 11 10 9 8 7 6 5 4 3 2 1 0 Out15 Out14 Out13 Out12 Out11 Out10 Out09 Out08 Out07 Out06 Out05 Out04 Out03 Out02 Out01 Out00 OutputOnMask.0 -- OutputOnMask.15 0 1 Out15 Out14 Out13 Out12 Out11 Out10 Out09 Out08 Out07 Out06 Out05 Out04 Out03 Out02 Out01 Out00 OutputOffMask.0 -- OutputOffMask.
Appendix D Programming Quick Reference Notes: 154 Rockwell Automation Publication 1769-UM006E-EN-P - July 2013
Appendix E History of Changes This appendix summarizes the revisions to this manual. Reference this appendix if you need information to determine what changes have been made across multiple revisions. This can be especially useful if you are deciding to upgrade your hardware or software based on information added with previous revisions of this manual. 1769-UM006D-EN-P, May 2011 1769-UM006C-EN-P, November 2010 • Changed the hysteresis detection and configuration section to indicate that the Ctr[n].
Appendix E History of Changes Notes: 156 Rockwell Automation Publication 1769-UM006E-EN-P - July 2013
Glossary The following terms and abbreviations are used throughout this manual. For definitions of terms not listed here, refer to the Allen-Bradley Industrial Automation Glossary, publication AG-7.1. accumulated value (ACC) The number of elapsed time intervals or counted events. actuator 1) A device that converts an electrical signal into mechanical motion. 2) In a general sense, any machine/process load device (for example, transducer) of a controller output circuit. See output device (page 162).
Glossary broadband link 1) A communication link that can have multiple channels. Each channel signal modulates its own carrier frequency. Example: LAN/1 link. 2) Contrasted with carrier-band link (page 158) and baseband link (page 157). bus A single path or multiple parallel paths for power or data signals that several devices can be connected at the same time. A bus can have several sources of supply and/or several sources of demand.
Glossary coordinated system time (CST) Timer value which is kept synchronized for all modules within a single ControlBus chassis. The CST is a 64-bit number with s resolution. data 1) A general term for any type of information. 2) In a more restricted sense, data refers to the end-use information in the particular context; thereby excluding the protocol information used to get the end-use information.
Glossary electronic keying A system feature which makes sure that the physical module attributes are consistent with what was configured in the software. encoder Any feedback element that converts linear or rotary position (absolute or incremental) into a digital signal. • Linear encoder—is a feedback element that directly converts linear position (absolute or incremental) into a digital signal.
Glossary intelligent I/O module 1) An I/O module that provides some on-board processing of input values to control some output values without going through the data table for control by the ladder logic. An intelligent I/O module can have digital I/O circuits, analog I/O circuits, or both. 2) Contrasted with direct I/O module (page 159). interval 1) The length of time between events or states. For example, the length of time between when a signal is high can be described as the interval between pulses.
Glossary node The connection point at which media access is provided. output device 1) For a computer, a CRT terminal or printer. 2) For a programmable controller, see actuator (page 157). owner-controller The controller that creates and stores the primary configuration and communication connection to a module. period 1) The length of time for a cyclical operation to complete one full cycle.
Glossary removal and insertion under power ControlLogix feature that lets a user install or remove a module or RTB while (RIUP) power is applied. requested packet interval (RPI) A configured parameter that defines when the module will multicast data. run mode In this mode, the controller program is executing. Inputs are actively producing data. Outputs are actively controlled.
Glossary Notes: 164 Rockwell Automation Publication 1769-UM006E-EN-P - July 2013
Index A additional resources 9 array configuration defaults 149 input defaults 152 output defaults 153 C cable 54 channel diagnostics 113 CompactLogix controller application example 131 compatibility 11 configuration array 66, 149 defaults 149 error 115 errors 66 flags 67, 68, 71, 82 control bits 92 count overflow 106 underflow 106 value 28-29 counter basic description 12 configuration summary 18 control bits 88-89 preset warning 108 reset 66, 72 type linear counter 28 ring counter 29 current count 98, 104
Index H hardware error 114 features 13 heat considerations 47 hold last state 40 hysteresis 33, 67, 80 minimum count 67, 71, 79 module configured 102 module error field 114 mounting 50 N number of counters 18, 75 I individual counter reset 66, 72 input array 98 array defaults 152 basic description 12 block diagram 16 differential encoder wiring 59 discrete device wiring 61 isolation 54 reducing noise 55 single-ended encoder wiring 60 state 98, 100, 101 terminal block wiring 58 input configurations 21 in
Index R range active 98, 100, 103 configuration flags 86, 88-90, 96 control 37 enable 88-89, 91 high limit 68, 84, 94 direct write value 88-90 invert 87, 98 low limit 68, 84, 88-90, 95 output control 68, 85, 88-90, 96 type 87, 97 rate 32 accuracy 36, 127 method 35 range 32 valid 34, 107 readback 44, 98, 101 real outputs 36 removing terminal block 55 replacing a module 53 reset 31, 73 blown fuse 88, 89, 92 counter overflow 92 counter preset warning 93 counter underflow 93 individual counter 66, 72 rising ed
Index 168 Rockwell Automation Publication 1769-UM006E-EN-P - July 2013
Rockwell Automation Support Rockwell Automation provides technical information on the Web to assist you in using its products. At http://www.rockwellautomation.com/support/, you can find technical manuals, a knowledge base of FAQs, technical and application notes, sample code and links to software service packs, and a MySupport feature that you can customize to make the best use of these tools.