PCMK Communication Card Catalog Number 1784-PCMK User Manual
Important User Information Solid state equipment has operational characteristics differing from those of electromechanical equipment. Safety Guidelines for the Application, Installation and Maintenance of Solid State Controls (publication SGI-1.1 available from your local Rockwell Automation sales office or online at http://literature.rockwellautomation.com) describes some important differences between solid state equipment and hard-wired electromechanical devices.
Environment and Enclosure ATTENTION Environment and Enclosure This equipment is intended for use in a Pollution Degree 2 industrial environment, in overvoltage Category II applications (as defined in IEC publication 60664-1), at altitudes up to 2000 meters (6562 ft.) without derating. This equipment is considered Group 1, Class A industrial equipment according to IEC/CISPR Publication 11.
Prevent Electrostatic Discharge ATTENTION Prevent Electrostatic Discharge This equipment is sensitive to electrostatic discharge, which can cause internal damage and affect normal operation. Follow these guidelines when you handle this equipment: • Touch a grounded object to discharge potential static. • Wear an approved grounding wriststrap. • Do not touch connectors or pins on component boards. • Do not touch circuit components inside the equipment. • Use a static-safe workstation, if available.
Table of Contents About The Manual . . . . . . . . . Introduction . . . . . . . . . . . Audience . . . . . . . . . . . . . Are You Using Cardware? . Abbreviations . . . . . . . . . . . . Conventions. . . . . . . . . . . . . . . . . . . . . . . . . . . . . . . . . . . . . . . . . . . . . . . . . . . . . . . . . . . . . . . . . . . . . . . . . . . . . . . . . . . . . . . . . . . . . . . . . . . . . . . . . . . . . . . . . . . . . . . . . . . . . . . . . . . . . . . . . . . . . . . . . .
TOC-ii Table of Contents Remove and Unistall the RSIPCMK Plug and Troubleshoot the Card . . . . . . . . . . . . . . . . Hearing Multiple Tones. . . . . . . . . . . . . Memory Manager Conflicts ........ Errors After You Remove EMM . . . . . . . PC Card Icon . . . . . . . . . . . . . . . . . . . . . . . Play Driver ......... ......... ......... ......... ......... . . . . . . . . . . . . . . . . . . . . . . . . . . . . . . . 3-7 . 3-8 . 3-8 . 3-8 .
Table of Contents TOC-iii Chapter 7 Choose and Connect a PCMK Cable What’s in This Chapter? Determine the Required Attach the Wedge. . . . . Connect the Cable . . . . Remove the Cable . . . . ......... Cable . . . . ......... ......... ......... ..... ..... ..... ..... ..... ..... ..... ..... ..... ..... ..... ..... ..... ..... ..... . . . . . . . . . . . . . . . . . . . . . . . . . . 7-1 . 7-1 . 7-3 . 7-6 7-12 Glossary Appendix Specifications Loopback Connector Pin Assignments . . . . . . . .
TOC-iv Table of Contents Publication 1784-UM519C-EN-P - September 2006
Preface About The Manual Introduction This manual describes how to install, configure, and troubleshoot the PCMK/B Communication card (cat. no. 1784-PCMK/B). Throughout the manual, we refer to this product as the PCMK card, or the PCMK/B card. Audience The information in this manual is intended for users who are: • familiar with the Windows 2000, Windows NT, Windows 98, and Windows 95 operating systems.
P-2 Preface Abbreviations Throughout this manual, we abbreviate some terms. Use this table to become familiar with our terminology.
Summary of Changes This release of the 1784-PCMK installation instructions contains new and updated information about obtaining the PCMK drivers. We use revision bars to call your attention to new or revised information. You will see change bars, as shown to the left of this paragraph, throughout this manual to help you quickly identify revisions.
SOC-2 Summary of Changes Notes: Publication 1784-UM519C-EN-P - September 2006
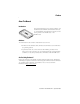
Chapter 1 About the PCMK/B Card What’s in This Chapter? Read this chapter to familiarize yourself with PCMCIA technology and the PCMK card. Topic Page What is PCMCIA? 1-1 What is a PC Card? 1-1 What’s the PCMK Card? 1-3 PC Card Architecture 1-2 Enhancements to the 1784-PCMK/ B Card 1-4 What is PCMCIA? The Personal Computer Memory Card International Association (PCMCIA) is an organization that defines standards for connecting peripherals to laptop or notebook computers.
1-2 About the PCMK/B Card Architecture Currently, there are three types of PC cards. The 1784-PCMK card is a Type II card. 54 mm (2.13 in.) 85.6 mm (3.37 in.) Type I 3.3 mm Thick Data storage, such as Flash memory cards I/O such as modem, LAN, and host communications Type II 5.0 mm Thick Data storage or I/O capabilities that require more space, such as rotation media and wireless communication devices Type III 10.
About the PCMK/B Card 1-3 What’s the PCMK Card? The PCMK/B card is a PCMCIA Type II form-factor card that allows a notebook computer to interface with other devices on both DH+, DH485, and remote I/O communication networks. 19865 IMPORTANT Your computer must be PCMCIA 2.1 compliant to support the PCMK/ B card. Refer to the documentation supplied with your computer to determine whether or not it is compliant.
1-4 About the PCMK/B Card Enhancements to the 1784-PCMK/ B Card The 1784-PCMK/B card contains new enhancements that were not contained in the 1784-PCMK/A card. The PCMK/B card: • is a 16-bit card. • connects with a new series of cables using locking connectors. • will work with newer notebook computers that use PCI bus technology. • has new updated drivers. • can be used in conjunction with the PCMK/A card. Dual PCMK cards are not supported on all operating systems.
Chapter 2 Pre-installation Procedures What’s in This Chapter? Read this chapter to prepare to install your PCMK card. Topic Page Verify Your Package Contents 2-1 Determine Your Operating System and Software 2-2 Determine Your Operating System and Software 2-2 Verify Your Package Contents Be certain that you have receive the appropriate items, based on the catalog number used when ordering, and the list below before you discard any packing material.
2-2 Pre-installation Procedures Determine Your Operating System and Software Before you can begin to install your PCMK card, determine the operating system and software packages with which you will be communicating. Windows 3. x. or MS-DOS Operating System Refer to the Install the PCMK driver for DOS/Windows 3.x release note, publication 1784-RN039, for specific information about using the PCMK card with the Windows 3.x or MS-DOS operating systems. If you are using Windows 3.
Pre-installation Procedures 2-3 Windows 95/98 Operating Systems Install the RSIPCMK driver if you are using: • Software compatible with the Windows 98 operating system, such as: – A.I.- Series, RSLogix 5 software – RSLogix 500 software – RSLogix 5000 software – PanelBuilder software – INTERCHANGE software, version 6.0.5 or later – WINtelligent LINX software, version 5.
2-4 Pre-installation Procedures Notes: Publication 1784-UM519C-EN-P - September 2006
Chapter 3 Install the RSIPCMK Driver for the Windows 95/98 Operating Systems What’s in This Chapter? Refer to this chapter to perform the following: Topic Page Locate the RSIPCMK Windows 95/98 1784-PCMK Driver 3-1 Install the Driver 3-3 Run the PCMKinfo Program 3-6 Stop the PCMCIA Card in the Windows 95 /98 Operating System 3-7 Remove and Unistall the RSIPCMK Plug and Play Driver 3-7 Troubleshoot the Card 3-8 The instructions in this chapter assume that you are using the Windows 95/98 opera
3-2 Install the RSIPCMK Driver for the Windows 95/98 Operating Systems ATTENTION If you already have a Series A PCMK card and it is properly configured with a driver version earlier than version 2.0, you must remove the earlier RSIPCMK driver from your computer before you install a later version. The new RSIPCMK driver supports both cards. Refer to Troubleshoot the Card on page 3-8. You must have version 2.0 or later of the RSIPCMK driver for the PCMK/B card.
Install the RSIPCMK Driver for the Windows 95/98 Operating Systems 3-3 Install the Driver Perform these steps after you insert the PCMK card into a PCMCIA slot in your computer. Refer to Chapter 6, Insert and Remove the PCMK Card, for further information. After you insert the PCMK card, the system will detect the hardware and begin to build the driver information needed to run the hardware. 1. Obtain the driver from the RSLinx software CD or the Rockwell Automation Website at http://support.
3-4 Install the RSIPCMK Driver for the Windows 95/98 Operating Systems 2. Click Next. The system displays: 3. Click Finish. 4. Click OK.
Install the RSIPCMK Driver for the Windows 95/98 Operating Systems 3-5 The following message might display. 5. In the Copy files from box, specify the location from which you are copying the files. 6. Click OK. The operating system loads the appropriate driver and continues with its startup procedures. A dialog may appear that states the file to be copied is older than the one already on your computer. If this is the case, click Yes to keep the newer file.
3-6 Install the RSIPCMK Driver for the Windows 95/98 Operating Systems Run the PCMKinfo Program PCMKinfo is a utility program that allows you to verify the installation of the RSIPCMK driver and the PCMK card. We recommend you run this utility after installing the PCMK card and the driver, so you can make sure the components are working smoothly. To run the PCMKinfo program, follow the steps below. 1. Access the Control Panel by selecting Start ⇒Settings ⇒Control Panel. 2.
Install the RSIPCMK Driver for the Windows 95/98 Operating Systems 3-7 Stop the PCMCIA Card in the Windows 95 /98 Operating System Before you remove the PCMK card from its socket, you should stop the communication to the PC card. To stop the card: 1. Right-click the PC Card icon in the taskbar. 2. Select Adjust PC Card Properties. 3. Select the PCMK card you want to stop from the list of PC cards. 4. Click Stop. 5. When you see the dialog that states you may safely remove this device, click OK.
3-8 Install the RSIPCMK Driver for the Windows 95/98 Operating Systems Troubleshoot the Card Occasionally, your system may need to be altered to allow the PCMK card to work properly. Documented below are some tips and suggestions for helping you set up the RSIPCMK driver and the PCMK card successfully. Hearing Multiple Tones If you insert multiple PC cards, you may hear more than one tonal notification per card.
Install the RSIPCMK Driver for the Windows 95/98 Operating Systems 3-9 6. Determine whether or not you need this Emm386 file based on the table below. If you Then Do not need the EMM386.EXE to load programs into high memory to create more conventional memory Remark or comment out the line containing the EMM386.EXE file by placing REM in front of the line Need the EMM386.EXE because you are receiving low-memory error messages within a DOS application Add win= xxxx–yyyy to your EMM386.
3-10 Install the RSIPCMK Driver for the Windows 95/98 Operating Systems PC Card Icon If you find that there is no PC Card icon in the Control Panel, this is an indication that the PCMCIA socket hardware was not installed properly. This situation prevents the Windows 95 operating system from locating the PC Card. To solve this problem contact the manufacturer of the computer.
Install the RSIPCMK Driver for the Windows 95/98 Operating Systems 3-11 4. Click OK. The PC card icon appears in the Taskbar. The Driver Still Does Not Work Use the following procedures to resolve any other driver issues. IMPORTANT This procedure works only in the Windows 95 operating system and in upgrades to the Windows 98 operating system. This procedure will not work with original OEM computers configured with the Windows 98 operating system. 1. Right-click the My Computer icon. 2.
3-12 Install the RSIPCMK Driver for the Windows 95/98 Operating Systems If this line has a plus sign, click the plus sign to expand the item. The Allen-Bradley 1784-PCMK device should be listed. 5. Select Allen-Bradley 1784-PCMK. 6. Click Properties.
Install the RSIPCMK Driver for the Windows 95/98 Operating Systems 3-13 . 7. If Code 10 (conflicting memory resources) is reported in the dialog, continue with the following steps.
3-14 Install the RSIPCMK Driver for the Windows 95/98 Operating Systems 8. Click the Resources tab in the Properties dialog. IMPORTANT Depending on how the Windows 98 operating system was installed, you may or may not have access to Change Settings.
Install the RSIPCMK Driver for the Windows 95/98 Operating Systems 3-15 9. Verify that there are no resources conflicts listed in the Conflicting Device list. 10. Verify that an interrupt has been assigned to the PCMK card. An interrupt must be assigned. You may have to disable another device, such as an unused communications or parallel port, to make an interrupt available for the PCMK card.
3-16 Install the RSIPCMK Driver for the Windows 95/98 Operating Systems 14. Click Properties. Verify that the socket controller is enabled in the hardware profile you are using. If Then The Device status says “This device is not present, not working properly, or does not have all drivers installed, code 10.” Click the Resources tab and check the Conflicting Device list for possible hardware conflicts, Or you may want to try enabling the Use Automatic Settings option. Refer to step 8.
Chapter 4 Install the 1784-PCMK Driver for the Windows NT Operating System What’s in This Chapter? Refer to this chapter to perform the following: Topic Page Locate the Windows NT Driver 4-1 Locate the Windows NT Driver The Windows NT driver for the PCMK card is built into RSLinx software, version 1.7 or later. Rockwell Automation has published detailed instructions for configuring this driver. You can find these instructions by visiting http://support.rockwellautomation.
4-2 Install the 1784-PCMK Driver for the Windows NT Operating System Refer to Chapter 6 for instructions on how to install and remove the card. In the Windows NT operating system, you can damage the card if you do not shut down your system before you install and remove the card.
Chapter 5 Install the 1784-PCMK Driver for Windows 2000/XP What’s in This Chapter? Refer to this chapter to perform the following: To: See Page: Locate the Windows 2000/XP 1784-PCMK Driver 5-1 Download the 1784-PCMK Driver 5-2 Review the 1784-PCMK Hardware Properties 5-6 Navigate to Device Manager 5-10 Eject the 1784-PCMK Card 5-13 Unsafe Removal of Card 5-14 Show the Card Unplug/Eject Icon on the Taskbar 5-16 In order to follow the instructions in this chapter, you must: • have the Window
5-2 Install the 1784-PCMK Driver for Windows 2000/XP Download the 1784-PCMK Driver Follow these instructions to download the 1784-PCMK driver from the Rockwell Automation Website. 1. Visit our Website at http://support.rockwellautomation.com. 2. In the left pane, select PC Cards Utilities and Downloads. 3. Download the 1784-PCMK driver for the Windows 2000 or XP operating systems, 1784-PCMK_Win2k_XP.zip.
Install the 1784-PCMK Driver for Windows 2000/XP 5-3 You see: 3. Click Next.
5-4 Install the 1784-PCMK Driver for Windows 2000/XP 4. Select Search for a suitable driver and click Next. At this point you need to select where the file is located. 5. Select one of the following: • Floppy disk drives if you are going to use a floppy disk that contains the driver • CD-ROM drives if you are going to get the file from the RSLinx CDROM Version 2.2 or later • Specify a location if you downloaded the driver file from the Rockwell Automation Website.
Install the 1784-PCMK Driver for Windows 2000/XP 5-5 6. Click Next. 7. Once the driver installs, the following displays. 8. Click Finish. You may be prompted to restart you computer for the driver to take effect.
5-6 Install the 1784-PCMK Driver for Windows 2000/XP 1784-PCMK Hardware Properties The Windows 2000 operating system provides properties dialog boxes for removable devices.
Install the 1784-PCMK Driver for Windows 2000/XP 5-7 To access Hardware Properties and verify that the 1784-PCMK card is OK, follow the steps on page 5-7. 1. Double-click the Unplug/Eject hardware icon in the task bar. TIP If you don’t have the icon on your task bar, go to page 5-16 to activate the icon. 2. Select the card. 3. Click Properties.
5-8 Install the 1784-PCMK Driver for Windows 2000/XP General Properties If Then The device status says “This device is not present, not working properly, or does not have all drivers installed.” Click the Resources tab and check the Conflicting Device list for possible hardware conflicts. Or you may want to try disabling the Automatic Settings option. Refer to Resources Properties on page 5-9.
Install the 1784-PCMK Driver for Windows 2000/XP 5-9 Resources Properties The majority of the time, we recommend that you use the automatic settings. The operating system assigns an interrupt and memory location for you. An interrupt must be assigned to the 1784-PCMK card. Verify that there is an interrupt assigned and no resource conflicts display in the Conflicting Device list.
5-10 Install the 1784-PCMK Driver for Windows 2000/XP In some cases, a device other than the 1784-PCMK card may be determined to use the interrupt that the PCMK card wants. If this happens, let the other device have the interrupt and assign the 1784-PCMK card another interrupt location. Navigate to Device Manager Here is a second way to find your way to the hardware properties so you can verify that your card is working properly. 1. Right-click My Computer. 2. Select Manage. 3.
Install the 1784-PCMK Driver for Windows 2000/XP 5-11 We recommend using only one card at a time. If you insert two PCMK cards, only one card will be available for use. The Device Manager window looks like this: One of the cards has an! and is unavailable for use. We do not recommend that you have more than one card in your system. 1. Double-click the 1784-PCMK card listing.
5-12 Install the 1784-PCMK Driver for Windows 2000/XP You will see: Publication 1784-UM519C-EN-P - September 2006
Install the 1784-PCMK Driver for Windows 2000/XP 5-13 Eject the 1784-PCMK Card Before you remove the PCMK card from its slot, you need to stop the communication to the card. To stop the card: 1. Double-click the card eject button on your task bar. TIP If you don’t have the icon on your task bar, go to page 5-16 to activate the icon. 2. Click the PCMK card you want to stop from the list of cards. 3. Click Stop. 4. When you see the dialog that states you may safely remove this device, click OK. 5.
5-14 Install the 1784-PCMK Driver for Windows 2000/XP Unsafe Removal of Card If you do not stop the communication to your card before you remove a card from your computer, you see this dialog box: IMPORTANT Use the Unplug/Eject icon to be sure you do not damage your card.
Install the 1784-PCMK Driver for Windows 2000/XP 5-15 Update the 1784-PCMK Driver Perform these steps after you insert the PCMK card into a PCMCIA slot in your computer. After you insert the PCMK card, the system will detect the hardware and begin to build the driver information needed to run the hardware. Because the driver has not been loaded, the operating system displays a new hardware dialog and the following message: 1. Right-click My Computer. 2. Select Properties. 3. Select Hardware. 4.
5-16 Install the 1784-PCMK Driver for Windows 2000/XP Show the Card Unplug/Eject Icon on the Taskbar If you frequently need to unplug the device, be sure to check the Show Unplug/ Eject icon on the taskbar box in the Completing the Add/Remove Hardware wizard page. You can check the box the first time you install the card. The next time you want to unplug or eject the device, you can use the icon on the taskbar instead of the Add/Remove Hardware wizard.
Chapter 6 Insert and Remove the PCMK Card What’s in This Chapter? Refer to this chapter to perform the following: Topic Page Insert the PCMK Card 6-2 Remove the PCMK Card 6-4 ATTENTION To comply with the CE Low Voltage Directive (LVD), this equipment must be powered from a source compliant with the following: Safety Extra Low Voltage (SELV) or Protected Extra Low Voltage (PELV).
6-2 Insert and Remove the PCMK Card Insert the PCMK Card IMPORTANT In most cases, except for when you are using the Windows NT operating system you can insert or remove the PCMK card from a powered computer. However, different application programs accessing the PCMK card behave differently. Some applications, for example, INTERCHANGE software, do not support removing and reinserting the card.
Insert and Remove the PCMK Card 6-3 2. Grasp the PCMK card by the edges with the PCMK logo facing upward and the 68-pin connector facing into the PCMCIA slot. 30370 IMPORTANT If you have more than one slot in your computer, you can insert the PCMK card into any empty slot. Check your computer’s documentation for the slot numbers. The other available slots can be used for other PC cards such as network or modem cards. 3.
6-4 Insert and Remove the PCMK Card If the computer is configured properly, your sound/speaker is enabled, and you installed the PCMK card successfully, you hear multiple tones when you insert a card or boot the computer. If you have two PCMCIA cards, there are 2 sets of tones, one for each card.
Chapter 7 Choose and Connect a PCMK Cable What’s in This Chapter? Follow the instructions in this chapter to connect the PCMK card to a network or processor. The instructions in this chapter assume that you have inserted the PCMK card into the PCMCIA slot.
7-2 Choose and Connect a PCMK Cable If you connect to Allen-Bradley You need(3) PLC-2 Family Processors (Not supported with cardbus sockets) PCM2/B Cable Assembly (cat. no. 1784-PCM2/B) SLC 5/01 Processors SLC 5/02 Processors SLC 5/03 Processors 1747-AIC link coupler for DH485 Other DH485 devices with an RJ45 jack PCM4/B Cable Assembly (cat.no. 1784-PCM4/B) PLC-3 Family Processors(1) PLC-5 Family Processors PLC-5/250 Classic Processors PCM5/B Cable Assembly (cat. no.
Choose and Connect a PCMK Cable 7-3 Attach the Wedge ATTENTION We recommend that you attach the wedge that is provided with your cable to the computer. This wedge provides strain relief for the cable and secures the cable to the computer so the cable is not accidently disconnected. If you do not use the wedge and the cable disconnects, it can damage the connector on the cable and PCMK card.
7-4 Choose and Connect a PCMK Cable 2. Position the assembly on the computer so the narrow end of the wedge is closest to the PCMCIA slot. When you find the best location for the wedge, use a pencil to mark the location on the computer. Length of cable from connector to electronics pod 17.8 cm (7.0 in.) 19875b 3. Separate the wedge from the electronics pod. 4. Remove the paper backing from the wedge. 19950 ATTENTION The adhesive on the wedge is very strong.
Choose and Connect a PCMK Cable 7-5 5. Place the wedge on the computer where you marked the location.
7-6 Choose and Connect a PCMK Cable Connect the Cable ATTENTION The PCMK card does not have a termination resistor; use caution when connecting this PCMK card at the end of a DH+ and DH485 link. If your application software prompts you to set termination of the PCMK card, set this field to OFF. Connect the cable to the PCMCIA slot. 1. Slide the cable’s electronics pod onto the wedge on the computer.
Choose and Connect a PCMK Cable 7-7 2. Attach the cable to the PCMK card. The silver side should face upward as you connect the cable to the PCMK card. 30380-M 3. Attach the cable to the processor. The cable you use depends on your processor. The following figures show the PCMK cables and illustrate how to attach each cable to its respective processor (PLC or SLC programmable controller).
7-8 Choose and Connect a PCMK Cable 1784-PCM2/B Loopback connector 15 pin D-shell connector 19866-M 1784-PCM2/B PLC-2 or Mini-PLC-2 family processor Ground wire 19877-M 1771-KE 1771-KF 1771-KG 1771-KGM 1771-KA2 1771-KA3 PLC-2 or Mini-PLC-2 family processor RS-232, DH, DH+ 1784-PCM2/B 1771-CN, -CO or -CR Ground wire 20227-M Publication 1784-UM519C-EN-P - September 2006
Choose and Connect a PCMK Cable 7-9 1784-PCM4/B cable RJ45 connector 20692-M 1784-PCM4/B PCMK card 1747-AIC SLC 5/01 SLC 5/02 SLC 5/03 30376-M Publication 1784-UM519C-EN-P - September 2006
7-10 Choose and Connect a PCMK Cable 1784-PCM5/B 9-pin D-shell connector A 1784-CP7 adapter ships with the cable.
Choose and Connect a PCMK Cable 7-11 1784-PCM6/B cable 8-pin DIN connector 20691-M 1784-PCM6/B 1756-DHRIO SLC 5/04 processor Enhanced PLC-5processor 42590 4. Verify that you can go online with the PCMK card and your application software.
7-12 Choose and Connect a PCMK Cable Remove the Cable 1. Verify all communications software has been stopped. 2. Remove the cable by gently pinching the side bars and pulling the connector toward you.
Choose and Connect a PCMK Cable 7-13 Publication 1784-UM519C-EN-P - September 2006
7-14 Choose and Connect a PCMK Cable Notes: Publication 1784-UM519C-EN-P - September 2006
Glossary adapter The hardware that connects the computer bus to the 68-pin PC card sockets in the PCMCIA slot. See also socket. application programming interface The set of services that an operating system makes available to programs that run under it. binary file A name that denotes any file that is not a text file, such as an executable file. Card Identification Structure A data structure written on every PC card that complies with the PCMCIA standard.
G-2 Glossary dual-port memory Memory that can be viewed from two different hosts. This memory allows the PCMK card and a host computer to communicate. The memory range marked as dual-port memory is a common shared-memory area. enabler Software used to control PC cards.
Glossary G-3 network A series of nodes connected by some type of communication medium. The connection paths between any pair of nodes can include repeaters, routers, bridges, and gateways. network address A node’s address on the network. PC card Credit-card size, 68-pin add-in cards that were designed to meet PCMCIA standards. Remote I/O link A serial link for carrying I/O data between a PLC or SLC processor/ scanner and remote I/O adapters.
G-4 Glossary Type I A 3.3 mm thick PC card that is used for memory enhancements, such as Flash memory cards. See also PC card. Type II A 5 mm think PC card that is used for I/O features such as modem, LAN, and host communications. See also PC card. Type III A 10.5 mm thick PC card that is used for memory enhancements or I/O capabilities that require more space, such as rotating media and wireless communication devices. See also PC card.
Appendix A Specifications PCMK Communications Card - 1784-PCMK Attribute: Value: Form-factor PCMCIA Type II form-factor network adapter card Compliant to PCMCIA PC card standard - February 1995 Compliant to PCMCIA Card and Socket Services Standard, Version 2.1 Wiring Category(1) 3 - on communications ports Enclosure None (open-style) (1) Use this Conductor Category information for planning conductor routing. Refer to Industrial Automation Wiring and Grounding Guidelines, publication 1770-4.1.
A-2 Specifications Environmental Specifications Attribute: Value: Vibration IEC 60068-2-6 (Test Fc, Operating): 15 g @ 10…200 Hz Storage Temperature IEC 60068-2-1 (Test Ab, Unpackaged Non-operating Cold),\ IEC 60068-2-2 (Test Bb, Unpackaged Non-operating Dry Heat), IEC 60068-2-14 (Test Na, Unpackaged Non-operating Thermal Shock): -20…65 °C (-4…149 °F) Surge Transient Immunity IEC 61000-4-5: ±2 kV line-earth (CM) on communications ports Certifications Certification(1) (When product is marked): Val
Specifications A-3 Loopback Connector Pin Assignments 1 TxD 2 RxD 3 TxDRet 4 RxDRet 5 RTS 6 CTS 7 RTSRet 8 CTSRet PCM2 Cable Assembly 1784-PCM2 The PCM2 cable assembly uses the loopback connector for its diagnostic loopback test. The PCM5 and PCM6 cable assemblies have a loopback test but do not have a loopback connector. In addition, the PCM4 cable assembly, used for DH485 communications, has neither a loopback connector nor a diagnostic loopback test.
A-4 Specifications DH+ Specifications-link Communication Rate Allen-Bradley has added 230 Kbps communication rate enhancements to the DH+ binary. Note this update to link communication rate in the DH+ memory map. :007h Link Communication Rate IMPORTANT INI FCh = 57600 FEh = 230400 R...........W Host writes a valid value (PCMK communication rate) to byte:00007h. PCMK reads at startup.
Index Numerics 1784 4-1, 5-1 6200 Series Software P PC Card 1-1 architecture 1-2 PCM2/B cable assembly 7-2 PCM4/B cable assembly 7-2 PCM5/B cable assembly 7-2 PCM6/B cable assembly 7-2 PCMCIA 1-1 PCMCIA technology 1-1 PCMK card cables 7-1 inserting 6-1 memory manager conflicts 3-8 removing 6-1 stopping in Windows 2000 operating system 2-2 C cables connecting 7-6 removing 7-12 selecting 7-1 D DH 1-3 cable connection DH485 1-3 7-11 5-13 stopping in Windows 95/98 operating system 3-7 PCMK card drive
I-2 Index W Windows 2000 driver 5-1 Windows 2000 operating system 2-3, 5-1 driver 5-1 install driver 5-2 multiple tones 5-2 PC Card icon enabling 5-16 properties 5-6 Windows 3. x.
Rockwell Automation Support Rockwell Automation provides technical information on the Web to assist you in using its products. At http://support.rockwellautomation.com, you can find technical manuals, a knowledge base of FAQs, technical and application notes, sample code and links to software service packs, and a MySupport feature that you can customize to make the best use of these tools.