
Manual

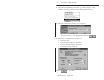
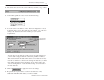
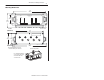


Table Of Contents
- 1792-5.4, ArmorBlock 4 Output Module, Installation Instructions
- European Union Directive Compliance
- Install Your ArmorBlock Module
- Connect the Wiring to the ArmorBlock Module
- Communicate with Your ArmorBlock Module
- Configure Your ArmorBlock Module Offline Using the DeviceNet Manager Configuration Tool
- Configure Your ArmorBlock Module Online Using the DeviceNet Manager Configuration Tool
- Monitoring Parameters Online
- Reset Faults
- Configure Your ArmorBlock Module Using EDS Files
- Specifications
- Back Cover
5
ArmorBlock 4 Output Module
Publication 1792-5.4 – October 1996
5. The bar at the bottom of the screen will tell you when you go online.
6. At the utility pulldown, select “Node Commissioning.”
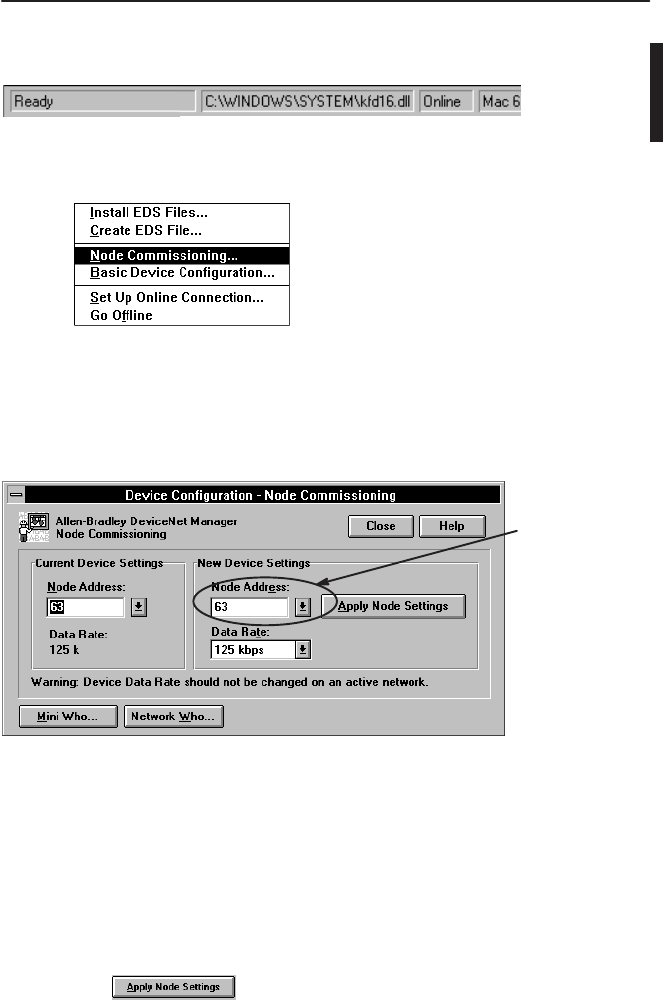
7. You can set the node address on the “Device Configuration – Node
Commissioning” screen. Note that the node address “out of the box”
setting is 63. Set the desired node address per your system
requirements.
Set new node
address here.
You can also set the data rate on this screen, if required. However,
your module is shipped with the “autobaud” parameter enabled.
This assures that the module will be at the correct data rate for any
network to which it is connected. To change the data rate, you must
first disable autobaud on the parameter screen, then return to the
“Device Configuration – Node Commissioning” screen and enter
the new data rate.
8. Click on
to apply the new node settings.
9. Repeat the above procedure to set the node addresses of any
additional ArmorBlock modules you want to install.