ControlNet Adapter 22-COMM-C FRN 1.
Important User Information Solid state equipment has operational characteristics differing from those of electromechanical equipment. Safety Guidelines for the Application, Installation and Maintenance of Solid State Controls (Publication SGI-1.1 available from your local Rockwell Automation sales office or online at http://www.rockwellautomation.com/ literature) describes some important differences between solid state equipment and hard-wired electromechanical devices.
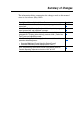
Summary of Changes The information below summarizes the changes made to this manual since its last release (May 2005): Description of New or Updated Information In the Chapter 4 introduction, added an Important paragraph about I/O connections. In the “About Explicit Messaging” section, added an Important paragraph about “unconnected” and “connected” messages. In the “Configuring the RS-485 Network” section, corrected the Important paragraph text.
soc-ii Summary of Changes
Table of Contents Preface About This Manual Related Documentation . . . . . . . . . . . . . . . . . . . . . . . . . . . . . P-1 Conventions Used in this Manual . . . . . . . . . . . . . . . . . . . . . P-2 Rockwell Automation Support. . . . . . . . . . . . . . . . . . . . . . . . P-3 Chapter 1 Getting Started Components . . . . . . . . . . . . . . . . . . . . . . . . . . . . . . . . . . . . . . Features . . . . . . . . . . . . . . . . . . . . . . . . . . . . . . . . . . . . . . . . .
ii Table of Contents Chapter 6 Using Explicit Messaging About Explicit Messaging . . . . . . . . . . . . . . . . . . . . . . . . . . . Performing Explicit Messages . . . . . . . . . . . . . . . . . . . . . . . ControlLogix Example . . . . . . . . . . . . . . . . . . . . . . . . . . . . . PLC-5 Example . . . . . . . . . . . . . . . . . . . . . . . . . . . . . . . . . . . Chapter 7 6-1 6-2 6-3 6-6 Using Multi-Drive Mode Single Mode vs. Multi-Drive Mode . . . . . . . . . . . . . . . . . . . .
Table of Contents Appendix C iii ControlNet Objects Identity Object . . . . . . . . . . . . . . . . . . . . . . . . . . . . . . . . . . . . C-2 Assembly Object . . . . . . . . . . . . . . . . . . . . . . . . . . . . . . . . . . C-4 Register Object. . . . . . . . . . . . . . . . . . . . . . . . . . . . . . . . . . . . C-6 Parameter Object . . . . . . . . . . . . . . . . . . . . . . . . . . . . . . . . . . C-9 Parameter Group Object (Single Mode only) . . . . . . . . . . . C-12 PCCC Object . . . . . . . .
iv Table of Contents
Preface About This Manual Topic Related Documentation Conventions Used in this Manual Rockwell Automation Support Page P-1 P-2 P-3 Related Documentation For: DriveExplorer™ Refer to: http://www.ab.com/drives/driveexplorer, and DriveExplorer online Help (installed with the software) DriveTools™ SP (includes http://www.ab.
P-2 About This Manual Conventions Used in this Manual The following conventions are used throughout this manual: • Parameter names are shown in the format Parameter xx - [*]. The xx represents the parameter number, and the * represents the parameter name — for example, Parameter 01 - [Mode]. • Menu commands are shown in bold type face and follow the format Menu > Command. For example, if you read “Select File > Open,” you should click the File menu and then click the Open command.
About This Manual P-3 Rockwell Automation Support Rockwell Automation, Inc. offers support services worldwide, with over 75 sales/support offices, over 500 authorized distributors, and over 250 authorized systems integrators located through the United States alone. In addition, Rockwell Automation, Inc. representatives are in every major country in the world. Local Product Support Contact your local Rockwell Automation, Inc.
P-4 Notes: About This Manual
Chapter 1 Getting Started The 22-COMM-C ControlNet adapter is a communication option intended for installation into a PowerFlex 40 or PowerFlex 400 drive. It can also be used with other Allen-Bradley products that support a DSI communication adapter, such as the DSI External Comms Kit (22-XCOMM-DC-BASE). The External Comms Kit enables PowerFlex 4 drives (which cannot support an internally-mounted adapter) to connect to a ControlNet network.
1-2 Getting Started Features The ControlNet adapter features the following: • The adapter is normally installed in a PowerFlex 40 or PowerFlex 400 drive. It can also be used in a DSI External Comms Kit (22-XCOMM-DC-BASE). • A jumper lets you select between Single or Multi-Drive mode of operation. In Single mode (default), the adapter represents a single drive on one node. In Multi-Drive mode, the adapter represents up to 5 drives on one node.
Getting Started 1-3 Compatible Products The adapter is compatible with Allen-Bradley PowerFlex 4-Class (Component-Class) drives and other products that support an internal DSI adapter. At the time of publication, compatible products include: • PowerFlex 4 drives with DSI External Comms Kit • PowerFlex 40 drives • PowerFlex 400 drives Required Equipment Equipment Shipped with the Adapter When you unpack the adapter, verify that the package includes: ❑ One ControlNet adapter ❑ One 15.24 cm (6 in.
1-4 Getting Started Safety Precautions Please read the following safety precautions carefully. ! ! ! ! ! ! ! ATTENTION: Risk of injury or death exists. The PowerFlex drive may contain high voltages that can cause injury or death. Remove power from the PowerFlex drive, and then verify power has been discharged before installing or removing the adapter. ATTENTION: Risk of injury or equipment damage exists.
Getting Started 1-5 Quick Start This section is provided to help experienced users quickly start using the adapter. If you are unsure how to complete a step, refer to the referenced chapter. Step 1 Review the safety precautions for the adapter. 2 3 Verify that the PowerFlex drive is properly installed. Install the adapter. Verify that the PowerFlex drive is not powered. Then, connect the adapter to the network using a ControlNet cable and to the drive using the Internal Interface cable.
1-6 Getting Started Modes of Operation The adapter uses four status indicators to report its operating status. They can be viewed on the adapter or through the drive cover (Figure 1.2). Figure 1.2 Status Indicators (location on drive may vary) ➊ ➋ ➌ ➍ ➊ ➋ ➌ ➍ Bottom side of adapter board Item Status Indicator ➊ PORT ➋ MOD ➌ ➍ NET A or NET B (1) Normal Description Status (1) Green Normal Operation. The adapter is properly connected and is communicating with the drive. Green Normal Operation.
Chapter 2 Installing the Adapter Chapter 2 provides instructions for installing the adapter in a PowerFlex 40 or PowerFlex 400 drive. This adapter can also be installed in a DSI External Comms Kit. In this case, refer to the 22-XCOMM-DC-BASE Installation Instructions (Publication No. 22COMM-IN001…) supplied with the kit.
2-2 Installing the Adapter 1. Set the adapter Operating Mode Jumper (J7) for Single (1x) or Multi-Drive (5x) operation (see Figure 2.1 and setting descriptions below). For complete details on Multi-Drive mode operation, see Chapter 7, Using Multi-Drive Mode. Figure 2.
Installing the Adapter 2-3 Connecting the Adapter to the Network ! ATTENTION: Risk of injury or death exists. The PowerFlex drive may contain high voltages that can cause injury or death. Remove power from the PowerFlex drive, and then verify power has been discharged before installing or removing an adapter. 1. Remove power from the drive. 2. Use static control precautions. 3. Remove the drive cover. 4. Connect a ControlNet cable to the ControlNet network. See Figure 2.
2-4 Installing the Adapter Connecting the Adapter to the Drive PowerFlex 40 Frames B and C, and PowerFlex 400 Frame C 1. Remove power from the drive. 2. Use static control precautions. 3. Mount the adapter on the required special drive cover (ordered separately — see Figure 2.4 for part numbers). • Frame C: Use the adapter screw to secure the adapter to the cover. • Frame B: Disregard the screw and snap the adapter in place.
Installing the Adapter 2-5 Figure 2.4 Mounting and Grounding the Adapter – PowerFlex 40 Frames B and C, and PowerFlex 400 Frame C Adapter Mounted on Back of Required Special Drive Cover (Frame C cover shown) PowerFlex 40 Frame B -- Part Number 22B-CCB PowerFlex 40 Frame C -- Part Number 22B-CCC PowerFlex 400 Frame C -- Part Number 22C-CCC PowerFlex 40 Drive (Frame C shown with cover removed) Ground for Frame C Drives NOTE: For Frame B drives, the lower left adapter screw does not ground the adapter.
2-6 Installing the Adapter PowerFlex 400 Frames D, E, and F 1. Remove power from the drive. 2. Use static control precautions. 3. Remove the drive cover. 4. With the adapter board right side up, remove its mounting screw from the lower left hole. Save the screw for mounting in Step 7. 5. Connect the Internal Interface cable to the DSI port on the drive (see Figure 2.5). 6.
Installing the Adapter 2-7 Applying Power ! ATTENTION: Risk of equipment damage, injury, or death exists. Unpredictable operation may occur if you fail to verify that parameter settings and switch settings are compatible with your application. Verify that settings are compatible with your application before applying power to the drive. 1. Install the drive cover. The status indicators can be viewed on the front of the drive after power has been applied. 2. Apply power to the PowerFlex drive.
2-8 Notes: Installing the Adapter
Chapter 3 Configuring the Adapter Chapter 3 provides instructions and information for setting the parameters in the adapter. Topic Configuration Tools Using the PowerFlex 4-Class HIM Setting the Node Address Setting the I/O Configuration Setting a Fault Action Resetting the Adapter Viewing the Adapter Configuration Page 3-1 3-2 3-3 3-3 3-4 3-6 3-7 For a list of parameters, refer to Appendix B, Adapter Parameters. For definitions of terms in this chapter, refer to the Glossary.
3-2 Configuring the Adapter Using the PowerFlex 4-Class HIM The PowerFlex 4-Class HIM (Human Interface Module) can be used to access parameters in the adapter (see basic steps shown below). It is recommended that you read through the steps for your HIM before performing the sequence. For additional HIM information, refer to the HIM Quick Reference card. Note: The HIM will only work when the adapter is set to Single mode. Using the HIM Step Key(s) 1. Power up the drive. Then plug the HIM into the drive.
Configuring the Adapter 3-3 Setting the Node Address If the Node Address Switches on the adapter are set to a node address of “00,” the value of Parameter 02 - [CN Addr Cfg] determines the ControlNet node address. 1. Set the value of Parameter 02 - [CN Addr Cfg] to a unique node address. Figure 3.1 Node Address Screen on PowerFlex 4-Class HIM (22-HIM-*) Default = 2 CN Addr Cfg Parameter: 002 # 2 VALUE SEL ! LIMITS 2. Reset the adapter (see Resetting the Adapter on Page 3-6).
3-4 Configuring the Adapter 4-Class drives that are daisy-chained to the RJ45 (RS-485) port on Drive 0. When the adapter is externally mounted in a DSI External Comms Kit, Drives 0 through 4 are daisy-chained to the RJ45 (RS-485) port on the Comms Kit. Refer to Chapter 7, Using Multi-Drive Mode for more information. 2. If a drive is enabled, configure the parameters in the drive to accept the Logic Command and Reference from the adapter.
Configuring the Adapter 3-5 To change the fault action Set the values of Parameters 08 - [Comm Flt Action] and 09 - [Idle Flt Action] to the desired responses: Value 0 1 2 3 4 Action Fault Stop Zero Data Description The drive is faulted and stopped. (Default) The drive is stopped, but not faulted. The drive is sent 0 for output data. This does not command a stop. Hold Last The drive continues in its present state.
3-6 Configuring the Adapter Resetting the Adapter Changes to switch settings and some adapter parameters require that you reset the adapter before the new settings take effect. You can reset the adapter by cycling power to the drive or by using the following parameter: ! ATTENTION: Risk of injury or equipment damage exists. If the adapter is transmitting control I/O to the drive, the drive may fault when you reset the adapter. Determine how your drive will respond before resetting a connected adapter.
Configuring the Adapter 3-7 Viewing the Adapter Configuration The following parameters provide information about how the adapter is configured. You can view these parameters at any time. Number 01 03 13 Name Mode Description The operating mode in which the adapter is set: Values 0 = Single Drv 1 = Multiple Drv CN Addr Act The node address used by the adapter. This will be one of the following values: • The address set by the adapter Node Address switches.
3-8 Notes: Configuring the Adapter
Chapter 4 Configuring the I/O Chapter 4 provides instructions on how to configure a ControlLogix controller with 1756-CNB/R bridge or PLC-5 controller to communicate with the adapter and connected PowerFlex drive. Topic ControlLogix Example PLC-5 Example Page 4-1 4-12 Important: The I/O consumes only one connection between the controller and drive(s) regardless of whether the adapter is in Single or Multi-Drive mode.
4-2 Configuring the I/O Figure 4.1 Example ControlNet Network Node 1 ControlLogix Controller with 1756-CNB/R Bridge Node 2 PowerFlex 40 Drive with 22-COMM-C ControlNet Adapter ControlNet Network (optional redundancy) Node 99 Computer with 1784-PCC Network Interface Card and RSNetWorx for ControlNet Adding the Bridge to the I/O Configuration To establish communications over a ControlNet network, you must first add the ControlLogix controller and its bridge to the I/O configuration. 1.
Configuring the I/O 4-3 2. In the project tree, right-click the I/O Configuration folder and select New Module. The Select Module Type screen (Figure 4.3) appears. Figure 4.3 Select Module Type Screen Step 3 Step 4 3. In the list, select the ControlNet bridge used by your controller. In this example (Figure 4.3), we use a 1756-CNBR/D ControlNet Bridge (Series D), so the 1756-CNBR/D option is selected. 4. Click OK. The Module Properties screen (Figure 4.4) appears. Figure 4.
4-4 Configuring the I/O Box Electronic Keying Setting Compatible Module. The “Compatible Module” setting for Electronic Keying ensures that the physical module is consistent with the software configuration before the controller and bridge make a connection. Therefore, ensure that you have set the correct revision in this screen. Refer to the online help if the controller and bridge have problems making a connection and you want to change this setting. 6. Click Finish>>.
Configuring the I/O 4-5 Figure 4.7 Module Properties Screen 3. Edit the following information about the adapter: Box Name Comm Format Node Setting A name to identify the adapter and drive. Data - INT (This setting formats the data in 16-bit words.) The node address setting of the adapter. 4. Under Connection Parameters, edit the following: Box Input Assembly Instance Size 1 (This value is The value will vary based on your application required.) (setting of Parameter 12 - [DSI I/O Cfg]).
4-6 Configuring the I/O Table 4.A ControlLogix Input/Output Size Configurations Input Size 4 6 8 10 12 Output Logic Command/ Reference/ Parameter 12 - Parameter 01 Size Status Feedback [DSI I/O Cfg] [Mode] 2 ✔ ✔ Drive 0 Single 4 ✔ ✔ Drives 0-1 6 ✔ ✔ Drives 0-2 Multi-Drive 8 ✔ ✔ Drives 0-3 10 ✔ ✔ Drives 0-4 TIP: For instructions on configuring the I/O for the adapter (Parameter 12 - [DSI I/O Cfg]), see Setting the I/O Configuration on page 3-3. 5.
Configuring the I/O Figure 4.
4-8 Configuring the I/O Saving the I/O Configuration to the Controller After adding the bridge and the adapter to the I/O configuration, you must download the configuration to the controller. You should also save the configuration to a file on your computer. 1. Select Communications > Download. The Download dialog box (Figure 4.10) appears. Figure 4.
Configuring the I/O 4-9 Saving the I/O Configuration to the Bridge You also need to download the I/O configuration to the bridge. You should also save the configuration to a file on your computer. 1. Launch RSNetWorx for ControlNet. In the RSNetWorx for ControlNet window, select File > New to display the New File screen. Then select “ControlNet Configuration” as the network configuration type, and click OK. 2. Select Network > Online to display the Browse for Network screen (Figure 4.11). Figure 4.
4-10 Configuring the I/O Figure 4.12 Expanded Browse for Network Screen 4. As the selected ControlNet path is browsed, RSNetWorx for ControlNet creates a graphical representation of the devices on the network (Figure 4.13). Figure 4.
Configuring the I/O 4-11 5. Select Network > Enable Edits. If the bridge has a different I/O configuration than the configuration now being saved, the Online / Offline mismatch dialog box (Figure 4.14) will appear. Figure 4.14 Online / Offline mismatch Dialog Box When both radio button choices are available, use the preselected default “Use online data (upload).” When this choice is unavailable (grayed out), you must select “Use offline data (download).” Then click OK. 6.
4-12 Configuring the I/O PLC-5 Example Example Network After the adapter is configured, the connected drive and adapter will be a single node on the network. This section provides the steps that are needed to configure a simple network like the network in Figure 4.16. In our example, we will configure a PLC-5/40C controller to communicate with a drive using Logic Command/Status and Reference/Feedback over the network. Figure 4.
Configuring the I/O 4-13 Figure 4.17 Browse for Network Screen 3. Expand the communications path from your computer to the ControlNet scanner. Figure 4.18 shows our example navigating to devices that are on a ControlNet network. Depending on the communication link you are using, the navigation path may be different. After selecting a valid ControlNet path (for example, A, ControlNet), click OK. Figure 4.
4-14 Configuring the I/O 4. As the selected ControlNet path is browsed, RSNetWorx for ControlNet creates a graphical representation of the devices on the network (Figure 4.19). Figure 4.19 RSNetWorx for ControlNet Graph View Screen 5. Select Network > Enable Edits. If the scanner has a different I/O configuration than the configuration now being saved, the Online / Offline mismatch dialog box (Figure 4.20) will appear. Figure 4.
Configuring the I/O 4-15 6. In the RSNetWorx for ControlNet graph view screen, right-click the PLC-5/40C icon and select Scanlist Configuration to display the Scanlist Configuration screen (Figure 4.21). Figure 4.21 Scanlist Configuration Screen 7. Right-click on the PowerFlex 40 drive row in the screen and select Insert Connection… to display the Connection Properties screen (Figure 4.22). Figure 4.22 Connection Properties Screen In this screen, leave the Connection Name box at the default value shown.
4-16 Configuring the I/O number of words that are required for your I/O in the Input Size and Output Size boxes. The size will depend on the I/O that you enabled in the adapter. This information can be found in Parameter 12 [DSI I/O Cfg] in the adapter. Table 4.B shows common configuration Input/Output sizes. Table 4.
Chapter 5 Using the I/O Chapter 5 provides information and examples that explain how to use the I/O to control, configure, and monitor a PowerFlex 4-Class drive. Topic About I/O Messaging Understanding the I/O Image Using Logic Command/Status Using Reference/Feedback Example Ladder Logic Program Information ControlLogix Example PLC-5 Example ! Page 5-1 5-2 5-3 5-3 5-4 5-5 5-8 ATTENTION: Risk of injury or equipment damage exists.
5-2 Using the I/O Understanding the I/O Image The terms input and output are defined from the controller’s point of view. Therefore, output I/O is data that is produced by the controller and consumed by the adapter. Input I/O is status data that is produced by the adapter and consumed as input by the controller. The I/O image table will vary based on the configuration of the adapter: • Operating Mode Jumper J7 (Figure 2.
Using the I/O 5-3 Using Logic Command/Status The Logic Command word is always word 0 in the output image. The Logic Command is a 16-bit word of control produced by the controller and consumed by the adapter. The Logic Status word is input word 2 for ControlLogix or input word 0 for PLC-5. The Logic Status is a 16-bit word of status produced by the adapter and consumed by the controller.
5-4 Using the I/O Example Ladder Logic Program Information The example ladder logic programs in the ControlLogix Example and PLC-5 Example sections of this chapter are intended for and operate PowerFlex 4-Class drives. Functions of the Example Programs The example programs enable an operator to perform the following: • Obtain status information from the drive. • Use the Logic Command to control the drive (for example, start, stop). • Send a Reference to the drive and receive Feedback from the drive.
Using the I/O 5-5 ControlLogix Example The Drive I/O Control program (Figure 5.3) defines the I/O needed to control the drive.
5-6 Using the I/O Figure 5.3 ControlLogix Ladder Logic Example for Drive I/O Control PowerFlex 40 ControlNet Single Mode Example This ControlLogix example system consists of a 1756-CNBR/D in Slot 4 communicating on a ControlNet network with a PowerFlex 40 drive with an installed 22-COMM-C ControlNet adapter. You may substitute the "PowerFlex 40" for a PowerFlex 400, or a PowerFlex 4 using an External DSI Communicaitons Kit (22-XCOMM-DC-BASE).
Using the I/O 5-7 Figure 5.3 ControlLogix Ladder Logic Example for Drive I/O Control (Continued) Command_Jog PowerFlex_40_Drive:O.Data[0].2 Command_Clear_Faults PowerFlex_40_Drive:O.Data[0].3 Command_Forward_Reverse PowerFlex_40_Drive:O.Data[0].4 Command_Forward_Reverse / PowerFlex_40_Drive:O.Data[0].5 9 10 11 12 13 This rung provides the Speed Reference word to the PowerFlex 40. Note that it is set in Hz and not in engineering units like PowerFlex 7-Class drives.
5-8 Using the I/O PLC-5 Example The Drive I/O Control program (Figure 5.4) defines the I/O needed to control the drive. Figure 5.
Using the I/O 5-9 Figure 5.4 PLC-5 Ladder Logic Example for Drive I/O Control (Continued) Rung 0006 moves the Speed Feedback from the drive to the operator station. Drive Speed Feedback MOV Move Source N9:1 0< Dest O:001 0< 0006 Rungs 0007 through 0012 move the Logic Command from the operator station to the drive.
5-10 Notes: Using the I/O
Chapter 6 Using Explicit Messaging Chapter 6 provides information and examples that explain how to use Explicit Messaging to configure and monitor the 22-COMM-C adapter and PowerFlex 4-Class drive to which it is connected. Topic About Explicit Messaging Performing Explicit Messages ! ! Page 6-1 6-2 Topic ControlLogix Example PLC-5 Example Page 6-3 6-6 ATTENTION: Risk of injury or equipment damage exists. The examples in this publication are intended solely for purposes of example.
6-2 Using Explicit Messaging during message setup. These message connections are in addition to the I/O connection. However, the tradeoff for more message connections is decreased network performance. If your application cannot tolerate this, do not check the “Connected” box. Performing Explicit Messages There are five basic events in the Explicit Messaging process. The details of each step will vary depending on the type of controller being used. Refer to the documentation for your controller.
Using Explicit Messaging 6-3 ControlLogix Example TIP: To display the Message Configuration screen in RSLogix 5000, add a message instruction (MSG), create a new tag for the message (Properties: Base tag type, MESSAGE data type, controller scope), and click the button in the message instruction. Formatting a Message to Read a Parameter A Get Attribute Single message is used to read a single parameter. This example read message is for parameter d003 - [Output Current] for a PowerFlex 4-Class drive.
6-4 Using Explicit Messaging For supported classes, instances, and attributes, refer to Appendix C, ControlNet Objects. Formatting a Message to Write to a Parameter A Set Attribute Single message is used to write to a single parameter. This example write message is for parameter P039 - [Accel Time 1] for a PowerFlex 4-Class drive. Figure 6.
Using Explicit Messaging 6-5 Table 6.A Tags for the ControlLogix Example Explicit Messaging Program Tag Names for Read Message Perform_Parameter_Read Parameter_Read_Message Output_Current Type BOOL MESSAGE INT Tag Names for Write Message Perform_Parameter_Write Parameter_Write_Message Accel_Time_1 Type BOOL MESSAGE INT Ladder Logic Program Figure 6.
6-6 Using Explicit Messaging PLC-5 Example Important: Due to controller limitations, explicit messaging can only be performed on drive parameters up to Parameter 256. The ControlNet I/O Transfer (CIO) instruction is used for PLC-5 controllers to send explicit messages. Formatting a Message to Read a Parameter This read message example is for parameter d003 - [Output Current] for a PowerFlex 4-Class drive.
Using Explicit Messaging 6-7 Formatting a Message to Write to a Parameter This write message example is for parameter P039 - [Accel Time 1] for a PowerFlex 4-Class drive. Configuration Box Communication Command Service Code Class Number Instance Number Example Value Description CIP messages are used to access the Parameter object in CIP Generic the 22-COMM-C. The code for the Set_Attribute_Single service. 10 (Hex.) The Class ID for the CIP Parameter object. f (Hex.
6-8 Using Explicit Messaging Ladder Logic Program Figure 6.5 Example PLC-5 Ladder Logic Explicit Messaging Program 0000 0001 0002 Rung 0000 enables the user to initiate an explicit message to read from Parameter d003 [Output Current] in the drive.
Chapter 7 Using Multi-Drive Mode Chapter 7 provides information on how to use Multi-Drive mode and includes ControlLogix and PLC-5 ladder examples. Topic Single Mode vs. Multi-Drive Mode System Wiring Understanding the I/O Image Configuring the RS-485 Network Example Configuration Settings ControlLogix I/O Example ControlLogix Explicit Messaging PLC-5 I/O Example Additional Information ! Page 7-1 7-4 7-5 7-7 7-8 7-9 7-22 7-24 7-36 ATTENTION: Risk of injury or equipment damage exists.
7-2 Using Multi-Drive Mode Figure 7.1 Single Mode Example for Network 1 drive per node ControlNet Network PowerFlex 40 or 400 Drive with 22-COMM-C Adapter PowerFlex 40 or 400 Drive with 22-COMM-C Adapter PowerFlex 40 or 400 Drive with 22-COMM-C Adapter Multi-Drive mode is an alternative to the typical network installation, where a single ControlNet node can consist of one to five drives. In Figure 7.
Using Multi-Drive Mode 7-3 Benefits of Multi-Drive mode include: • Lower hardware costs. Only one adapter is needed for up to five drives. Any PowerFlex 4-Class drive can be daisy-chained. • Reduces the network node count. For example, in Single mode 30 drives would consume 30 nodes. In Multi-Drive mode, 30 drives can be connected in 6 nodes.
7-4 Using Multi-Drive Mode System Wiring The AK-U0-RJ45-TB2P two-position terminal block connector (Figure 7.4) can be used to conveniently daisy-chain the PowerFlex 4-Class drives. Two terminating resistors are also included with terminal block connectors in the AK-U0-RJ45-TB2P kit. Figure 7.4 AK-U0-RJ45-TB2P Terminal Block Connector Figure 7.5 and Figure 7.6 show wiring diagrams for using the AK-U0-RJ45-TB2P terminal block connectors. Figure 7.
Using Multi-Drive Mode 7-5 Understanding the I/O Image The terms input and output are defined from the scanner’s point of view. Therefore, output I/O is data that is output from the scanner and consumed by the adapter. Input I/O is status data that is produced by the adapter and consumed as input by the scanner. The I/O image table will vary based on the configuration of the adapter: • Operating Mode Jumper J7 (Figure 2.
7-6 Using Multi-Drive Mode Figure 7.
Using Multi-Drive Mode 7-7 Configuring the RS-485 Network The following parameters in each daisy-chained drive must be set to these values: Parameter P36 - [Start Source] P38 - [Speed Reference] A103 - [Comm Data Rate] A104 - [Comm Node Addr] A107 - [Comm Format] Value 5 (Comm Port) 5 (Comm Port) 4 (19.2K) 1-247 (must be unique) 0 (RTU 8-N-1) Note that the RS-485 network is fixed at 19.2K baud, 8 data bits, no parity, and 1 stop bit.
7-8 Using Multi-Drive Mode Example Configuration Settings Adapter Settings • The adapter Operating Mode Jumper (J7 in Figure 2.1) is set to the “5x” (Multi-Drive) position.
Using Multi-Drive Mode 7-9 ControlLogix I/O Example This example ladder logic program demonstrates using Multi-Drive mode with five drives. See Figure 7.2 or Figure 7.3 for a system layout diagram. Function of the Example Program This example program enables you to: • View status information from the drives such as Ready, Faulted, At Speed, and Feedback. • Control the drives using various Logic Command bits (Stop, Start, etc.) and Reference.
7-10 Using Multi-Drive Mode Figure 7.9 ControlLogix Main Routine PowerFlex 40 ControlNet Multi-Drive Mode Example ControlLogix Multi-Drive Mode example program with a PowerFlex 40 on ControlNet (22-COMM-C adapter). In this example, Four (4) PowerFlex 4 drives are daisy-chained to the main PowerFlex 40 (with installed 22-COMM-C adapter) via their RJ-45 ports (RS-485). In this mode, a total of up to five (5) PowerFlex 4/40/400's can exist as one (1) ControlNet node on the network.
Using Multi-Drive Mode 7-11 Drive 0 - Drive 4 Control Subroutines The following Drive Control subroutines provide status information (Logic Status and Feedback), control (Logic Command and Reference), and parameter read/write for each of the respective drives: Control Subroutine Drive 0 Drive 1 Drive 2 Drive 3 Drive 4 Refer to… Figure 7.10 Figure 7.11 Figure 7.12 Figure 7.13 Figure 7.
7-12 Using Multi-Drive Mode Figure 7.10 ControlLogix Drive 0 Control Subroutine Drive 0 Control Subroutine This section takes the data from the input image area and moves it to specific tags (Logic Status bits and Speed Feedback) for use elsewhere in the ladder program. Drive_Input_Image[0].0 Drive_0_Status_Ready Drive_Input_Image[0].1 Drive_0_Status_Active Drive_Input_Image[0].3 Drive_0_Status_Forward Drive_Input_Image[0].3 / Drive_0_Status_Reverse Drive_Input_Image[0].
Using Multi-Drive Mode 7-13 Figure 7.10 ControlLogix Drive 0 Control Subroutine (Continued) COP Copy File Source Drive_0_Speed_Reference Dest Drive_Output_Image[1] Length 1 13 Explicit Messaging Example Drive 0 parameters are accessed by adding 17408 decimal (4400 hex) to the desired parameter number. This example reads data from Parameter d003 - [Output Current] by using an Instance of 17411 (17408 + 3).
7-14 Using Multi-Drive Mode Figure 7.11 ControlLogix Drive 1 Control Subroutine Drive 1 Control Subroutine This section takes the data from the input image area and moves it to specific tags (Logic Status bits and Speed Feedback) for use elsewhere in the ladder program. Drive_Input_Image[2].0 Drive_1_Status_Ready Drive_Input_Image[2].1 Drive_1_Status_Active Drive_Input_Image[2].3 Drive_1_Status_Forward Drive_Input_Image[2].3 / Drive_1_Status_Reverse Drive_Input_Image[2].
Using Multi-Drive Mode 7-15 Figure 7.11 ControlLogix Drive 1 Control Subroutine (Continued) COP Copy File Source Drive_1_Speed_Reference Dest Drive_Output_Image[3] Length 1 13 Explicit Messaging Example Drive 1 parameters are accessed by adding 18432 decimal (4800 hex) to the desired parameter number. This example reads data from Parameter d003 - [Output Current] by using an Instance of 18435 (18432 + 3).
7-16 Using Multi-Drive Mode Figure 7.12 ControlLogix Drive 2 Control Subroutine Drive 2 Control Subroutine This section takes the data from the input image area and moves it to specific tags (Logic Status bits and Speed Feedback) for use elsewhere in the ladder program. Drive_Input_Image[4].0 Drive_2_Status_Ready Drive_Input_Image[4].1 Drive_2_Status_Active Drive_Input_Image[4].3 Drive_2_Status_Forward Drive_Input_Image[4].3 / Drive_2_Status_Reverse Drive_Input_Image[4].
Using Multi-Drive Mode 7-17 Figure 7.12 ControlLogix Drive 2 Control Subroutine (Continued) COP Copy File Source Drive_2_Speed_Reference Dest Drive_Output_Image[5] Length 1 13 Explicit Messaging Example Drive 2 parameters are accessed by adding 19456 decimal (4C00 hex) to the desired parameter number. This example reads data from Parameter d003 - [Output Current] by using an Instance of 19459 (19456 + 3).
7-18 Using Multi-Drive Mode Figure 7.13 ControlLogix Drive 3 Control Subroutine Drive 3 Control Subroutine This section takes the data from the input image area and moves it to specific tags (Logic Status bits and Speed Feedback) for use elsewhere in the ladder program. Drive_Input_Image[6].0 Drive_3_Status_Ready Drive_Input_Image[6].1 Drive_3_Status_Active Drive_Input_Image[6].3 Drive_3_Status_Forward Drive_Input_Image[6].3 / Drive_3_Status_Reverse Drive_Input_Image[6].
Using Multi-Drive Mode 7-19 Figure 7.13 ControlLogix Drive 3 Control Subroutine (Continued) COP Copy File Source Drive_3_Speed_Reference Dest Drive_Output_Image[7] Length 1 13 Explicit Messaging Example Drive 3 parameters are accessed by adding 20480 decimal (5000 hex) to the desired parameter number. This example reads data from Parameter d003 - [Output Current] by using an Instance of 20483 (20480 + 3).
7-20 Using Multi-Drive Mode Figure 7.14 ControlLogix Drive 4 Control Subroutine Drive 4 Control Subroutine This section takes the data from the input image area and moves it to specific tags (Logic Status bits and Speed Feedback) for use elsewhere in the ladder program. Drive_Input_Image[8].0 Drive_4_Status_Ready Drive_Input_Image[8].1 Drive_4_Status_Active Drive_Input_Image[8].3 Drive_4_Status_Forward Drive_Input_Image[8].3 / Drive_4_Status_Reverse Drive_Input_Image[8].
Using Multi-Drive Mode 7-21 Figure 7.14 ControlLogix Drive 4 Control Subroutine (Continued) COP Copy File Source Drive_4_Speed_Reference Dest Drive_Output_Image[9] Length 1 13 Explicit Messaging Example Drive 4 parameters are accessed by adding 21504 decimal (5400 hex) to the desired parameter number. This example reads data from Parameter d003 - [Output Current] by using an Instance of 21507 (21504 + 3).
7-22 Using Multi-Drive Mode ControlLogix Explicit Messaging Parameter addressing for Explicit messaging is different in Multi-Drive than with Single mode. In Single mode, the Instance value in the message equals the desired parameter number in the drive. In Multi-Drive mode, an Instance table is used to account for the parameters in the adapter and up to 5 drives. The parameters in the adapter and each of the drives are offset by 400 hex (1024 decimal): Instance (Hex.
Using Multi-Drive Mode 7-23 Figure 7.15 ControlLogix Parameter Read Message Configuration Figure 7.16 ControlLogix Parameter Write Message Configuration The Class Code is “ f ” for the CIP Parameter Object and the Attribute is “1” to select the parameter value. See Appendix C, Parameter Object for more information. The Instance value is “17411” to access parameter d003 - [Output Current] and “17447” to access parameter P039 - [Accel Time 1].
7-24 Using Multi-Drive Mode PLC-5 I/O Example Important: Due to PLC-5 controller limitations, explicit messaging cannot be performed in Multi-Drive mode. This example ladder logic program demonstrates using Multi-Drive mode with five drives. See Figure 7.2 or Figure 7.3 for a system layout diagram. Function of the Example Program This example program enables you to: • View status information from the drives such as Ready, Faulted, At Speed, and Feedback.
Using Multi-Drive Mode 7-25 Figure 7.
7-26 Using Multi-Drive Mode Drive 0 - Drive 4 Control Subroutines The following Drive Control Subroutines provide status information (Logic Status and Feedback) and control (Logic Command and Reference) for each of the respective drives: Control Subroutine Drive 0 Drive 1 Drive 2 Drive 3 Drive 4 Refer to… Figure 7.18 Figure 7.19 Figure 7.20 Figure 7.21 Figure 7.22 Figure 7.
Using Multi-Drive Mode 7-27 Figure 7.18 PLC-5 Drive 0 Control Subroutine (U:3) (Continued) Rung 0006 moves the Speed Feedback from Drive 0 to the operator station. Drive 0 Speed Feedback MOV Move Source N9:1 0< Dest O:001 0< 0006 Rungs 0007 through 0012 move the Logic Command from the operator station to Drive 0.
7-28 Using Multi-Drive Mode Figure 7.
Using Multi-Drive Mode 7-29 Figure 7.19 PLC-5 Drive 1 Control Subroutine (U:4) (Continued) Rung 0006 moves the Speed Feedback from Drive 1 to the operator station. Drive 1 Speed Feedback MOV Move Source N9:3 0< Dest O:003 0< 0006 Rungs 0007 through 0012 move the Logic Command from the operator station to Drive 1.
7-30 Using Multi-Drive Mode Figure 7.
Using Multi-Drive Mode 7-31 Figure 7.20 PLC-5 Drive 2 Control Subroutine (U:5) (Continued) Rung 0006 moves the Speed Feedback from Drive 2 to the operator station. Drive 2 Speed Feedback MOV Move Source N9:5 0< Dest O:005 0< 0006 Rungs 0007 through 0012 move the Logic Command from the operator station to Drive 2.
7-32 Using Multi-Drive Mode Figure 7.
Using Multi-Drive Mode 7-33 Figure 7.21 PLC-5 Drive 3 Control Subroutine (U:6) (Continued) Rung 0006 moves the Speed Feedback from Drive 3 to the operator station. Drive 3 Speed Feedback MOV Move Source N9:7 0< Dest O:007 0< 0006 Rungs 0007 through 0012 move the Logic Command from the operator station to Drive 3.
7-34 Using Multi-Drive Mode Figure 7.
Using Multi-Drive Mode 7-35 Figure 7.22 PLC-5 Drive 4 Control Subroutine (U:7) (Continued) Rung 0006 moves the Speed Feedback from Drive 4 to the operator station. Drive 4 Speed Feedback MOV Move Source N9:9 0< Dest O:011 0< 0006 Rungs 0007 through 0012 move the Logic Command from the operator station to Drive 4.
7-36 Using Multi-Drive Mode Additional Information • When the adapter — mounted in a PowerFlex 40/400 drive (Drive 0) or a DSI External Comms Kit — is powered up, all configured daisy-chained drives must be present before an I/O connection is allowed on the network (i.e., before the drives can be controlled).
Chapter 8 Troubleshooting Chapter 8 provides information for troubleshooting potential problems with the adapter. Topic Locating the Status Indicators PORT Status Indicator MOD Status Indicator Net A and B Status Indicators Together Net A or B Status Indicators Independently Adapter Diagnostic Items in Single Mode Adapter Diagnostic Items in Multi-Drive Mode Viewing and Clearing Events Page 8-1 8-2 8-3 8-4 8-4 8-5 8-6 8-7 Locating the Status Indicators The adapter has four status indicators.
8-2 Troubleshooting PORT Status Indicator Status Off Cause The adapter is not powered or not properly connected to the drive. Flashing In Single mode, the adapter is Red not receiving communication from the drive. Corrective Action • Securely connect the adapter to the drive using the Internal Interface (ribbon) cable. • Apply power to the drive (or adapter if mounted in a DSI External Comms Kit). • Verify that the Operating Mode Jumper (J7 in Figure 2.
Troubleshooting 8-3 MOD Status Indicator Status Off Cause The adapter is not powered or not properly connected to the drive. Flashing The adapter has failed the Red firmware test. Corrective Action • Securely connect the adapter to the drive using the Internal Interface (ribbon) cable. • Apply power to the drive (or adapter if mounted in a DSI External Comms Kit). • Cycle power to the drive (or adapter if mounted in a DSI External Comms Kit).
8-4 Troubleshooting Net A and B Status Indicators Together Status Both LEDs are Off. Both LEDs are steady Red. LEDs are alternating Red/Green. LEDs are alternating Red/Off. Cause A reset occurred or there is no power. A link interface failed. The adapter is in self-test mode. There is a bad node configuration. Corrective Actions Apply power to the drive (or adapter if mounted in a DSI External Comms Kit). • Check media for broken cables, loose connectors, missing terminators, etc.
Troubleshooting 8-5 Adapter Diagnostic Items in Single Mode The following diagnostic items can be accessed using a PowerFlex 4-Class HIM, DriveExplorer (version 3.01 or higher), or DriveExecutive (version 3.01 or higher). No. 1 2 3 4 5 6 7 – 22 23 24 25 26 27 28 29 30 31 32 33 34 35 36 37 Name Reserved Logic Cmd Reference Reserved Logic Sts Feedback Reserved DSI Overrun Errs DSI Framing Errs DSI CRC Errs Boot Flash Count Description — The Logic Command being transmitted to the drive by the adapter.
8-6 Troubleshooting Adapter Diagnostic Items in Multi-Drive Mode The following diagnostic items can be accessed using a PowerFlex 4-Class HIM or DriveExplorer (version 3.01 or higher). No.
Troubleshooting 8-7 Viewing and Clearing Events The adapter maintains an event queue that reports the history of its actions. You can view the event queue using a PowerFlex 4-Class HIM, DriveExplorer (version 3.01 or higher), or DriveExecutive (version 3.01 or higher). Figure 8.2 DriveExplorer Event View/Clear Screen Events Many events in the event queue occur under normal operation.
8-8 Troubleshooting Code 15 16 17 18 19 20 21 22 23 24 25 26 27 28 29 30 – 39 40 41 42 43 44 45 46 47 48 49 50 51 52 53 54 Event Host 0 Logon Host 1 Logon Host 2 Logon Host 3 Logon Host 4 Logon Host 0 Timeout Host 1 Timeout Host 2 Timeout Host 3 Timeout Host 4 Timeout Host 0 Brand Flt Host 1 Brand Flt Host 2 Brand Flt Host 3 Brand Flt Host 4 Brand Flt Reserved Description The adapter has established communications with Drive 0. The adapter has established communications with Drive 1.
Appendix A Specifications Appendix A presents the specifications for the adapter. Topic Communications Electrical Mechanical Environmental Regulatory Compliance Page A-1 A-1 A-1 A-2 A-2 Communications Network Protocol Data Rate Media Drive Protocol Data Rate ControlNet 5M baud Coax with BNC connector DSI 19.2 kbps Electrical Consumption Drive Network 275 mA at 5 VDC, supplied through the drive or DSI External Comms Kit None Mechanical Dimensions Height Length Width Weight 19 mm (0.
A-2 Specifications Environmental Temperature Operating Storage Relative Humidity Atmosphere -10 to 50°C (14 to 122°F) -40 to 85°C (-40 to 185°F) 5 to 95% non-condensing Important: Adapter must not be installed in an area where the ambient atmosphere contains volatile or corrosive gas, vapors or dust. If the adapter is not going to be installed for a period of time, it must be stored in an area where it will not be exposed to a corrosive atmosphere.
Appendix B Adapter Parameters Appendix B provides information about the ControlNet adapter parameters. Topic About Parameter Numbers Parameter List Page B-1 B-1 About Parameter Numbers The parameters in the adapter are numbered consecutively. However, depending on which configuration tool you use, they may have different numbers. Configuration Tool • DriveExplorer • DriveExecutive • HIM • Explicit Messaging • RSNetWorx for ControlNet Numbering Scheme The adapter parameters begin with parameter 1.
B-2 Adapter Parameters Parameter No. Name and Description 04 [CN Rate Cfg] Sets the ControlNet data rate (megabits per second) at which the adapter communicates. (Updates Parameter 05 - [CN Rate Act] after a reset.) 05 [CN Rate Act] Displays the ControlNet data rate (megabits per second) actually used by the adapter. 06 [CN Active Cfg] Displays the source from which the adapter node address is taken. This will either be switches or Parameter 02 - [CN Addr Cfg] in EEPROM.
Adapter Parameters Parameter No. Name and Description Details 09 [Idle Flt Action] Default: Sets the action that the adapter and drive will take Values: if the adapter detects that the controller is in program mode. This setting is effective only if I/O that controls the drive is transmitted through the adapter. Type: Reset Required: ! 10 0 = Fault 0 = Fault 1 = Stop 2 = Zero Data 3 = Hold Last 4 = Send Flt Cfg Read/Write No ATTENTION: Risk of injury or equipment damage exists.
B-4 Adapter Parameters Parameter No. Name and Description 13 [DSI I/O Act] Displays the drives that are active in the Multi-Drive mode.
Appendix C ControlNet Objects Appendix C provides information about the ControlNet objects that can be accessed using Explicit Messages. For information on the format of Explicit Messages and example ladder logic programs, refer to Chapter 6, Using Explicit Messaging. Object Identity Object Assembly Object Register Object Parameter Object Parameter Group Object (Single Mode only) Class Code Hex. Dec.
C-2 ControlNet Objects Identity Object Class Code Hexadecimal 0x01 Decimal 1 Services Service Code 0x01 0x05 0x0E Implemented for: Class Instance Yes Yes No Yes Yes Yes Service Name Get_Attributes_All Reset Get_Attribute_Single Instances – Single Mode The number of instances is fixed at three and is shown below: Instance 0 1 2 3 Description Class Host drive 22-COMM-C 22-SCM-232 or 22-HIM-* (when present) Instances – Multi-Drive Mode The number of instances is fixed at one and is shown below: Instan
ControlNet Objects C-3 Identity Object (Continued) Class Attributes Attribute ID 1 2 6 Access Rule Get Get Get 7 Get Name Revision Max Instance Max ID Number of Class Attributes Max ID Number of Instance Attributes Data Type UINT UINT UINT Description 1 Total number of instances 7 UINT 100 Instance Attributes Attribute ID 1 2 3 Access Rule Get Get Get 4 Get 5 Get 6 7 9 Get Get Get 100 Get Name Vendor ID Device Type Product Code Data Type UINT UINT UINT Revision: Major Minor Status ST
C-4 ControlNet Objects Assembly Object Class Code Hexadecimal 0x04 Decimal 4 Services Service Code 0x0E 0x10 Implemented for: Class Instance Yes Yes Yes Yes Service Name Get_Attribute_Single Set_Attribute_Single Instances Instance 1 2 Description All I/O data being read from the DSI drives (read-only) All I/O data written to the DSI drives (read/write) Class Attributes Attribute ID 1 2 100 Access Rule Get Get Set Name Revision Max Instance Control Timeout Data Type UINT UINT UINT Description 2
ControlNet Objects C-5 Assembly Object (Continued) Instance Attributes Attribute ID Access Rule 1 Get 2 3 4 (1) Get Name Number of Members Member List Conditional (1) Data Get Size Data Type UINT ARRAY of STRUCT: UINT UINT Packed EPATH Array of Bits UINT Description 1 Size of member data Size of member path Member path Data to be transferred Size of assembly data in bits For instance 1, access rule for the data attribute is Get. For instance 2, it is Get/Set.
C-6 ControlNet Objects Register Object Class Code Hexadecimal 0x07 Decimal 7 Services Service Code 0x0E 0x10 Implemented for: Class Instance Yes Yes Yes Yes Service Name Get_Attribute_Single Set_Attribute_Single Instances Instance Description 1 2 3 4 5 6 7 8 9 10 11 12 13 14 15 16 17 18 19 20 Logic Command and Reference for all drives Logic Status and Feedback for all drives Logic Command and Reference for Drive 0 Logic Status and Feedback for Drive 0 Logic Command and Reference for Drive 1 Logic St
ControlNet Objects C-7 Register Object (Continued) Instances (Continued) Input/ Output Out In Out In Out In Out In Out In Out In Out In Out In Out In Instance Description 21 22 23 24 25 26 27 28 29 30 31 32 33 34 35 36 37 38 Reference for Drive 0 Feedback for Drive 0 Logic Command for Drive 1 Logic Status for Drive 1 Reference for Drive 1 Feedback for Drive 1 Logic Command for Drive 2 Logic Status for Drive 2 Reference for Drive 2 Feedback for Drive 2 Logic Command for Drive 3 Logic Status for Drive 3 R
C-8 ControlNet Objects Register Object (Continued) Instance Attributes Attribute ID Access Rule 1 Get Name Bad Flag 2 Get Direction 3 4 Get Size Conditional (1) Data (1) Data Type Description BOOL If set to 1, then attribute 4 contains invalid, bad or otherwise corrupt data.
ControlNet Objects Parameter Object Class Code Hexadecimal 0x0F Decimal 15 Services Service Code 0x01 0x05 0x0E 0x10 0x4B Implemented for: Class Yes Yes Yes No No Instance Yes No Yes Yes Yes Instances – Single Mode The number of instances is shown below: Instance 0 1 " n n+1 " n+m Description Class Drive Parameter 1 " Drive Parameter n (1) Adapter Parameter 1 " Adapter Parameter m (2) (1) n represents the number of parameters in the drive. (2) m represents the number of parameters in the adapter.
C-10 ControlNet Objects Parameter Object (Continued) Instances – Multi-Drive Mode The number of instances is shown below: Instance 0 1 " m (1) Description Class Adapter Parameter 1 " Adapter Parameter m (1) m represents the number of parameters in the adapter. In addition, the parameters for the DSI drives can be accessed using the instance-offset encoding shown in the table below: Instances (Dec.
ControlNet Objects C-11 Parameter Object (Continued) Instance Attributes Attribute Access ID Rule Name (1) 1 Parameter Value 2 Get Link Path Size Data Type Description (2) (3) USINT 0 = No link specified n = The size of Attribute 3 in bytes (4) 3 4 Get Get Link Path Descriptor WORD 5 Get Data Type USINT 6 7 Get Get USINT SHORT_STRING 8 9 10 11 12 13 14 15 16 17 18 19 20 21 Get Get Get Get Get Get Get Get Get Get Get Get Get Get Data Size Parameter Name String Units String Help String M
ControlNet Objects Parameter Group Object (Single Mode only) Class Code Hexadecimal 0x10 Decimal 16 Services Implemented for: Class Yes Yes Service Code 0x0E 0x01 Instance Yes Yes Service Name Get_Attribute_Single Get_Attributes_All Instances The number of instances depends on the number of groups in the device. A group of adapter parameters is appended to the list of groups in the device. The total number of groups can be read in Instance 0, Attribute 2.
ControlNet Objects C-13 Parameter Group Object (Single Mode only) (Continued) Instance Attributes Access Rule Name Get Group Name String 2 Get 3 Get 4 Get n (1) Data Type Description SHORT_ Group name STRING Number of Members UINT Number of parameters in in Group group. (1) 1st Parameter Number UINT in Group (1) 2nd Parameter UINT Number in Group … … Attribute ID 1 Get n Parameter Number in Group Value varies based on group instance.
C-14 ControlNet Objects PCCC Object Class Code Hexadecimal 0x67 Decimal 103 Services Service Code 0x4B 0x4C Implemented for: Class No No Instance Yes Yes Service Name Execute_PCCC Execute_DH+ Instances Supports Instance 1. Class Attributes Not supported. Instance Attributes Not supported.
ControlNet Objects C-15 PCCC Object (Continued) Message Structure for Execute_PCCC (Continued) Request Response Name STS TNSW Data Type USINT UINT FNC USINT Description 0 Transport word Function code. Not used for all CMD’s. PCCC_ ARRAY of CMD/FNC specific params USINT parameters Name STS TNSW Data Type USINT UINT Description Status byte Transport word. Same value as the request. EXT_STS USINT Extended status. Not used for all CMD’s.
ControlNet Objects PCCC Object (Continued) The adapter supports the following PCCC command types: CMD 0x06 0x0F 0x0F 0x0F 0x0F 0x0F 0x0F 0x0F 0x0F 0x0F FNC 0x03 0x67 0x68 0x95 0xA2 0xAA 0xA1 0xA9 0x00 0x01 Description Identify host and some status PLC-5 typed write PLC-5 typed read Encapsulate other protocol SLC 500 protected typed read with 3 address fields SLC 500 protected typed write with 3 address fields SLC 500 protected typed read with 2 address fields SLC 500 protected typed write with 2 address
ControlNet Objects C-17 PCCC Object (Continued) N-Files (Continued) DSI Port Assignments DSI Port No. 0 1 2 3 4 5 Single Mode The drive The adapter The slave Not supported Not supported Not supported N-File Description Multi-Drive Mode Drive 0 Drive 1 Drive 2 Drive 3 Drive 4 The adapter For Single Mode Only N41 This N-file lets you read and write control I/O messages.
C-18 ControlNet Objects PCCC Object (Continued) N-Files (Continued) N-File Description For Multi-Drive Mode Only N44 This N-file lets you read and write control I/O messages. You can write control I/O messages only when all of the following conditions are true: • The adapter is not receiving I/O from a scanner. For example, there is no scanner on the network, the scanner is in idle (program) mode, the scanner is faulted, or the adapter is not mapped to the scanner.
ControlNet Objects C-19 PCCC Object (Continued) N-Files (Continued) Important: If your controller or HMI platform supports CIP messaging, use the CIP Parameter object to get and set parameters. N-File N10 – N18 Description These N-files let you read and write parameter values in the drive and the adapter.
C-20 ControlNet Objects DSI Device Object Class Code Hexadecimal 0x92 Decimal 146 Services Implemented for: Class Instance Yes Yes Yes Yes Service Code 0x0E 0x10 Service Name Get_Attribute_Single Set_Attribute_Single Instances The number of instances depends on the number of components in the device. The total number of components can be read in Instance 0, Class Attribute 4. Instances (Dec.
ControlNet Objects C-21 DSI Device Object (Continued) Class Attributes (Continued) Attribute Access ID Rule Name 3 Get Product Series Data Type BYTE 4 Get BYTE 5 Set 6 7 Get Get 8 Get Number of Components User Definable Text Status Text Configuration Code Configuration Text STRING[16] 9 11 Get Get Brand Code NVS Checksum WORD WORD 12 13 Get Get Class Revision Character Set Code WORD BYTE 15 Get Languages Supported 16 17 18 Get Get Get STRING[16] STRING[12] BYTE STRUCT of: BY
C-22 ControlNet Objects DSI Device Object (Continued) Instance Attributes Attribute Access ID Rule Name 3 Get Component Name 4 Get Component Firmware Revision 5 Get Component Hardware Change Number 8 Get Component Serial Number Data Type STRING[32] Description Name of the component STRUCT of: BYTE BYTE BYTE Major Revision Minor Revision DWORD Value between 0x00 and 0xFFFFFFFF
ControlNet Objects C-23 DSI Parameter Object Class Code Hexadecimal 0x93 Decimal 147 Instances The number of instances depends on the number of parameters in the device. The total number of parameters can be read in Instance 0, Attribute 0. Instances (Dec.
C-24 ControlNet Objects DSI Parameter Object (Continued) Instance Attributes Attribute Access ID Rule Name Data Type 7 Get Online Read Full STRUCT of: BOOL[32] CONTAINER(1) CONTAINER CONTAINER CONTAINER WORD WORD STRING[4] UINT UINT UINT INT BYTE[3] BYTE STRING[16] 8 Get Descriptor BOOL[32] 9 Get/Set Parameter Value Various 10 Get/Set RAM Parameter Various Value 11 Get/Set Link BYTE[3] 12 Get 13 Get 14 15 16 Get Get Get Help Object Instance Read Basic WORD STRUCT of: BOOL[32] CONTAINER CONTAINER C
ControlNet Objects C-25 DSI Parameter Object (Continued) Descriptor Attributes Bit 0 Name Data Type (Bit 1) 1 Data Type (Bit 2) 2 Data Type (Bit 3) 3 Sign Type 4 Hidden 5 Not a Link Sink 6 Not Recallable 7 ENUM 8 Writable 9 Not Writable When Enabled Instance 10 11 12 13 14 15 16 17 18 19 20 21 Reserved Decimal Place (Bit 0) Decimal Place (Bit 1) Decimal Place (Bit 2) Decimal Place (Bit 3) Extended Data Type (Bit 1) Extended Data Type (Bit 2) Extended Data Type (Bit 2) Parameter Exis
C-26 ControlNet Objects DSI Parameter Object (Continued) Descriptor Attributes (Continued) Bit 22 23 24 25 26 Name Access Level (Bit 1) Access Level (Bit 2) Access Level (Bit 3) Writable ENUM Not a Link Source 27 28 29 30 31 Enhanced Bit ENUM Enhanced ENUM Not Used Not Used Not Used Description Reserved Reserved Reserved Reserved 0 = Parameter can be a source for a link 1 = Parameter cannot be a source for a link Reserved Reserved Reserved Reserved Reserved Formulas for Converting Display Value = ((I
ControlNet Objects C-27 DSI Fault Object Class Code Hexadecimal 0x97 Decimal 151 Products such as PowerFlex drives use this object for faults. Adapters use this object for events. Services Implemented for: Class Instance Yes Yes Yes Yes Service Code 0x0E 0x10 Service Name Get_Attribute_Single Set_Attribute_Single Instances The number of instances depends on the maximum number of faults or events supported in the queue. The maximum number of faults/events can be read in Instance 0, Attribute 2.
C-28 ControlNet Objects DSI Fault Object (Continued) Class Attributes (Continued) Attribute Access ID Rule Name 4 Get Fault Trip Instance Read 5 Get Fault Data List 6 Get 7 Get Number of Recorded Faults Fault Parameter Reference Data Type WORD STRUCT of: BYTE BYTE WORD[n] WORD WORD Description Fault that tripped the device. For adapters, this value is always 1 when faulted. Reserved Number of faults/events in the queue. A “0” indicates the fault queue is empty.
ControlNet Objects C-29 DSI Diagnostic Object Class Code Hexadecimal 0x99 Decimal 153 Services Implemented for: Class Instance Yes Yes Yes Yes Service Code 0x0E 0x10 Service Name Get_Attribute_Single Set_Attribute_Single Instances The number of instances depends on the maximum number of diagnostic items in the device. The total number of diagnostic items can be read in Instance 0, Attribute 2. Instances (Dec.
C-30 ControlNet Objects DSI Diagnostic Object (Continued) Instance Attributes Attribute Access ID Rule Name 0 Get Full/All Info 1 Get/Set Value Data Type STRUCT of: BOOL[32] CONTAINER (1) CONTAINER CONTAINER CONTAINER WORD WORD STRING[4] UINT UINT UINT INT DWORD STRING[16] Various Description Descriptor (Refer to pages C-25 – C-26) Value Minimum value Maximum value Default value Pad Word Pad Word Units (e.g.
Appendix D Logic Command/Status Words Appendix D provides the definitions of the Logic Command/Logic Status words that are used for some products that can be connected to the adapter. If you do not see the Logic Command/Logic Status for the product that you are using, refer to your product’s documentation.
D-2 Logic Command/Status Words PowerFlex 4/40/400 Drives (Continued) Logic Status Word Logic Bits 15 14 13 12 11 10 9 8 7 6 5 4 3 2 1 0 Status x Ready x x x x x x x x x x x x x x x (1) Active Command Direction Actual Direction Accel Decel Alarm Fault At Speed Main Freq Operation Command Parameters Description 0 = Not Ready 1 = Ready 0 = Not Active 1 = Active 0 = Reverse 1 = Forward 0 = Reverse 1 = Forward 0 = Not Accelerating 1 = Accelerating 0 = Not Decelerating 1 = Decelerating 0 = No Alarm 1 = Alarm
Glossary A Adapter Devices such as drives, controllers, and computers usually require an adapter to provide a communication interface between them and a network such as ControlNet. An adapter reads data on the network and transmits it to the connected drive. It also reads data in the drive and transmits it to the network. The 22-COMM-C ControlNet adapter connects PowerFlex 4-Class drives to a ControlNet network.
G-2 Glossary D Data Rate The data rate is the speed at which data is transferred on the ControlNet network (fixed at 5Mbps). DSI (Drive Serial Interface) DSI is based on the Modbus RTU serial communication protocol and is used by PowerFlex 4-Class drives. DSI Peripheral A device that provides an interface between DSI and a network or user. Peripheral devices are also referred to as “adapters” and “modules.
Glossary G-3 Explicit Messaging Explicit Messages are used to transfer data that does not require continuous updates. They are typically used to configure, monitor, and diagnose a device over the network. F Fault Action A fault action determines how the adapter and connected drive act when a communications fault (for example, a cable is disconnected) occurs or when the scanner is switched out of run mode. The former uses a communications fault action, and the latter uses an idle fault action.
G-4 Glossary terms “input” and “output” are defined from the scanner’s point of view. Output is produced by the scanner and consumed by the adapter. Input is produced by the adapter and consumed by the scanner. L Logic Command/Logic Status The Logic Command is used to control the PowerFlex drive (for example, start, stop, direction). It consists of one 16-bit word of output to the adapter from the network. The definitions of the bits in this word depend on the drive.
Glossary G-5 RSLogix 5/500/5000 RSLogix software is a tool for configuring and monitoring controllers to execute logic and communicate with connected devices. It is a 32-bit application that runs on various Microsoft Windows operating systems. Information about RSLogix software can be found at http:// www.software.rockwell.com/rslogix. RSNetWorx for ControlNet RSNetWorx for ControlNet software is a tool for configuring and monitoring ControlNet networks and connected devices.
G-6 Notes: Glossary
Index A adapter applying power, 2-7 compatible products, 1-3 components, 1-1 definition, G-1 features, 1-2 grounding, 2-4 illustration, 1-1 installing, 2-1 to 2-7 mounting, 2-4 to 2-5 node address, 3-3 parameters, B-1 to B-4 resetting, 3-6 Single versus Multi-Drive mode of operation, 7-1 specifications, A-1 switches, 1-1 tools to configure, 3-1 troubleshooting, 8-1 to 8-8 applying power to the adapter, 2-7 Assembly object, C-4 attentions, 1-4 B baud rate, see data rate bit definitions for Logic Command/ St
Index-2 DriveExplorer accessing parameters with, 3-1 definition, G-2 free lite version, G-2 drives, see PowerFlex drives DriveTools SP accessing parameters with, 3-1 definition, G-2 Explicit Messages about, 6-1 definition, G-3 performing, 6-2 with adapter in Multi-Drive mode ControlLogix example, 7-22 with adapter in Single mode ControlLogix example, 6-3 PLC-5 example, 6-6 Drv 0 - 4 Addr parameters, B-4 DSI connector on adapter, 1-1 definition, G-2 Internal Interface cable, 2-4 peripheral, G-2 products, G
Index-3 I I/O about, 5-1 configuring the adapter for, 3-3 configuring the network for ControlLogix controller, 4-1 PLC-5 controller, 4-12 definition, G-3 image, 5-2, 7-5 using example program for ControlLogix controller, 5-5 PLC-5 controller, 5-8 Identity object, C-2 Idle Flt Action parameter, B-3 installation applying power to the adapter, 2-7 connecting to the drive, 2-4 connecting to the network, 2-3 preparing for, 2-1 Internal Interface cable connecting to the adapter, 2-4 connecting to the drive, 2-4
Index-4 P R Parameter Group object, C-12 Ref Adjust parameter, B-4 Parameter object, C-9 Reference/Feedback definition, G-4 in I/O image, 5-2, 7-5 using, 5-3 parameters accessing, 3-1 convention, P-2 editing with PowerFlex 4-Class HIM, 3-2 list of, B-1 to B-4 numbers, B-1 PCCC (Programmable Controller Communication Commands), G-4 PCCC object, C-14 PLC-5 controller example network, 4-12 with adapter in Multi-Drive mode I/O example, 7-24 with adapter in Single mode Explicit Message example, 6-6 I/O exa
Index-5 switches on adapter locating, 1-1 setting node address, 2-2 T technical support, P-3 tools required, 1-3 troubleshooting, 8-1 to 8-8 U update, see flash update W web site for DriveExplorer software, G-2 for DriveTools SP software, G-2 for EDS files, G-2 for manuals, P-1 wiring, see cables Z zero data configuring the adapter for, 3-4 definition, G-5
Index-6
U.S. Allen-Bradley Drives Technical Support Tel: (1) 262.512.8176, Fax: (1) 262.512.2222, Email: support@drives.ra.rockwell.com, Online: www.ab.com/support/abdrives www.rockwellautomation.com Power, Control and Information Solutions Headquarters Americas: Rockwell Automation, 1201 South Second Street, Milwaukee, WI 53204-2496 USA,Tel: (1) 414.382.2000, Fax: (1) 414.382.