Stereo VideoMic Instruction Manual www.rodemic.
Introduction Thank you for investing in the (SVM). Stereo VideoMic Those of you who are first time customers, may be interested to know that we are one of the largest and most respected professional microphone companies in the world. Our studio microphones are the ‘tone’ behind some of the biggest hits of the last decade, and our award winning live performance microphones are on tour throughout the world.
Specifications Acoustic Principle: Pressure Gradient Directional Pattern: Super Cardioid (per capsule) (see graph) Frequency Range: 40 Hz - 20 kHz selectable High Pass Filter (HPF) @ 80 HZ 12 dB/octave Output Impedence: 200 Sensitivity: -38 dB re 1 Volt/Pascal (12.
Specifications Frequency Response Polar Response -2.0 -10.0 -20.
Features • Stereo X/Y condenser microphone • Broadcast sound quality • Rugged cast aluminum body • 9V battery operation • Two step high-pass filter and PAD • Low handling noise • Integral camera-shoe mount • Designed & manufactured in Australia • Full 10 year warranty* *Online product registration required.
Battery Installation • The SVM operates on a standard 9V battery. We recommend you use either Alkaline or Lithium batteries for the longest continuous operating time. • The SVM will run continuously for over 60 hours with a good quality Alkaline battery. It is however important to understand that battery performance can vary dramatically with ambient temperature and shelf life. • Actual operation times will vary and we suggest you always carry a spare battery.
-7-
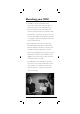
Mounting your SVM • The SVM incorporates a standard camerashoe mount on the bottom of the microphone. Designed to reduce motor and handling noise, the shock mount has a 3/8” threaded insert for mounting on tripods and poles. You will find older models and low cost cameras produce more motor noise, which the highly sensitive SVM can pick up. If so, engage the High Pass Filter (HPF) to reduce this noise (see SVM controls).
Operating the SVM • Now that you have the SVM securely fastened to your camera and the audio output lead connected, you can switch the mic on. There are three switches located at the rear of the microphone: PAD (left switch) The PAD allows for attenuation of the microphone recording level (either 0dB or -10dB). This is useful in situations where you may be recording a loud sound source that may overload the input levels of your microphone/camera. Power (middle switch) This switches the microphone on.
Operating the SVM allow you to access this setting through the camera menu. You should try and set the level using the sound source you will be recording, or a sound source of similar level before starting to record or you could distort the input of your camera if the level has been set too high. We suggest you read your camera manual, which should cover this topic.
Operating the SVM • The SVM is made from rugged cast aluminum, ensuring impact resistance and a longer life. However care must be taken not to get the SVM wet. Treat the mic the way you should treat your camera and you will have many years of reliable service. SVM Windshield • The SVM comes with a custom designed windshield. The windshield should be left on at all times as even the slightest breeze can cause sound interference.
Warranty All microphones are warranted for one year from date of purchase. You can extend that to a full ten years if you register online at www.rodemic.com. The warranty covers parts and labour that may be required to repair the microphone during the warranty period. The warranty excludes defects caused by normal wear and tear, modification, shipping damage, or failure to use the microphone as per the instruction guide.