
User Manual

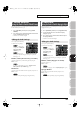
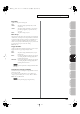
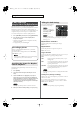

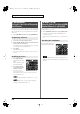
Table Of Contents
- USING THE UNIT SAFELY
- IMPORTANT NOTES
- Contents
- 01: Introduction (Overview and Basic Operation)
- 02: Sound Generator, Section 1 (Playing Sounds)
- Playing in Single Mode
- About the Single Play Screen
- Selecting a Patch
- Selecting the Tones That Will Sound (Tone On/Off)
- Playing Single Notes (Monophonic)
- Part Settings (Part View)
- Selecting the Parameter Controlled by the Realtime Controllers or D Beam Controller (Control Sett...
- Playing Percussion Instruments (Rhythm Set)
- Playing a Sample Set
- Creating a List of Frequently Used Sounds (Favorite)
- Registering a Sound (Regist)
- Recalling a Sound
- Specifying the Volume for Each Step (Favorite Level)
- Changing the Step in Which You Registered a Sound
- Removing a Sound You Registered (Remove)
- Removing All Sound Registrations from a Bank (Remove Bank)
- Registering a Song (Set Song)
- Importing a Text File (Import Text)
- Removing a Text File (Remove Text)
- Switching the Display Font (Font)
- Playing in Live Mode
- Displaying Live Play (Layer/ Split) Screen
- Functions in the Live Play (Layer/Split) Screen
- Selecting a Live Set
- Using the Live Play (Layer/ Split) Screen
- Using the Live Set Part Mixer Screen
- Using the Layer Edit Screen
- Performing with the Arpeggio
- Performing with the Realtime Controllers and D Beam Controller
- Setting Effects
- Adjusting the Master Level
- Making Detailed Settings for a Live Set
- Playing in Studio Mode
- Playing in Single Mode
- 03: Sound Generator, Section 2 (Controlling Sounds)
- 04: Sound Generator, Section 3 (Creating Sounds)
- Creating a Patch
- How to Make Patch Settings
- Saving Patches You’ve Created (Write)
- Functions of Patch Parameters
- Settings Common to the Entire Patch (General)
- Modifying Waveforms (Wave)
- Changing How a Tone Is Sounded (TMT)
- Modifying Pitch (Pitch/Pitch Env)
- Modifying the Brightness of a Sound with a Filter (TVF/TVF Env)
- Adjusting the Volume (TVA/TVA Env)
- Output
- Modulating Sounds (LFO1/2/Step LFO)
- Apply Portamento or Legato to the Sound (Solo/Porta)
- Miscellaneous Settings (Misc)
- Matrix Control Settings (Control 1–4)
- Setting Effects for a Patch (PFX)
- Creating a Rhythm Set
- How to Make Rhythm Set Settings
- Saving Rhythm Sets You’ve Created (Write)
- Functions of Rhythm Set Parameters
- Making Settings Common to the Entire Rhythm Set (General)
- Modifying Waveforms (Wave)
- Changing How a Rhythm Tone Is Sounded (WMT)
- Modifying Pitch (Pitch/Pitch Env)
- Modifying the Brightness of a Sound with a Filter (TVF/TVF Env)
- Adjusting the Volume (TVA/TVA Env)
- Output Settings (Output)
- Setting Effects for a Rhythm Set (PFX)
- Creating a Sample Set
- Creating a Live/Studio Set
- Adding Effects
- Where Effect Settings are Saved
- Turning Effects On and Off
- Making Effect Settings
- Applying Effects in Single Mode
- Applying Effects in Live Mode
- Applying Effects in Studio Mode
- Making Patch Multi-Effects Settings (PFX)
- Making Multi-Effects Settings (MFX1–2)
- Making Chorus Settings (Chorus)
- Making Reverb Settings (Reverb)
- Mastering Effect
- Effects List
- Creating a Patch
- 05: Pads (Using the Pads)
- Using the Pads
- Common Operations for Pads
- 1 SAMPLE PAD (Using the Pads to Play Samples)
- 2 RHYTHM (Using the Pads to Play a Rhythm Set)
- 3 CHORD MEMORY (Using the Pads to Switch Chord Forms)
- 4 ARPEGGIO (Using the Pads to Switch Arpeggio Styles)
- 5 RPS (Using the Pads to Play Phrases)
- 6 RHYTHM PTN (Using the Pads to Play Rhythm Patterns)
- 7 TONE SEL/SW (Using the Pads to Select Tones or Switch Them On/Off)
- 8 TRACK MUTE (Using the Pads to Mute Tracks)
- 9 BOOKMARK (Using the Pads to Recall Frequently Used Screens)
- 10 MIDI TX SW (Using the Pads to Turn External MIDI Transmit Channels (1–16) On/Off)
- 11 EFFECT SW (Using the Pads to Switch the Effects)
- 12 PATCH MFX SW (Using the Pads to Switch Patch Multi-effects)
- 13 PART SELECT (Using the Pads to Select Parts)
- 14 PART MUTE (Using the Pads to Mute Parts)
- 15 USER GROUP (Using the Pads to Register/Recall User Groups)
- 16 FAVORITE (Using the Pads to Register/Recall Favorite Settings)
- Using the Pads
- 06: Sequencer (Creating a Song)
- Playing Back a Song
- Three Ways to Play Back
- Playing a Song (Song Play)
- Loading a Song (Song List)
- Playing a Song (Song Play)
- Operations in the Song Play Screen
- Fast-forwarding or Rewinding during Playback
- Muting the Playback of a Track (MUTE)
- Accessing the Mixer Screen
- Changing the Playback Tempo of the Song
- Playing a Song Repeatedly (Loop)
- Placing Markers in a Song (Marker)
- Changing the Track Display Zoom and Display Order (Zoom/Track Order)
- Naming a Track (Track Name)
- Specifying a Track’s Output Destination (Output Assign)
- Deleting a Song File (Song Delete)
- Song Automatically Loaded at Power-on (When Loading a Project)
- Erasing the Currently-open Song (Song Clear)
- Playing a Standard MIDI File (SMF)
- Playing Phrases (MIDI Phrase)
- Recording MIDI
- Recording Audio
- Editing Songs
- Three Ways to Edit
- Editing a Song (Song Edit)
- Song Utility (Song Util)
- Editing a Phrase (Phrase Edit)
- Phrase Modify Menu
- Aligning a Phrase’s Timing (Quantize)
- Erasing Unwanted Performance Data (Erase)
- Deleting Unwanted Measures (Delete)
- Copying Phrases (Copy)
- Inserting a Blank Measure (Insert)
- Transpose the Key (Transpose)
- Changing the Velocity (Change Velocity)
- Changing the MIDI Channel (Change Channel)
- Modifying the Length of Notes (Change Duration)
- Shifting Performance Data Forward and Back (Shift Clock)
- Thinning Out the Sequencer Data (Data Thin)
- Deleting Blank Measures (Truncate)
- Editing Individual Items of Sequencer Data (Microscope)
- Saving a Song (Song Save)
- Playing Back a Song
- 07: Sampler
- Sampling
- Editing a Sample
- Selecting a Sample (Sample List)
- Displaying Sample Edit Screen (Sample Edit)
- Setting the Start/End Points of the Sample
- Making Settings for Sample (Sample Parameters)
- Removing Unwanted Portions of a Sample (Truncate)
- Boosting or Limiting the High-frequency Range of the Sample (Emphasis)
- Maximizing the Volume of a Sample (Normalize)
- Amp
- Stretching or Shrinking a Sample (Time Stretch)
- Dividing a Sample into Notes (Chop)
- Saving a Sample (Save)
- Saving all samples (Save All)
- 08: Various Settings (Menu and System)
- Menu Reference
- System Settings (Settings Common to All Modes)
- About V-LINK
- 09: Appendix

193
Using the Pads
Overview Sound 1 Sound 2 Sound 3 Pad Sampler
Menu/System
AppendixSequencer
This pad mode allows you to use the pads to switch chord forms for
the Chord Memory function (p. 80).
1.
Press [PAD MODE], and then press pad [3] (CHORD
MEMORY).
2.
Press pads [1]–[16] to switch between different chord forms
for the Chord Memory function (p. 80).
• Pads that can be selected will light.
You can press [PAD SETTING]
to edit the following settings.
For details on editing and
saving, refer to
“Editing the
Pad Settings (PAD
SETTING)”
(p. 190).
In the Pad Setting screen,
you can press [F2 (Pad Exchg)] to exchange two pads (Pad
Exchange, p. 190).
Number / Name (Chord memory set number)
Selects the chord memory set that will be played by the pads.
Value:
001–128
For details on Chord Memory, refer to
“Using the Chord
Memory Function (Chord Memory)”
(p. 80).
Chord Form
Selects the chord form number that will be played by each pad (1–16).
Value:
001–128
You can save the pad settings by pressing [F7 (Write)].
This pad mode allows you to use the pads to switch styles for the
Arpeggio function (p. 78).
1.
Press [PAD MODE], and then press pad [4] (ARPEGGIO).
2.
Use the Arpeggio function as described in “Playing
Arpeggios” (p. 78).
3.
Press pads [1]–[16] to switch between different styles for
the Arpeggio function.
• Pads that can be selected will light.
You can press [PAD SETTING]
to edit the following settings.
For details on editing and
saving, refer to
“Editing the
Pad Settings (PAD
SETTING)”
(p. 190).
In the Pad Setting screen,
you can press [F2 (Pad Exchg)] to exchange two pads (Pad
Exchange, p. 190).
Number / Name (Arpeggio set number)
Selects the arpeggio set.
Value:
001–128
For details on arpeggios, refer to
“Playing Arpeggios”
(p. 78).
Arpeggio Number
Specifies the arpeggio number selected by each pad (1–16).
Value:
001–128
You can save the pad settings by pressing [F7 (Write)].
3 CHORD MEMORY
(Using the Pads to Switch Chord Forms)
Editing the Pad Settings
4 ARPEGGIO
(Using the Pads to Switch Arpeggio Styles)
Editing the Pad Settings
Fantom-G_r_e.book 193 ページ 2008年1月31日 木曜日 午後12時15分