
User Manual
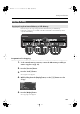
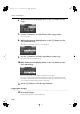
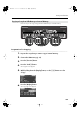
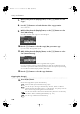

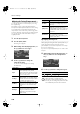
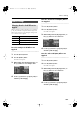

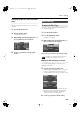
Table Of Contents
- Introduction
- Contents
- Main Features
- USING THE UNIT SAFELY
- Important Notes
- Names of Things and What They Do
- Before You Play
- Listening to Songs
- Performing
- Performing with a Variety of Sounds
- Simulating the Way that Sounds are Created on an Organ (Tone Wheel)
- Performing with Two Layered Tones (Dual Play)
- Performing with Different Tones in the Left and Right Sides of the Keyboard (Split Play)
- Changing the Volume Balance for Dual Play and Split Play
- Adjusting the Keyboard Sensitivity (Key Touch)
- Adding Reverberation to Sounds (Reverb Effect)
- Adding a Variety Effects to the Sound (Effects)
- Adding a Spinning Sound to Organ Tones (Rotary Effect)
- Transposing the Key of the Keyboard or Song Playback (Transpose)
- Performing with the Metronome
- Adding Liveliness to the Sound (Sound Control)
- Changing the Tonal Quality (Equalizer)
- Performing with Audio Files (Audio Key)
- Creating a Piano Sound to Your Taste (Piano Designer)
- Playing Along with Rhythms
- What is Session Partner?
- Performing Along with Session Partner
- Selecting a Rhythm
- Changing a Rhythm’s Tempo
- Selecting a Rhythm’s Chord Progression
- Performing with the Chord Progression Specified in the Left Hand (Chord Progression Off)
- Changing the Rhythm Pattern (Original/Variation)
- Recording the Chord Progression
- Saving Your Favorite Performance Settings
- Recording
- Saving a Performance
- Various Settings
- Connecting Other Equipment
- Appendices

114
Saving a Performance
7.
While holding down the [Display] button, use the [-] [+] buttons to select
“Type.”
8.
Use the [-] [+] buttons to select the direction of the copy operation.
Choose “Ext -> Int.”
9.
While holding down the [Display] button, use the [-] [+] buttons to select
“Ext” (USB memory).
The number and name of the song to be saved will appear.
10.
Use the [-] [+] buttons to select the song(s) that you want to copy.
If you select “All,” all songs will be copied.
11.
While holding down the [Display] button, use the [-] [+] buttons to select
“Int” (internal memory).
The screen will show the save-destination song number and song name.
If you select a number in which a song has already been saved, the song that was previously
saved at the copy destination will be erased. If you don’t want to erase a previously saved song,
select a number for which the display indicates “(Not Used).”
12.
Use the [-] [+] buttons to select the copy destination.
Copying the Song(s)
13.
Press the [Rec] button.
The selected song(s) will be copied to internal memory.
Never turn off the power while data is being copied.
You can save up to 99 songs in internal memory. However, if there is insufficient
capacity remaining, the indication “Error: 11” will appear (p. 157), and you won’t be
able to save the song even though there are fewer than 99.
You can erase all of the content saved in internal memory and restore it to the factory-
set condition. Refer to “Initializing Internal Memory” (p. 132)
You can’t copy a Wav file into internal memory.
NOTE
NOTE
NOTE
FP-7-e.book 114 ページ 2007年7月12日 木曜日 午後3時47分