E-X50 Arranger Keyboard Owner’s Manual Version: V06 -1-
Changes or Modifications not expressly approved by the party responsible could void the user’s authority to operate this device. This equipment has been tested and found to comply with the limits for a Class B digital device, pursuant to Part 15 of the FCC Rules. These limits are designed to provide reasonable protection against harmful interference in a residential installation.
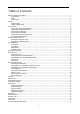
Table of Contents Panel & Display Description.............................................................................................................................. 5 Front Panel .................................................................................................................................................. 5 LCD ...............................................................................................................................................................
Playing a Style/Song from USB Flash Drive ........................................................................................ 29 Saving User Song to USB Flash Drive .................................................................................................. 29 Loading User Song from USB Flash Drive ........................................................................................... 30 Saving User Style to USB Flash Drive .....................................................................
Panel & Display Description Front Panel 1. [POWER] switch Switch the power on or off. 2. [MASTER VOLUME] knob Adjust the master volume. 4. [AUDIO PAD / SCALE TUNE] button Switch between Scale Tune mode and Audio Pad mode. -----------------------------------------------In Scale Tune mode: 3. SCALE TUNE buttons Set the Scale parameters. 5. [SCALE RESET / RECALL] button Reset the scale / recall scale parameters. In Audio Pad mode: 3. AUDIO PAD buttons Play back the selected MP3 / WAV.
Enter or exit the Bluetooth menu. 7. [CHORD] button Enter the Chord mode. 8. [SYNC] button Turn the Sync function on or off. 9. ACCOMP VOLUME [-] / [+] buttons Adjust the accompaniment volume. 10. TEMPO [TAP] / [-] / [+] buttons Adjust the current tempo. 11. [START/STOP] button Start or stop playing the style. 12. [INTRO/ENDING] button Click to play the long Intro or long Ending. Double click to play the short Intro or short Ending. 13.
29. LCD display Display all parameters and values related to the current operation. 30. Data dial Adjust the parameter. 31. CATEGORY [<] / [>] buttons Change the category in the current menu. 32. [EXIT] / [ENTER] and Numeric buttons Go back / confirm current setting or select the Style/Tone number. 33. SONG buttons [PLAY/STOP]: When in other mode, press to enter Song mode, or press and hold it to enter Song mode and play back the song. When in Song mode, press to play or pause the song.
7. TEMPO 8. MEASURE 9. BEAT 10. RECORD 11. MEMORY / O.T.S. / DEMO Rear Panel 39. USB MEMORY jack: for connecting a USB flash drive. 40. USB COMPUTER jack: for connecting to a computer. 41. PEDAL jack: for connecting a sustain pedal. 42. OUTPUT jacks: for connecting external audio equipment. 43. MIC INPUT jack: for connecting a microphone. 44. DC IN jack: for connecting the DC 12 V power adaptor.
Setup This section contains information about setting up your instrument and preparing to play. Please go through this section carefully before turning the power on. Power Supply You can power the instrument by using the included power adaptor. Turn down the volume of instrument and the connected audio equipment before you switch the instrument on. 1. Connect the adaptor to the DC 12V jack of this instrument. 2. Plug the adaptor into an AC outlet. 3.
Connections Connecting a Pair of Headphones A standard pair of stereo headphones can be connected to the PHONES jack for private practice or late-night playing. The internal stereo speaker system is automatically shut off when a pair of headphones is plugged into this jack. Note: To avoid the risk of hearing loss, do not listen with headphones at high volume level for a long period of time.
Notes: 1. Please connect the plug of the pedal to the PEDAL jack before turning the power on. 2. The polarity of different pedals may vary. If the connected sustain pedal works in reversed behavior, please plug the pedal to the PEDAL jack before turning the power on. Connecting an Audio Equipment The rear-panel OUTPUT jacks deliver the output of the instrument to external audio equipment such as a keyboard amplifier, a stereo sound system, a mixing console, or a tape recorder.
If the LCD isn't lit after you turn on the instrument, please check the power connection. When power on, the [POWER] switch LED will stay lit. Adjusting the Master Volume Rotate the [VOLUME] knob clockwise to increase the master volume or counter-clockwise to decrease it. Adjust to set the desired volume level. Note: If the keyboard keeps silent, check if the volume has been set to minimum or if headphones are plugged into the PHONES jack. Typical Modes The instrument features 4 typical modes.
Function Menu Press the [MENU] button to enter the Function Menu. In the Function Menu, you can edit the parameters and functions of this instrument. For the operation details, please see the chapter Function Menu (P.33). Playing Demo Song 1. Press the [METRONOME] + [USB] buttons simultaneously to play the demo song. The demo song will play repeatedly. 2. Press the [METRONOME] + [USB] buttons again to stop playing and exit demo song.
Note: When Dual and Split functions are in use, you can press the [TONE] button repeatedly to switch between the tone layers. Playing Two Tones Simultaneously The dual function allows you to layer two different tones together, creating a much richer sound. 1. Press the [DUAL] button to enter Dual mode. The “DUAL” icon on LCD will light up and the LCD displays the current name and number for “TONE 2”. 2. Use the data dial or the [EXIT] + [<] / [>] buttons to select a tone you want to play.
Pitch Bend Use the pitch bend wheel to bend notes up (roll the wheel away from you) or down (roll the wheel toward you) while playing the keyboard. The pitch bend wheel is self-centering and will automatically return to normal pitch when released. With the pitch bend wheel, you can easily imitate the pitch bend effect of the guitar, violin, saxophone or other instruments. Transpose This function will shift the pitch of the entire keyboard in semitone steps. 1. Press the TRANSPOSE [-] / [+] button.
Selecting Chord Modes When chord mode is off, you can press the [START/STOP] button to start playing the rhythm tracks. When chord mode is on, the [CHORD] button LED lights up. You can press the [START/STOP] button to start the rhythm tracks, then play a chord in the chord section to start all tracks. When in chord mode, you can play back chords in the A.B.C mode and the WHOLE mode. Press the [CHORD] button once to enter the” A.B.C.” (Auto Bass Chord) mode. The chord button LED lights up red. The “A.B.C.
Playing Auto Accompaniment (All Tracks) 1. Press the [CHORD] button to enter Chord mode. 2. Press the [SYNC] button to turn on the Sync function. The button LED lights up and the beats on LCD blink. The Sync function puts the playback on standby. You can play a chord in the chord section to start playing all tracks. Or you can press the [START/STOP] button to start the rhythm tracks. Then play a chord in the chord section to start all tracks.
9. Press the [INTRO/ENDING] button. The “ENDING” icon on LCD lights up. It will play the Ending section. When the Ending is finished, the playback will stop. Notes: 1. When style stops, press the [INTRO/ENDING] button to engage the long Intro. The button LED and the “INTRO” icon on LCD stay lit. Or you can fast double press the [INTRO/ENDING] button to engage the short Intro. The button LED and the “INTRO” icon on LCD blink. Press the [INTRO/ENDING] button again to disengage Intro.
Accompaniment Volume You can adjust the accompaniment volume to keep an appropriate balance between the accompaniment volume and the tone volume. 1. Press the ACCOMP VOLUME [-] / [+] button. The LCD displays the current accompaniment volume level. 2. Use the ACCOMP VOLUME [-] / [+] button, the [EXIT] + [<] / [>] buttons or the data dial to adjust the volume level. 3. Press the ACCOMP VOLUME [-] and [+] buttons simultaneously to restore the default volume.
批注:改成 38 批注:在后面增加这 6 种和弦在→ Tempo 1. Press the Tempo [-] / [+] button to change the tempo. The tempo value on LCD blinks. 2. When the tempo value blinks, use the data dial to fast change the tempo. Press the TEMPO [-] and [+] buttons simultaneously to restore the default tempo. 3. You can use the [TAP] button to set the tempo. When style stops, press the [TAP] button 5 times at an even speed, it will start the style at the tapping speed.
Metronome The metronome provides a steady beat to help you practice at a preset tempo. 1. Press [METRONOME] button to start the metronome. The button LED will blink in sync with the metronome sound. 2. Press the [METRONOME] button again to stop the metronome. The button LED turns off. 3. The default time signature is “4”. You can change it in the function menu. Press the [MENU] button to enter the Function Menu, then use the [<] / [>] button to select the “OTHERS” menu.
that button. 3. Parameters that can be saved to registration memory include: Tone: main tone, dual tone, split tone, DSP effects, mixer settings. Accompaniment: style, tempo, Chord mode. Function: touch response, mic effect and some parameters in the function menu. Recalling the Registered Settings Press one of the memory buttons [1] - [4]. It will recall the settings saved in that button. This will reset related parameters on the control panel. Notes: 1.
Recording You can record your performance in real time and save it as a user song. The user songs can be exported to a USB flash drive. (Please refer to Connecting USB Flash Drive for details.) Prepare Recording 1. Before you start recording, you need to select a user song to which the recording will be saved. 2. Press the [REC] button to enter the user song menu. The button LED and “REC” icon on LCD light up. You can use the data dial or [EXIT] + [<] / [>] buttons to select a user song.
During recording, you can press the [REC] button to stop recording. The button LED and the “REC” icon on LCD turn off. The beat counting stops. Or you can press the [EXIT] button to stop recording. It will go back to the user song menu. Automatically Stop Recording: When memory is used up, recording will stop automatically and be saved. If you are recording the accompaniment, recording will stop when the Ending finishes. Play Back Recording 1.
Bluetooth Bluetooth paring and playback 1. The instrument’s Bluetooth function is turned on by default. The Bluetooth Audio name is E-X50 Audio. 2. Turn on the Bluetooth function on mobile device, search the Bluetooth Audio name “E-X50 Audio “.Tap this name to pair it. After it is paired, the [ ] button LED and the Bluetooth icon on LCD will light up. 3. You can play back songs on your mobile device and hear the playback from the instrument speakers. Turning Bluetooth Function On/Off 1.
1. Press the [MENU] button to enter the function menu. 2. Use the [<] / [>] button to select the “KEYBOARD” menu. Then use the data dial to select the “Pedal” parameter. 3. Press the [ENTER] button to move the cursor to the lower menu. Now use the data dial or the [EXIT] + [<] / [>] buttons to change the pedal function. Sustain Pedal This pedal function performs the same function as the damper pedal on an acoustic piano, letting you sustain the sound even after releasing the keys.
3. Press the [ENTER] button to move the cursor to “OFF” in the lower menu. Now use the data dial or the [EXIT] + [<] / [>] buttons to turn this function on or off. Please refer to the function menu (P.33). Scale Tune There are two modes: “SCALE TUNE” and “AUDIO PAD”. Scale Tune mode is turned on by default. You can press the [AUDIO PAD / SCALE TUNE] button to switch between the Scale Tune mode and the Audio Pad mode (only when a USB flash drive is connected).
Audio Pad When a USB flash drive is connected and recognized, you can press the [AUDIO PAD / SCALE TUNE] button to switch to Audio Pad mode. The button LED lights up and the LCD will temporarily display “AudioPad”. 1. Audio Pad buttons are [C], [C#], [D], [D#], [E], [F], [F#], [G], [G#], [A], [A#] and [B]. When the audio files on USB flash drive are recognized, the corresponding button LED will turn on. Press one of the lit buttons to play back the corresponding MP3/WAV file.
Bit Rate 16bit Notes: 1. Two or more audio files cannot be played at the same time. 2. The tempo of an audio file cannot be changed. Connecting USB Flash Drive The instrument recognizes USB flash drives (32MB to 128GB) in FAT32 format. It does not support multi-partitioned USB flash drives. We recommend formatting the USB flash drive on the instrument before using. Note: The instrument supports up to 512 files under the root directory of a USB flash drive of FAT32 format.
songs will be saved to the root directory of the USB flash drive. The files will be named as “RecSng_XX_NUB.MIDI”. 3. After saving, the LCD will prompt “Save OK!”, then return to the USB menu. File name description: “RecSng_XX” is the user song name and number (corresponding to the user songs on the instrument). “NUB” is the number of the saved song (01~512). Loading User Song from USB Flash Drive 1. Press the [MENU] button to enter the function menu, then press the [USB] button to enter the USB menu.
1. Press the [MENU] button to enter the function menu, then press the [USB] button to enter the USB menu. Use the data dial to select “SaveSTY”. 2. Press the [ENTER] button to move the cursor to “Yes?” in the lower menu. Press the [ENTER] button, the LCD will display “Saving..”. The user styles will be saved to the root directory of the USB flash drive using the original style names. If the user styles on the instrument are blank, the LCD will prompt “No File!”. 3.
volume), and registration memory. When exporting the user settings, user songs and user styles will be saved to the USB flash drive as well. 1. Press the [MENU] button to enter the function menu, then press the [USB] button to enter the USB menu. Use the data dial to select “SaveUSet”. 2. Press the [ENTER] button to move the cursor to “Yes?” in the lower menu. Press the [ENTER] button, the LCD will display “Saving..”. The user settings will be saved to the root directory of the USB flash drive.
menu. 3. Press the [ENTER] button to format the USB flash drive, or press the [EXIT] button to cancel. 4. After formatting, it will return to the USB menu. Note: Formatting will delete all data on the USB flash drive. It may take several minutes to format a USB flash drive of large capacity. Function Menu 1. Press the [MENU] button to enter the function menu. 2. Use the [<] / [>] button to select a parameter category. After a second, the LCD automatically shows the parameter. 3.
up or down in a 2-cent increment. Upper tone octave OctvR1 -2 ~ +2 (default: 0) Shift the pitch of the specified Dual tone octave OctvR2 -2 ~ +2 (default: 0) tone layer up or down by one Split tone octave OctvL -2 ~ +2 (default: 1) octave. Touch response Touch OFF,1 ~ 3 (default: 2) Set the velocity response of the keyboard. Split point SplitPt 1 ~ 61 (default: 19) Set the split point for Split mode and Chord mode.
Rock Class Jazz R&B (default: Piano) Chorus type ChrTYPE Chorus1 Select the chorus type. Chorus2 Chorus3 Chorus4 ChrGMC1 ChrGMC2 ChrCel1 ChrCel2 ChrSym1 ChrSym2 ChrDoub ChrStd. (default: ChrStd.) Chorus level Chr Lev 0 ~ 32 (default: 0) Adjust the chorus level of the current chorus type.
MChrSym1 MChrSym2 MChrDoub MChrStd. MWah MPhaser MDist. MOvDr. MPan (default: MChrStd.) Mic effect level MEfLev 0 ~ 32 (default: 0) Adjust the mic effect level. Mic delay type MDlType MDelay Select the mic delay type. MPanDly (default: MDelay) Mic delay time MDlTime 0 ~ 32 (default: 10) Set the mic delay time. Mic delay feedback MDlyFb 0 ~ 32 (default: 14) Set the mic delay feedback. Mic delay level MDlyLev 0 ~ 32 (default: 8) Set the mic delay level.
Factory Reset 1. Press the [MENU] button to enter the function menu (P.33). Use the [<] / [>] button to select “OTHERS”, then use the data dial to select “Reset”. 2. Press the [ENTER] button to move the cursor to “Reset?” in the lower menu. You’re going to execute factory reset. 3. Rotate the data dial clockwise to confirm and execute factory reset. Note: This operation will delete all user settings. 4. The LCD continues to display “DelUSng?”, prompting it’s going to delete all user songs. 5.
The instrument can output the real-time playback information via MIDI messages and control external MIDI devices. The instrument can also accept incoming MIDI messages and generate sound accordingly. Note: This instrument has a USB computer jack (P.8), which can be connected to a computer as a MIDI input or MIDI output. This can not be connected with another instrument, unless the instrument has a USB host terminal. The main application of MIDI 1. Used as a tone generator.
Speakers do not produce sound when the 1. Check if the master volume is set too low. keyboard is played. 2. Check if the R1/R2/L1 sound volume is set too low in the mixer in the function menu. 3. Check if headphones are plugged into the PHONES jack. The speakers produce noise when a Using a mobile phone in close proximity to the instrument may produce mobile phone is put near them. interference. To prevent this, turn off the mobile phone or use it farther away from the instrument.
Start / Stop Sync Start Intro (1, 2) Main (1, 2, 3, 4) Style control Fill (1, 2, 3, 4) Ending (1, 2) Chord mode Fade in / out Style creator Yes Chord type 38 Reverb 11 types, 33 levels Chorus 12 types, 33 levels Effects DSP effects, Mic effects Master EQ 6 types Mixer Yes Sequencer 10 user songs Registration memory 4 x 8 banks, parameter lock O.T.S.
information, refer to the Roland website. * All specifications are subject to change without notice.
Tone List Clavi 1 Clavi1 39 Clavi 2 Clavi2 40 Phase Clavi PhaseClv 41 Wah Clavi WahClv 42 Pulse Clavi PluseClv 43 Dream EP DreamEP 44 Tremolo EP TremoEP 45 Funk EP FunkEP 46 Warm EP WarmEP 47 ChoirEP ChoirEP 48 Wah EP WahEP 49 Modern EP ModernEP 50 EP Pad EPPad 51 CHROMATIC PERCUSSION(ChroPerc) Celesta 1 Celesta1 52 Celesta 2 Celesta2 53 Celesta 3 Celesta3 54 Glockenspiel 1 Glocken1 55 Glockenspiel 2 Glocken2 56 Glockenspiel 3 Glocken3 57 Music Box 1 MuscBox1 58 Music Box 2 MuscBox2 59 Music Box 3 MuscBox3
Drawbar Organ 3 80 81 Detuned Drawbar Organ 82 Detuned Percussive Organ Percussive Organ 1 83 Percussive Organ 2 84 Percussive Organ 3 85 70's Percussive Organ 86 Rock Organ 1 87 Rock Organ 2 88 Rock Organ 3 89 Church Organ 1 90 Church Organ 2 91 Church Organ 3 92 93 Church Organ (octave mix) Detuned Church Organ 94 Reed Organ 1 95 Reed Organ 2 96 Rotary Organ 97 Puff Organ 98 Accordion 1 99 Accordion 2 100 Accordion 3 101 Harmonica 1 102 Harmonica 2 103 Harmonica 3 104 Tango Accordion 1 105 Tango Accordion
Violin 2 167 Violin (slow attack) 168 Viola 1 169 Viola 2 170 Cello 1 171 Cello 2 172 Contrabass 1 173 Contrabass 2 174 Tremolo Strings 1 175 Tremolo Strings 2 176 Tremolo Strings 3 177 Pizzicato Strings 1 178 Pizzicato Strings 2 179 Orchestral Harp 1 180 Orchestral Harp 2 181 Yang Chin 182 Timpani 1 183 Timpani 2 184 String Ensembles 1 185 String Ensembles 2 186 String Ensembles 3 187 String Ensembles 4 188 Strings & Brass 189 60's Strings 190 Synth Strings 1 191 Synth Strings 2 192 Synth Strings 3 193 Syn
2 Oboes 259 English Horn 1 260 English Horn 2 261 English Horn 3 262 2 English Horns 263 Bassoon 1 264 Bassoon 2 265 Bassoon 3 266 2 Bassoons 267 Clarinet 1 268 Clarinet 2 269 Clarinet 3 270 2 Clarinets 271 PIPE(Pipe) Piccolo 1 272 Piccolo 2 273 Piccolo 3 274 2 Piccolos 275 Sweet Flute 276 Flute 1 277 Flute 2 278 Flute 3 279 2 Flutes 280 Recorder 1 281 Recorder 2 282 2 Recorders 283 Pan Flute 1 284 Pan Flute 2 285 Sweet Pan Flute 286 Blown Bottle 1 287 Blown Bottle 2 288 Shakuhachi 1 289 Shakuhachi 2 290 Wh
Pad 1 (new age) 3 348 Pad 1 (new age) 4 349 Pad 2 (warm) 1 350 Pad 2 (warm) 2 351 Pad 2 (warm) 3 352 Pad 2a (sine pad) 353 Pad 3 (polysynth) 1 354 Pad 3 (polysynth) 2 355 Pad 3 (polysynth) 3 356 Pad 3 (polysynth) 4 357 Pad 4 (choir) 1 358 Pad 4 (choir) 2 359 Pad 4a (itopia) 360 Pad 5 (bowed) 1 361 Pad 5 (bowed) 2 362 Pad 5 (bowed) 3 363 Pad 5 (bowed) 4 364 Pad 6 (metallic) 1 365 Pad 6 (metallic) 2 366 Pad 6 (metallic) 3 367 Pad 7 (halo) 1 368 Pad 7 (halo) 2 369 Pad 7 (halo) 3 370 Pad 7 (halo) 4 371 Pad 8 (s
Santur 2 440 Santur 3 441 Mountain Dulcimer 442 India Stroke 443 TablaTarang 444 Indian Flute 1 445 Indian Flute 2 446 Sitar 4 447 Sitar 5 448 Sitar 6 449 INDONESIA(Indonesi) Talempong 450 Suling Hl 451 Suling Hs 452 Suling Lv 453 VIETNAM(Vietnam) Taj Mahal 454 QuDi Vib 455 Twin Sine 456 ORIENTAL(Oriental) Accordion c1 457 Accordion 4L 458 Oud Sad Verd 459 Divan Orn 1 460 NAY 1 461 Kanoun 3 Trm 462 Mizmar Trm V 463 Strings Stage 464 Aks-Baglama 465 Ney 466 Zurna TR 467 Pick Bs Line 468 Violin Mono 469 Truba
527 528 529 530 531 532 533 534 535 536 537 538 539 540 541 542 543 544 545 546 547 548 549 550 551 552 553 554 555 556 557 558 559 560 561 562 563 564 565 566 567 568 569 570 571 572 573 Taiko Drum 1 Taiko Drum 2 Taiko Drum 3 Concert Bass Drum 1 Concert Bass Drum 2 Acoustic Bass Drum Room Kick Power Kick Electric Bass Drum Analog Bass Drum Jazz Kick Side Stick Analog Rim Shot Acoustic Snare Room Snare Power Snare Electric Snare Analog Snare Jazz Snare Brush Tap Concert SD Hand Clap Tom Room Tom Power Tom
Bird Tweet 1 Tweet1 618 Bird Tweet 2 Tweet2 619 Dog Dog 620 Horse Gallop HouseGlp 621 Telephone Ring 1 Telphon1 622 Telephone Ring 2 Telphon2 623 Door Creaking DoorCrek 624 Door Door 625 Scratch Scratch 626 Wind Chime WindChim 627 Helicopter Helicptr 628 Car Engine CarEngin 629 Car Stop CarStop 630 Car Pass CarPass 631 Car Crash CarCrash 632 Siren Siren 633 Train Train 634 Jetplane Jetplane 635 Starship Starship 636 Burst Noise BurtNois 637 Applause Applause 638 Laughing Laughing 639 Screaming Scream 640 Pu
706 707 LD Std Kit IndoMix4 LD-Std IndoMix4 - 50 -
Style List Pop Ballad 1 PopBald1 42 Fusion Fusion 43 Soft Beat SoftBeat 44 Natural Ballad NatulBld 45 Love Ballad LoveBald 46 Blues Ballad 2 BluBld2 47 Pop Ballad PopBald 48 EP Ballad EPBallad 49 12/8 Swing 12/8Swng 50 New Shuffle NewShufl 51 6/8 Pop 1 6/8Pop1 52 6/8 Pop 2 6/8Pop2 53 DANCE & DISCO(DANCE&DI) Techno 1 Techno1 54 Hip Hop HipHop 55 Groove Groove 56 House 1 House1 57 House 2 House2 58 Pop Dance PopDance 59 Down Beat DownBeat 60 Techno 2 Techno2 61 Progressive Progress 62 Disco Party DscParty 63
Smooth Jazz 1 87 Swing Shuffle 88 LATIN Samba 1 89 Bossa Nova 1 90 Latin 91 New Reggae 92 Reggae Dance 93 Paso Doble 94 Lite Bossa 95 Latin Rock 96 Beguine 1 97 Slow Bolero 98 Disco Samba 99 Mambo 100 Meneito 101 Rumba 1 102 Rumba 2 103 Tikitikita 104 Lambada 105 Pop Cha Cha 1 106 Pop Cha Cha 2 107 Salsa 1 108 Arrastape 109 Arrocha 110 Bossa Nova 2 111 Chamame 112 Forro 1 113 Forro 2 114 Guarania 115 Marchinha 116 Samba 117 Samba de Rua 118 Sertanejo 119 Vanerao 120 Xote 121 TRADITIONAL(TRAD) Tango 122 Spai
South Pattern 2 177 Pramad NM 178 Keral 179 Dhamaal 180 DesiRock 181 Sufi 182 Filmy Masti 1 183 Filmy Masti 2 184 In Masti 1 185 In Masti 2 186 Punjabi 187 Bhangra 1 188 Bhangra 2 189 Garba 1 190 Garba 2 191 Qawaali 192 Raja Bha 193 Sun Belia 194 Rajasthan 195 Goa Masti 196 Congo 197 INDONESIA(INDONESI) Dangdut Std 198 House Dangdut Koplo 199 Langgam Jawa 200 Keroncongan 201 Melayu Slow 202 Batak 203 204 Tarling Crbntarling Crbn Minang 205 Pop Sunda 206 VIETNAM Bolero 1 207 Bolero 2 208 Bonton 1 209 Bonton
267 268 269 270 271 272 273 274 275 276 277 278 279 280 PIANIST 281 282 283 10-THM-1 10-THM-2 ACS-2-4 Ciftetelli-1 Duble-Vahde Harmandali Misket Moulfo Pop Halay Top Pop Turk-Pop-1 Turku Pop Vahde-R&B Zeybek 10-THM-1 10-THM-2 ACS-2-4 Ciftetl1 DblVahde Harmandl Misket Moulfo PopHalay Top Pop TurkPop1 TurkuPop VahdeR&B Zeybek Pianist 1 Pianist 2 Pianist 3 Pianist1 Pianist2 Pianist3 284 285 286 287 288 289 290 291 292 293 294 295 296 297 298 299 300 Demo List NO.
MIDI Implementation Chart (same as E-X30) - 55 -