
User Manual


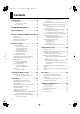
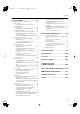
Table Of Contents
- IMPORTANT SAFETY INSTRUCTIONS
- Introduction
- Contents
- USING THE UNIT SAFELY
- Important Notes
- Names of Things and What They Do
- Before You Play
- Listening to Demo Songs
- Performing
- Performing with a Variety of Sounds
- Adjusting the Piano Sound to Your Taste (Piano Designer)
- Adjusting the Keyboard Sensitivity (Key Touch)
- Adding Spatial Depth to the Sound (3D Sound Control)
- Adding Liveliness to the Sound (Dynamics Sound Control)
- Adding Reverberation to Sounds (Reverb Effect)
- Adding a Variety Effects to the Sound (Effects)
- Changing the Key of the Keyboard (Key Transpose)
- Dividing the Keyboard for Two-person Performance (Twin Piano)
- Performing with Two Layered Tones (Dual Play)
- Performing with Different Tones in the Left and Right Sides of the Keyboard (Split Play)
- Performing with the Metronome
- Sounding a Count to Keep Your Timing Accurate
- Playing Back Songs
- Recording
- Saving Your Performance
- Various Settings
- Basic Operation in Function Mode
- Tuning Settings
- Equalizer Settings
- Song Playback Settings
- Changing the CD Settings
- Metronome Setting
- Keyboard Settings
- Pedal Settings
- MIDI Settings
- Other Settings
- Using the V-LINK Function (V-LINK)
- Specifying the V-LINK Transmission Channel
- Changing the USB Driver Settings (USB Driver)
- Changing the External Memory Setting (Ext. Memory Mode)
- Adjusting the Volume (Master Gain)
- Changing How Grand Space is Applied (3D Mode)
- Changing the Parts Assigned to the Track Buttons During SMF Playback (Track Assign)
- Switching On/Off the Display of Lyrics (Lyrics)
- Switching VIMA TUNES Recommended Tones (Recommended Tone)
- Changing the Language Displayed in the Screen (Language)
- Remembering the Settings (Memory Backup)
- Restoring the Settings to the Factory Condition (Factory Reset)
- Disabling the Buttons (Panel Lock)
- Connecting to Other Devices
- Troubleshooting
- Error Messages
- Tone List
- Internal Song List
- Parameters Stored in Memory Backup
- Music Files That the LX-10 Can Use
- MIDI Implementation Chart
- Main Specifications
- Index

10
USING THE UNIT SAFELY
Place in a well ventilated location
101a
The unit should be located so that its location or
position does not interfere with its proper venti-
lation.
.................................................................................................................................
Grasp the plug when connecting or disconnecting
the power cord
102b
Always grasp only the plug on the power-supply cord
when plugging into, or unplugging from, an outlet or
this unit.
.................................................................................................................................
Periodically wipe the dust off the power cord plug
103a
At regular intervals, you should unplug the power
plug and clean it by using a dry cloth to wipe all dust
and other accumulations away from its prongs. Also,
disconnect the power plug from the power outlet
whenever the unit is to remain unused for an
extended period of time. Any accumulation of dust
between the power plug and the power outlet can
result in poor insulation and lead to fire.
.................................................................................................................................
Manage cables for safety
104
Try to prevent cords and cables from becoming
entangled. Also, all cords and cables should be
placed so they are out of the reach of children.
.................................................................................................................................
Do not stand or place heavy objects on this unit
106
Never climb on top of, nor place heavy objects on the
unit.
.................................................................................................................................
Do not connect or disconnect the power cord with
wet hands
107b
Never handle the power cord or its plugs with wet
hands when plugging into, or unplugging from, an
outlet or this unit.
.................................................................................................................................
Cautions when moving this unit
108d
If you need to move the instrument, take note of the
precautions listed below. At least two persons are
required to safely lift and move the unit. It should be
handled carefully, all the while keeping it level. Make
sure to have a firm grip, to protect yourself from
injury and the instrument from damage.
1
• Check to make sure the screws securing the unit to
the stand have not become loose. Fasten them
again securely whenever you notice any loosening.
2
• Disconnect the power cord.
3
• Disconnect external devices.
4
• Raise the adjuster of the stand (p. 22).
5
• Close the lid and top board.
.................................................................................................................................
Unplug the power cord from the AC outlet before
cleaning
109a
Before cleaning the unit, turn off the power and
unplug the power cord from the outlet(p. 18).
.................................................................................................................................
If there is a possibility of lightning strike,
disconnect the power cord from the AC outlet
110a
Whenever you suspect the possibility of lightning in
your area, pull the plug on the power cord out of the
outlet.
.................................................................................................................................
Cautions when opening/closing the lid
116
Be careful when opening/closing the lid so you do
not get your fingers pinched (p. 19). Adult super-
vision is recommended whenever small children use
the unit.
.................................................................................................................................
Keep small items out of the reach of children
118c
To prevent small items such as the following from
being swallowed accidentally, keep them out of the
reach of children.
• Included items
• Screws for assembling the stand
• Wing nut for headphone hook
• Removed parts
• Volume knob
• Brilliance knob
.................................................................................................................................
LX-10_e.book 10 ページ 2009年2月13日 金曜日 午前10時39分