
User`s manual


16
Part 1
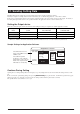
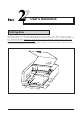
Workpiece
Z0
Z2
Cutter up positon
Cutter down positon
Z1
Cutter
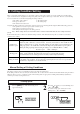
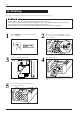
10. Setting the Z1 and Z2 Position
The cutter up position (Z2 point) and down position (Z1 point) are normally set with the software. If they cannot be set with your current
software then set them manually using the keys on the switch panel.
* The Z0, Z1, and Z2 points can be stored in memory by setting “Z0/Z1/Z2 MEMORY” to “ON.”
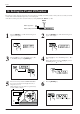
Press the [MENU] key to make the following screen
appear on the display.
1
Press the [ENTER] key to make the following screen
appear on the display.
2
Press the [ ] key to move the blinking cursor (“ ”)
to “Z-Axis,” then press the [ENTER] key.
3
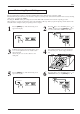
Press the [ ] key to move the blinking cursor (“ ”) to
“Z1.”
When setting the Z2 point, press the [ ] key to move
the blinking cursor (“ ”) to “Z2.”
4
Press the arrow keys and the CUTTER UP/DOWN
keys to move the cutter to the height where Z1 (or
Z2) point is to be set.
When setting Z1, move the cutter to a position away
from the loaded workpiece.
5
Press the [ENTER] key.
6
Make sure that “< >” appears.
Z2
Z0
Z1
Bottom of the head