
User`s manual


31
Part 2
Cutting line varies in places
Is the workpiece vibrating because the
adhesive double sided tape was stuck on
poorly?
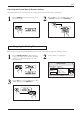
Check where the double-sided tape is affixed and reload the
material.
Engraving cannot be performed at the desired location
Is there a mistake in the home position
setting?
Was there a position error when the
workpiece was replaced?
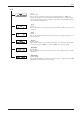
Refer to page 12 of “Setting the Origin (Home Position)”. Use
these procedures to set the home position correctly.
Check that workpiece position setting is correct.
The letters have been cut too deep (or too shallow) and cannot be read
Is the cutter mounted securely?
Is there a mistake in the Z position?
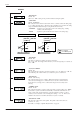
Refer to “Loading a Cutter” on page 8 to install the cutter securely.
Increase (or decrease) the “Z1” setting as needed.
When moving the cutter while in the up position the cutter tip contacts or pulls on the workpiece
Is there a mistake in the Z position? Refer to page 16 of “Setting the Z1 and Z2 Position”. Increase the
“Z2” setting as needed.
Burrs are present on grooves made during cutting
Is the cutter mounted securely?
Is the tip of the cutter worn?
Is the cutter feed speed too fast (spindle
rotation speed too slow).
Refer to “Loading a Cutter” on page 8 to install the cutter securely.
When the tip of the cutter is worn, replace with a new one.
Refer to page 13 of “Feeding Speed” to find the correct feed speed
“XY-SPEED” and “Z-SPEED”, and adjust the spindle rotation
speed by referring to page 14 of “Spindle Motor Revolution
Speed”.
The cutting finish is unsatisfactory
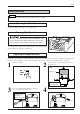
Separating the process of cutting the material into two stages makes for engraved results which are more attractive. After
rouging out the general shape with “rough engraving,” “finishing” is performed to produce the final results.
For instance, to cut letters to a depth of 0.3 mm, first of all rough cut to a depth of 0.25 mm. Then continue exactly the
same kind of cutting to a depth of 0.3 mm.