
User`s manual


36
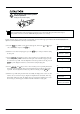
Do not place hands near the platen
while in operation.
Doing so may result in injury.
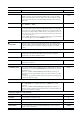
• The crop mark setting cannot be made if the angle of the base point and the align point is more than 5 degrees.
• Crop marks cannot be set when the "ROTATE" display menu is set to "90 deg."
Load the material (with pre-printed graphics) and install the water based fiber tipped pen included with the CM-500/400/300. The
alignment tool is installed in the same way as the blade holder.
(1) Press the
MENU
key until the screen shown at right appears, then use the and keys to
select "SUBMENU" and press the
ENTER
key.
(2) When the screen shown at right appears, press the
ENTER
key to change to menu for setting
the base point.
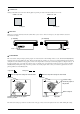
(3) Use the , , , and keys to move to the tool carriage to a position below and to the
left of the crop mark printed on the material. Line up the water based fiber tipped pen with
the center of the crop mark. After the alignment tool has been positioned correctly, press the
ENTER
key. The display then advances to the menu for setting the align point.
(4) Use the , , , and keys to move to the tool carriage to the crop mark printed at the
lower right of the material. Line up the water based fiber tipped pen with the center of the
crop mark. After the alignment tool has been positioned correctly, press the
ENTER
key.
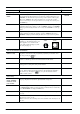
(5) When the crop mark setting has been made successfully, the display shows screen (A), then
returns to the screen shown in step (2). Replace the alignment tool with a blade. If the crop
mark setting could not be made, the display shows screen (B) before returning to the screen
shown in step (2). If this happens, reload the material and make the setting again.
(3)
BASEPOINT->ENTER
0 0
AREA AXIS
REPLOT SUBMENU
(1)
(2)
CROPMARK UPDOWN
OVER-CUT CALIB
(4)
ALIGNPOINT->ENTER
0 0
CROPMARK SETTING
COMPLETED !
(A)
(B)
CROPMARK SETTING
FAILED,SET AGAIN